Room Scheduling System • Room Agent Installation and Configuration 41
Assign or change a background image as follows:
NOTE: Room Agent software and the scheduling system support image files with
the following traits only:
•
JPEG or PNG format
•
800x480 r
esolution
•
8-bit color
1.
Click the Change Image... button (see figure 41,
3
on the previous page). The
Open dialog box opens.
2. Navigate to the folder where you saved the background image file. Select the file
(see figure 42,
1
on the previous page).
3. Click Open (
2
). The Open dialog box closes and the newly assigned background
image is displayed in the preview pane (see figure 41).
4
Overlay Opacity (see figure 41) —Click
and drag this fader control or type a value
directly in the field to set the opacity of any displayed background image.
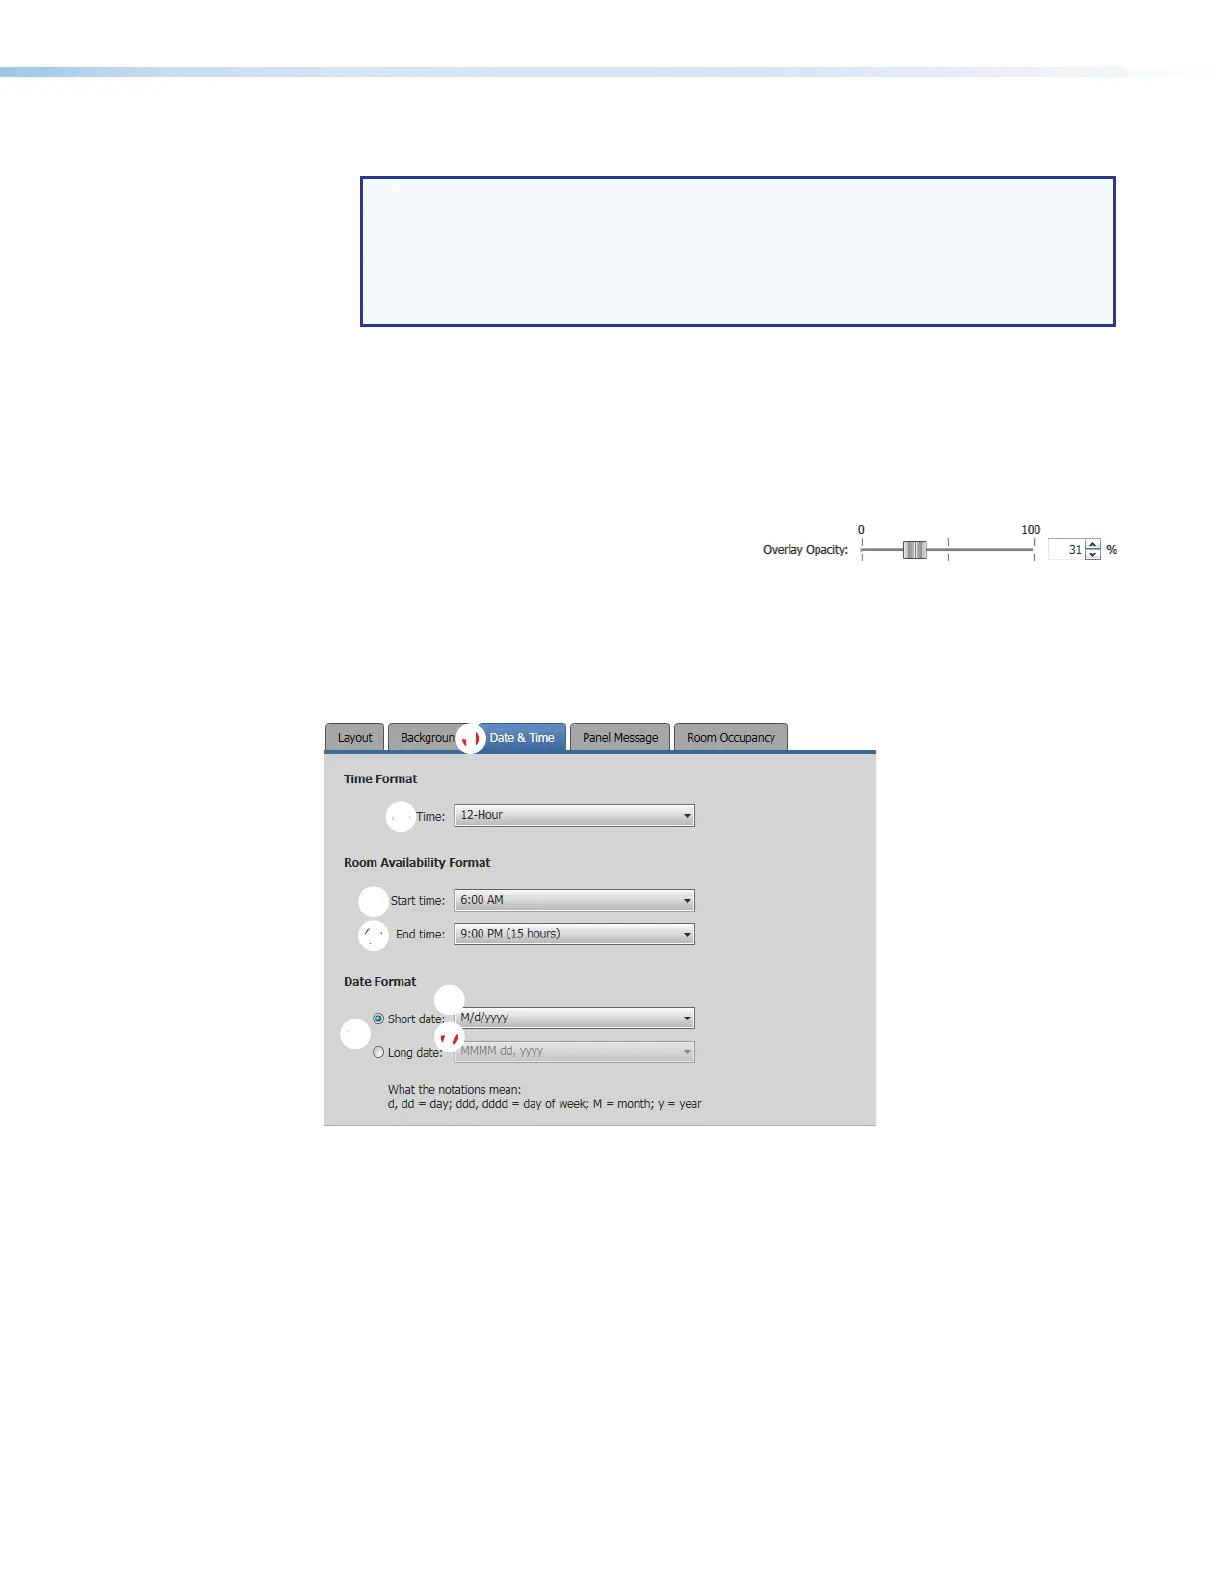
Date & Time tab
If necessary, click the Date & Time tab (see figure 43,
1
) to make changes to the date and
time format.
5555555555
66
66666666
77
77777777
11
11111111
22
22222222
33
33333333
44
44444444
Figure 43. Panel Design Pane, Date & Time Tab
2
Time Format, Time: drop-down list — Use this drop-down list to select among
12-Hour (1:30 PM, for example), 24-Hour US (13:30),and 24-Hour International
(13.30).
3
Room Availability Format, Start time: drop-down list — Use this drop-down list to
select the start time of room availability display, in half-hour increments.
4
Room Availability Format, End time: drop-down list — Use this drop-down list to
select the end time of room availability display, in half-hour increments. The menu also
shows the quantity of time the room availability is displayed.
5
Date Format radio buttons — Use these radio buttons to select the format to display
on the panel. After you select either Short date or Long date, the associated drop-
down list (see
6
and
7
on the next page) becomes available for selection.