Room Scheduling System • Room Agent Installation and Configuration 16
Automatically Discover Panels
Automatically discover panels that are on the same subnet as the computer running the
Room Agent software as follows:
NOTE: Any panels not on the same subnet as the computer running Room Agent must
be added using the Manually Add Panels pane (see “Manually Add Panels”).
1. If Panel Management view is not currently displayed, click the Panel Management tab.
2. Click the Discover button above the Auto Discovered Panels pane (see figure 10,
1
on the previous page).
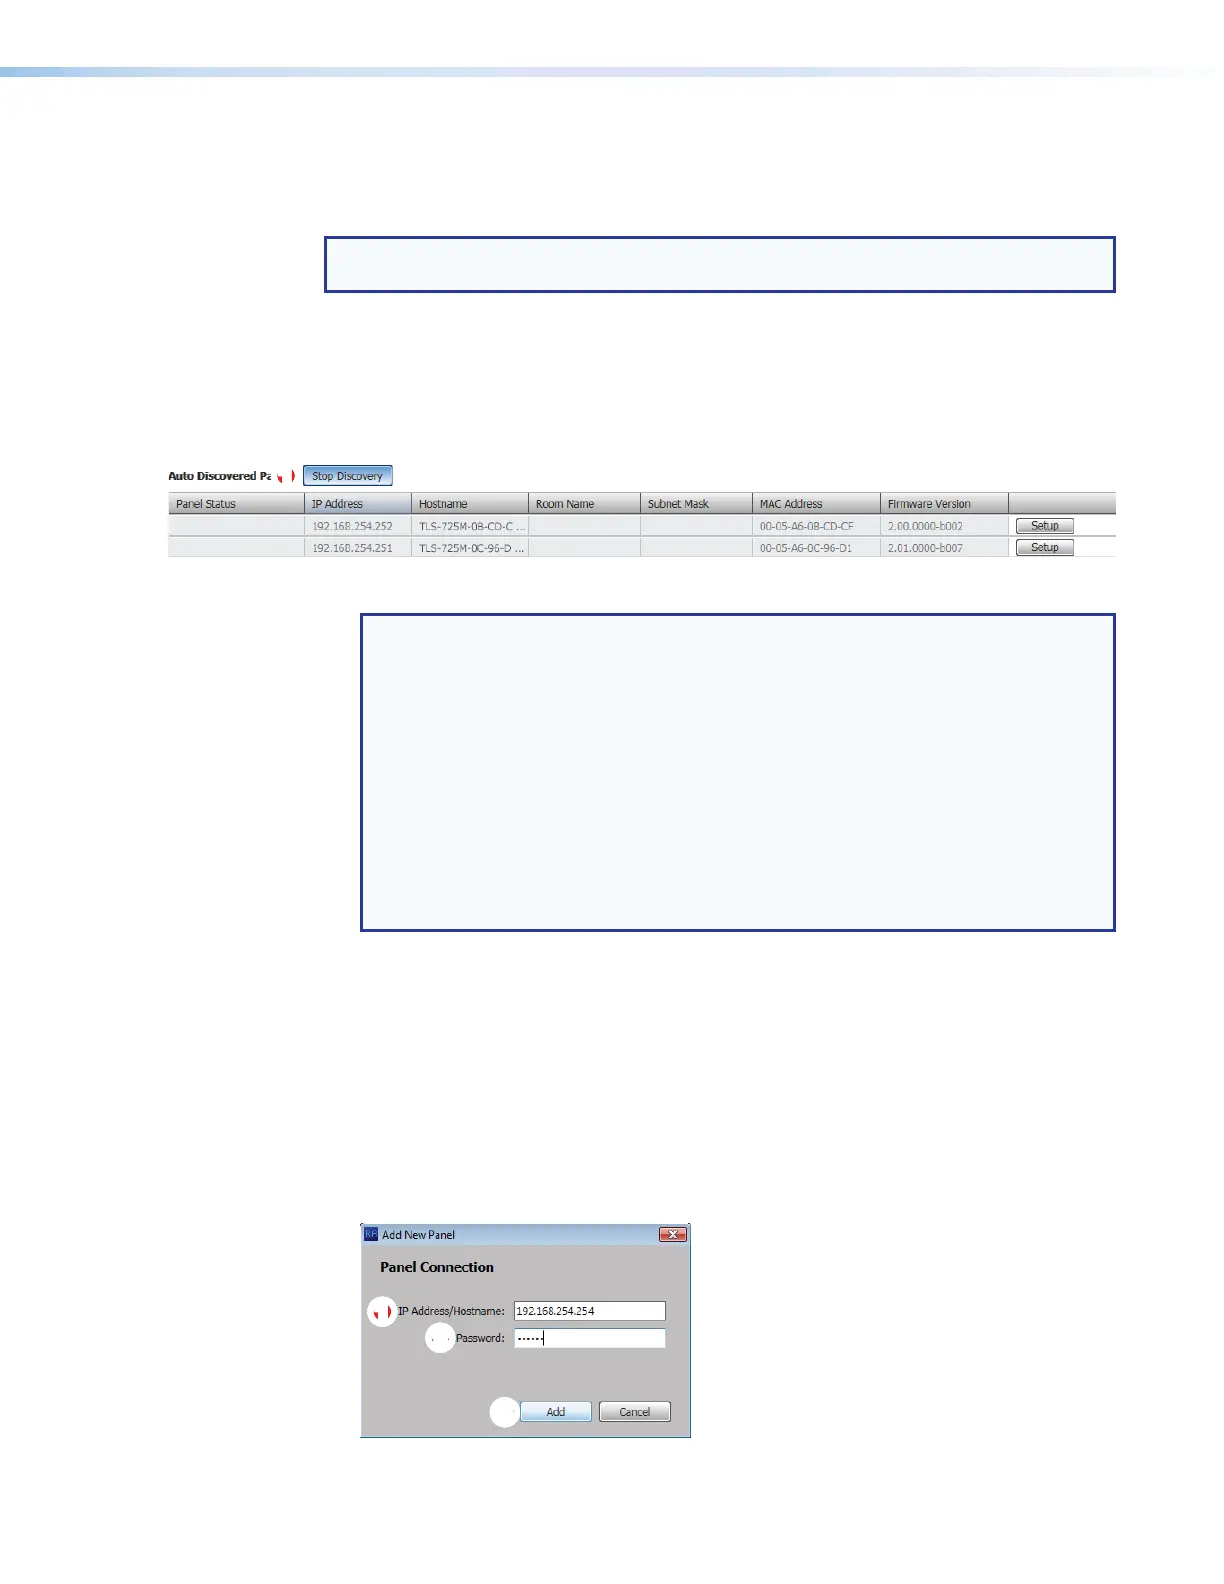
The Discover button becomes the Stop Discovery button. Panels that are located
on the same subnet are automatically discovered and displayed (see figure 11).
Figure 11. Auto Discovered Panels Pane
NOTES:
• TLS scheduling panels ship with scheduling firmware installed. All except the
TLS 525M, TLS 725M, or TLS 1025M require firmware version 2.01.0010-b001
or higher to connect to them. TLS 525M, TLS 725M, or TLS 1025M requires
version 1.00.0004-b001.
•
TLP Pr
o touchpanels ship with control firmware installed. Room Agent
requires that scheduling panels run different, scheduling, firmware, version
2.01.0010-b001 or higher to connect to them.
•
For either family of
panel models, if you receive the message
Cannot
connect to this device, click OK in the message dialog box, STOP HERE
and update the panel firmware (see Update Firmware on page 46, beginning
at step 5).
3. When all of the panels are displayed, click the
Stop Discovery button to end the
search (see figure 11,
1
).
Manually Add Panels
Manually add panels that are on a different subnet than the computer running the Room
Agent software as follows:
1. If Panel Management view is not currently displayed, click the Panel Management tab.
2. Click the Add New button above the Manually Added Panels pane (see figure 10,
2
).
The Add New Panel dialog box opens (see figure 12).
1111111111
22
22222222
33
33333333
Figure 12. Add New Panel Dialog Box