Page 51 of 77
5.7.10. For the midrail, first measure the distance between the Frame posts at the turn back,
then cut the 1-1/2” x 2” midrail to the measured length, less 5/8” to account for the
threaded inserts and attachment plates, which will be installed in the following steps.
5.7.11. Using a metal file, smooth all sharp edges from cutting the midrail.
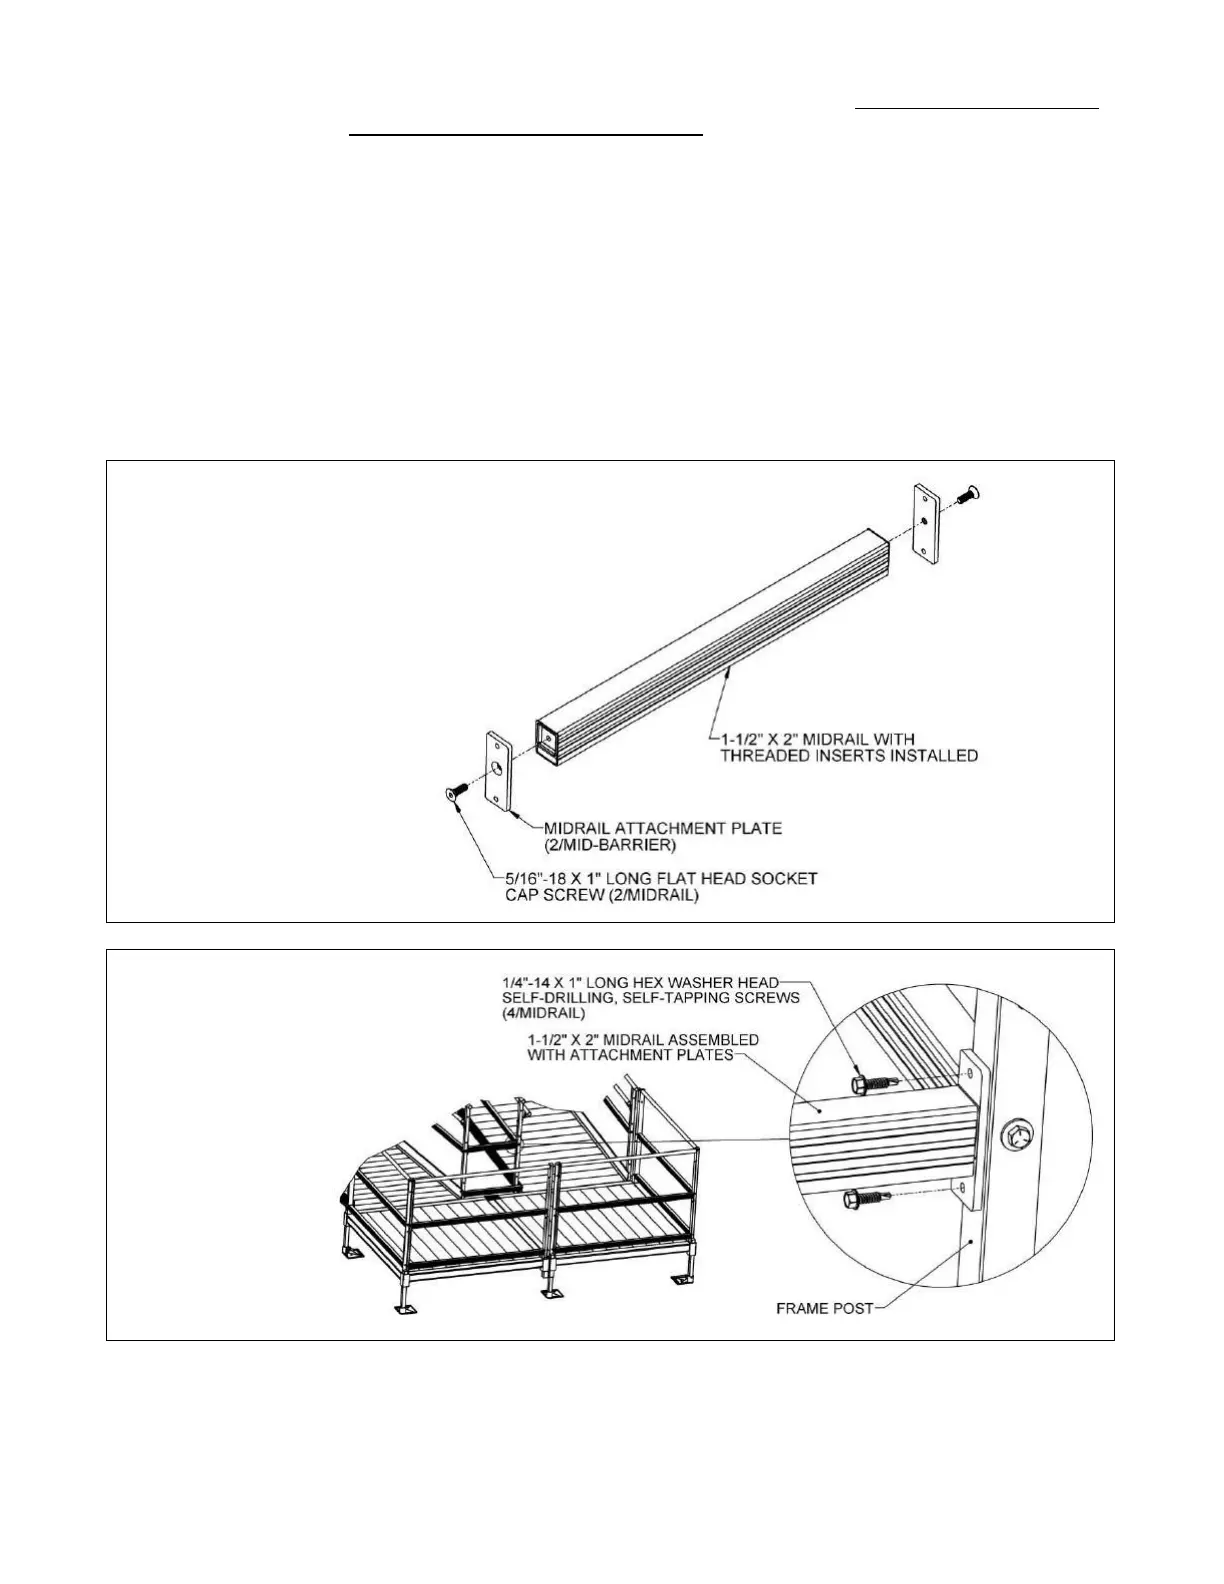
5.7.12. Insert 1-1/2” square threaded inserts into both ends of the 1-1/2” x 2” midrail. Use a
rubber mallet or similar tool to fully seat the insert if needed (FIG. 5.23).
5.7.13. Attach the Midrail Attachment Plates to the midrail with 5/16”-18 x 1” long flat head
socket cap screws. The hole in the Midrail Attachment Plate is offset to account for
the offset of the threaded insert in the midrail. Orient the plate such that the midrail
is centered on both sides then tighten the screws securely (FIG. 5.24).
5.7.14. Attach the midrail assembly between the Frame posts using two each 1/4”-14 x 1”
long hex washer head self-drilling, self-tapping screws per attachment plate. Center
the midrail assembly (approximately) between the Frame midrails (about 18” to 18-
1/2” above the lower barrier) (FIG. 5.25).
 Loading...