32
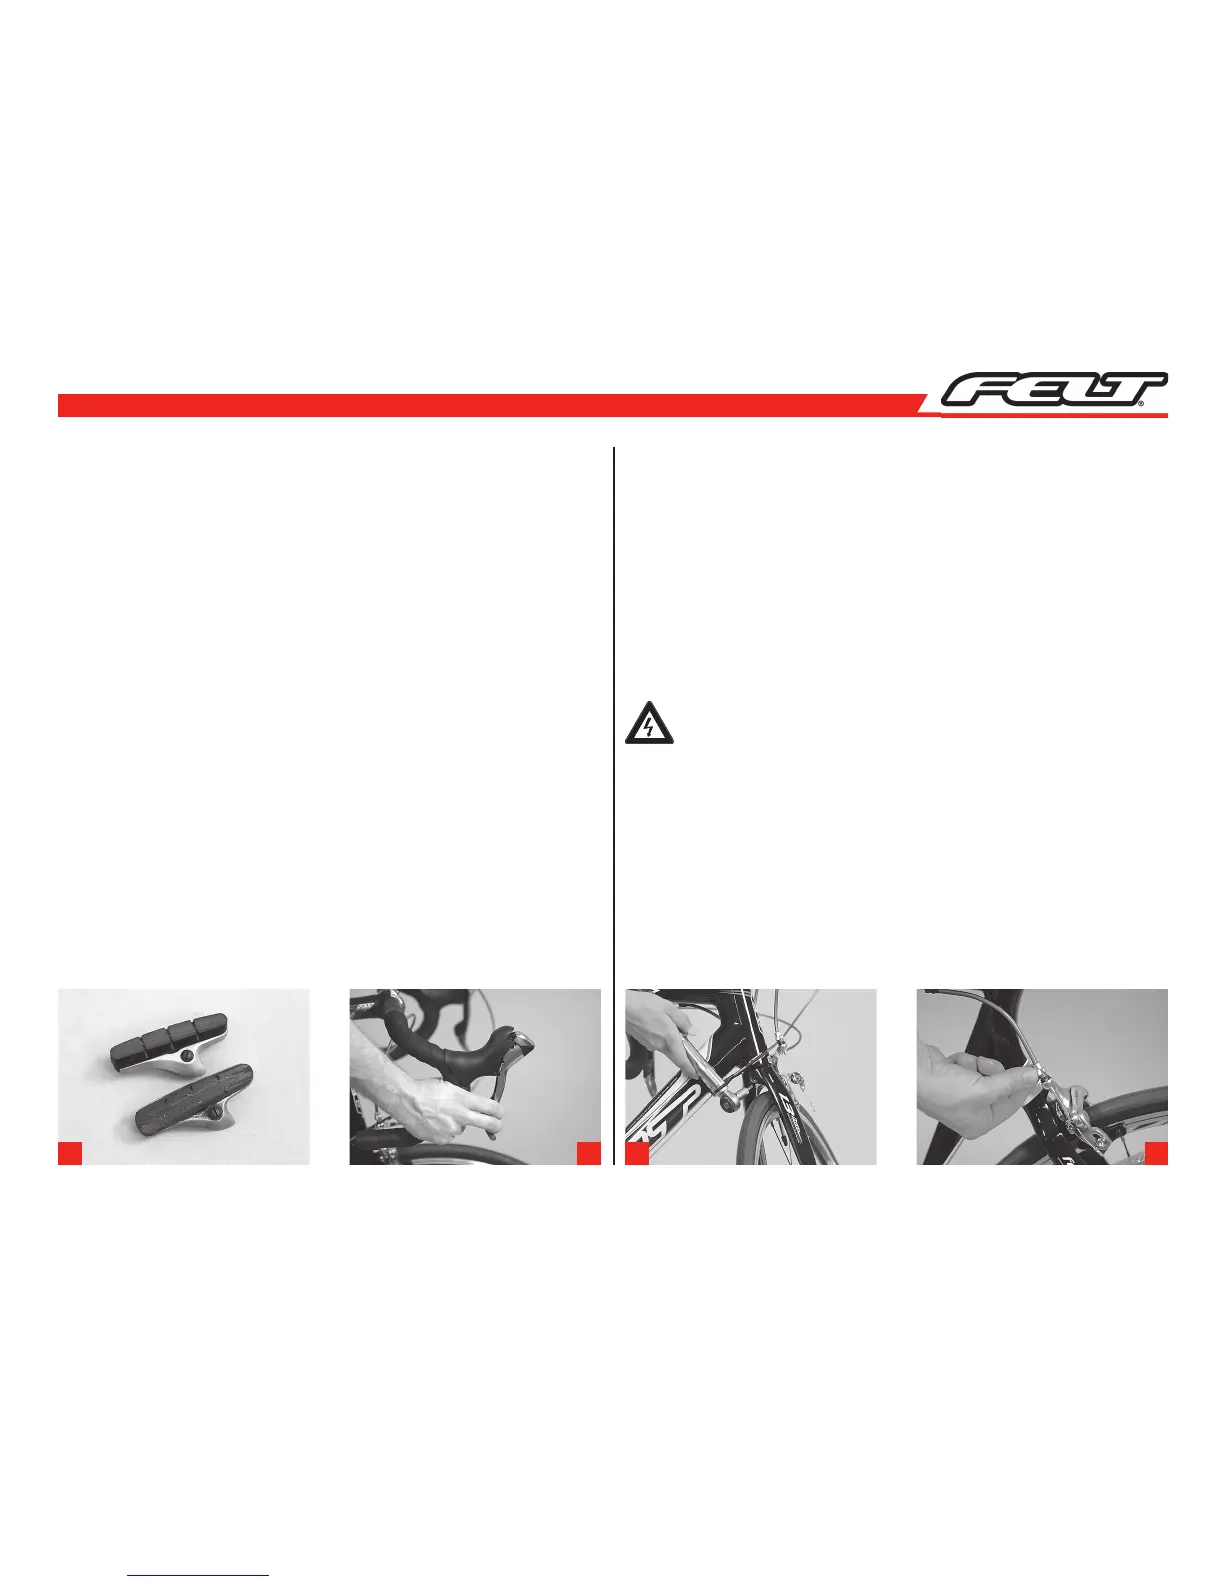
Checking, adjusting and synchronizing racing or side-pull brakes
With side-pull brakes, the brake arms are suspended from a common point, thus
forming an integral system. When pulling the brake lever, both arms are controlled
by the cable, the pads then touch the rim.
Check whether the brake pads are accurately aligned with the rims and still suf-
ficiently thick. You can judge the wear of the brake pads by appearance of the
grooves. If the pads are worn down to the bottom of the grooves, it is time to
replace them (a).
Do the arms contact the rim simultaneously when you pull the brake, and do they
stay clear of the tire? The brake lever must always remain clear of the handlebars.
You should not even be able to pull them all the way to the handlebars in the
event of an emergency stop (b). If your brake passes all these points, it is properly
adjusted.
Vertical adjustment of the brake pads
Release the fastening screw of the brake pad by one, to at most two, complete
turns.
Push the brake pad to the required height and align it according to the rim before
tightening the fastening bolt again.
Synchronizing and adjusting the brakes
With dual pivot brakes, turn the small (headless) screw, located at the side or on
top of the calliper, until the left and right brake pad are at the same distance from
the rim.
Furthermore check whether the bolt, connecting the brake to the frame or fork, is
still tightened to the prescribed torque (c).
To adjust the brake, turn the knurled nut or bolt through which the brake cable
passes at the yoke until the travel of the brake lever suits your needs (d).
Always test the brakes in stationary position first after adjusting them,
making sure that the brake pads engage fully with the rim without touch-
ing the tire when you pull them hard. Make sure you cannot pull the lever
all the way to the handlebars.
Following the stationary test, check the brakes in a place clear of traffic
a b c d