10
PREPARING THE APPLIANCE
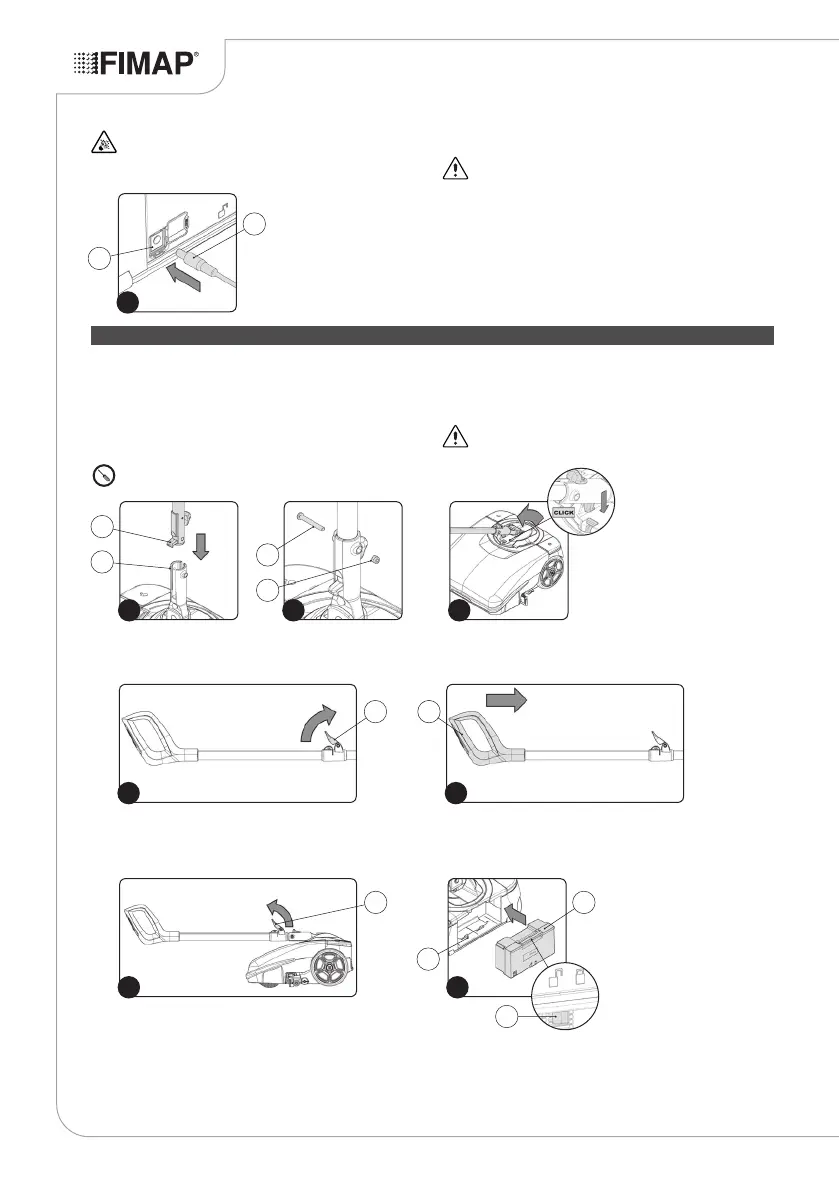
5. Block the handlebar in the horizontal position. Rest your foot on
the main part of the appliance to prevent it from tilting, then push
the handle away from you until it snaps into the horizontal position
(Fig.3).
ATTENTION: do not rest your foot on the main switch.
1. Take the package to the dedicated maintenance area.
2. Remove the appliance and all the accessories from the box.
3. Insert the lower tube (1) of the control handlebar in the hole on
the joint (2) (Fig.1).
4. Fix the handlebar to the joint using the screw and nut (3), making
sure the hole on the handlebar coincides with the hole on the
joint (Fig.2).
ATTENTION: the screwdriver is not supplied.
ATTENTION: if the battery used in this appliance is
overcharged, there may be a risk of re, explosion or chemical
burns.
9. Once the charging cycle is completed, remove the plug (2) on the
6. Rotate the stop lever of the handlebar (4) in the direction of the
arrow (Fig.4).
7. Close the command handlebar, pushing the handle (5) towards
the main part of the appliance (Fig.5).
8. Rotate the stop lever of the handlebar (4) in the direction of the
arrow (Fig.6).
9. Insert the battery (6) in the battery-holder compartment (7) in
the rear part of the appliance (Fig.7). Push the battery until the
uncoupling lever (8) locks into place.
battery charger from the mains socket.
ATTENTION: to prevent any damage to the mains socket, pull
directly on the plug (not on the cable) when taking it out.
10. Take the power cable plug (6) out of the socket (7) on the battery.
11. Insert the cap (5) that covers the battery power socket.
7
6
5
1
3
2
3
1 2 3
6
4
7
6
7
8
4 5
4 5