Installation and Setup Guide
65
Chapter 5 - Advanced Settings
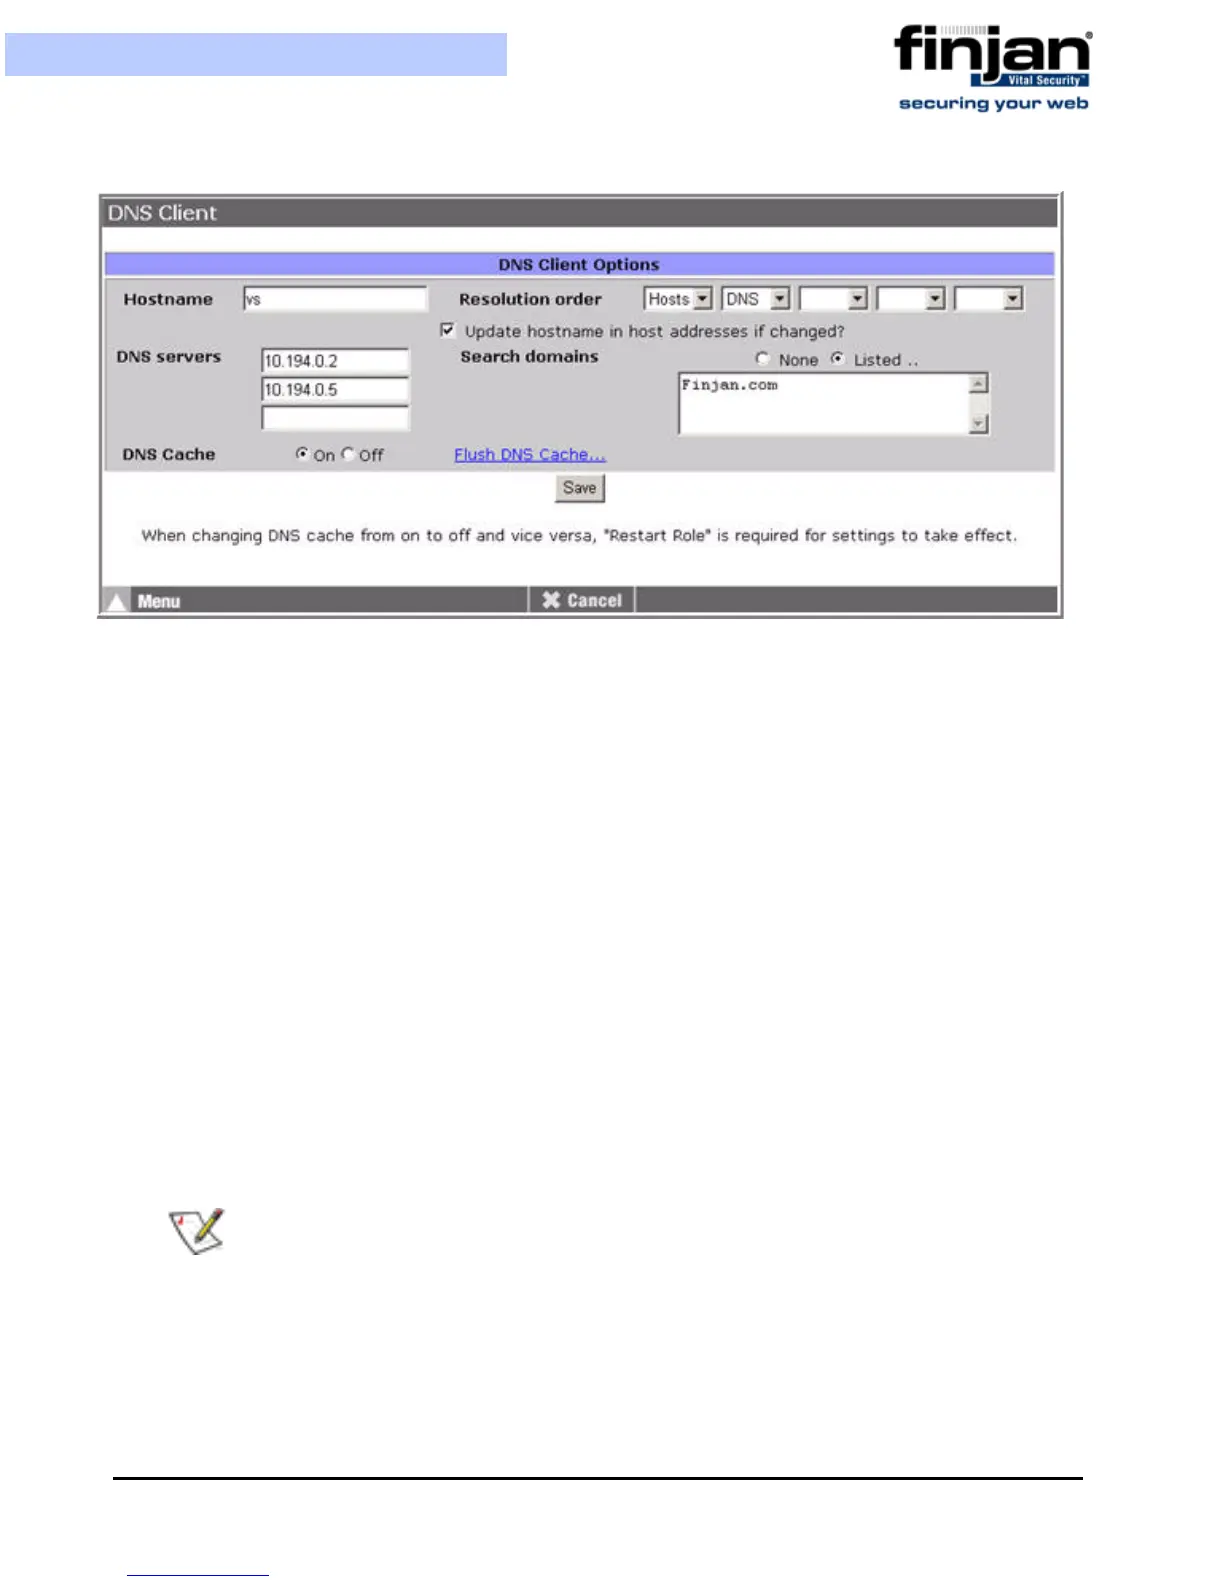
Figure 5-20: DNS Client
To configure a DNS Client:
1. In the Hostname field, enter the name of the PC.
2. In Resolution order, from the various options, select the required resolution order.
3. Select Update hostname in host addresses if changed if required.
4. In the DNS servers fields, enter the IP address of up to three servers. If the first is
not available, the system will try the second, and then the third.
5. In the Search domains field, enter any domain names that should be automatically
appended to any search results, and then select Listed, or leave the Search
domains field empty, and select None.
6. In the DNS Cache field, select On or Off to enable or disable DNS Cache. It is
automatically enabled when clicking Apply in the initial Setup Wizard in the Setup
Console.
7. Click Flush DNS Cache to "flush" (i.e., empty) the cache, and restart it.
8. Click Save to save any changes made.
2.5.4 Host Addresses
Clicking Host Addresses in the Advanced Network Settings screen, displays the Host
Addresses screen.
NOTE: When enabling/disabling DNS Cache (On/Off), you need to run Restart Role for
the settings to take effect.
 Loading...
