————————————————————————————————————————————
Print over USB
1. Connect Finder with computer via an USB 2.0 cable.
2. Turn on the Finder. Make sure that the build plate has been leveled and filament has been
loaded properly.
3. Click [Print], click [Connect Machine], a dialog box will pop up. Select [USB] in Connection
Mode and select [FlashForge Finder 3D Printer]. Click [Connect] to get your Finder to be
connected. When Finder is connected to FlashPrint successfully. The status box on the bottom
right displays the real-time nozzle temperature.
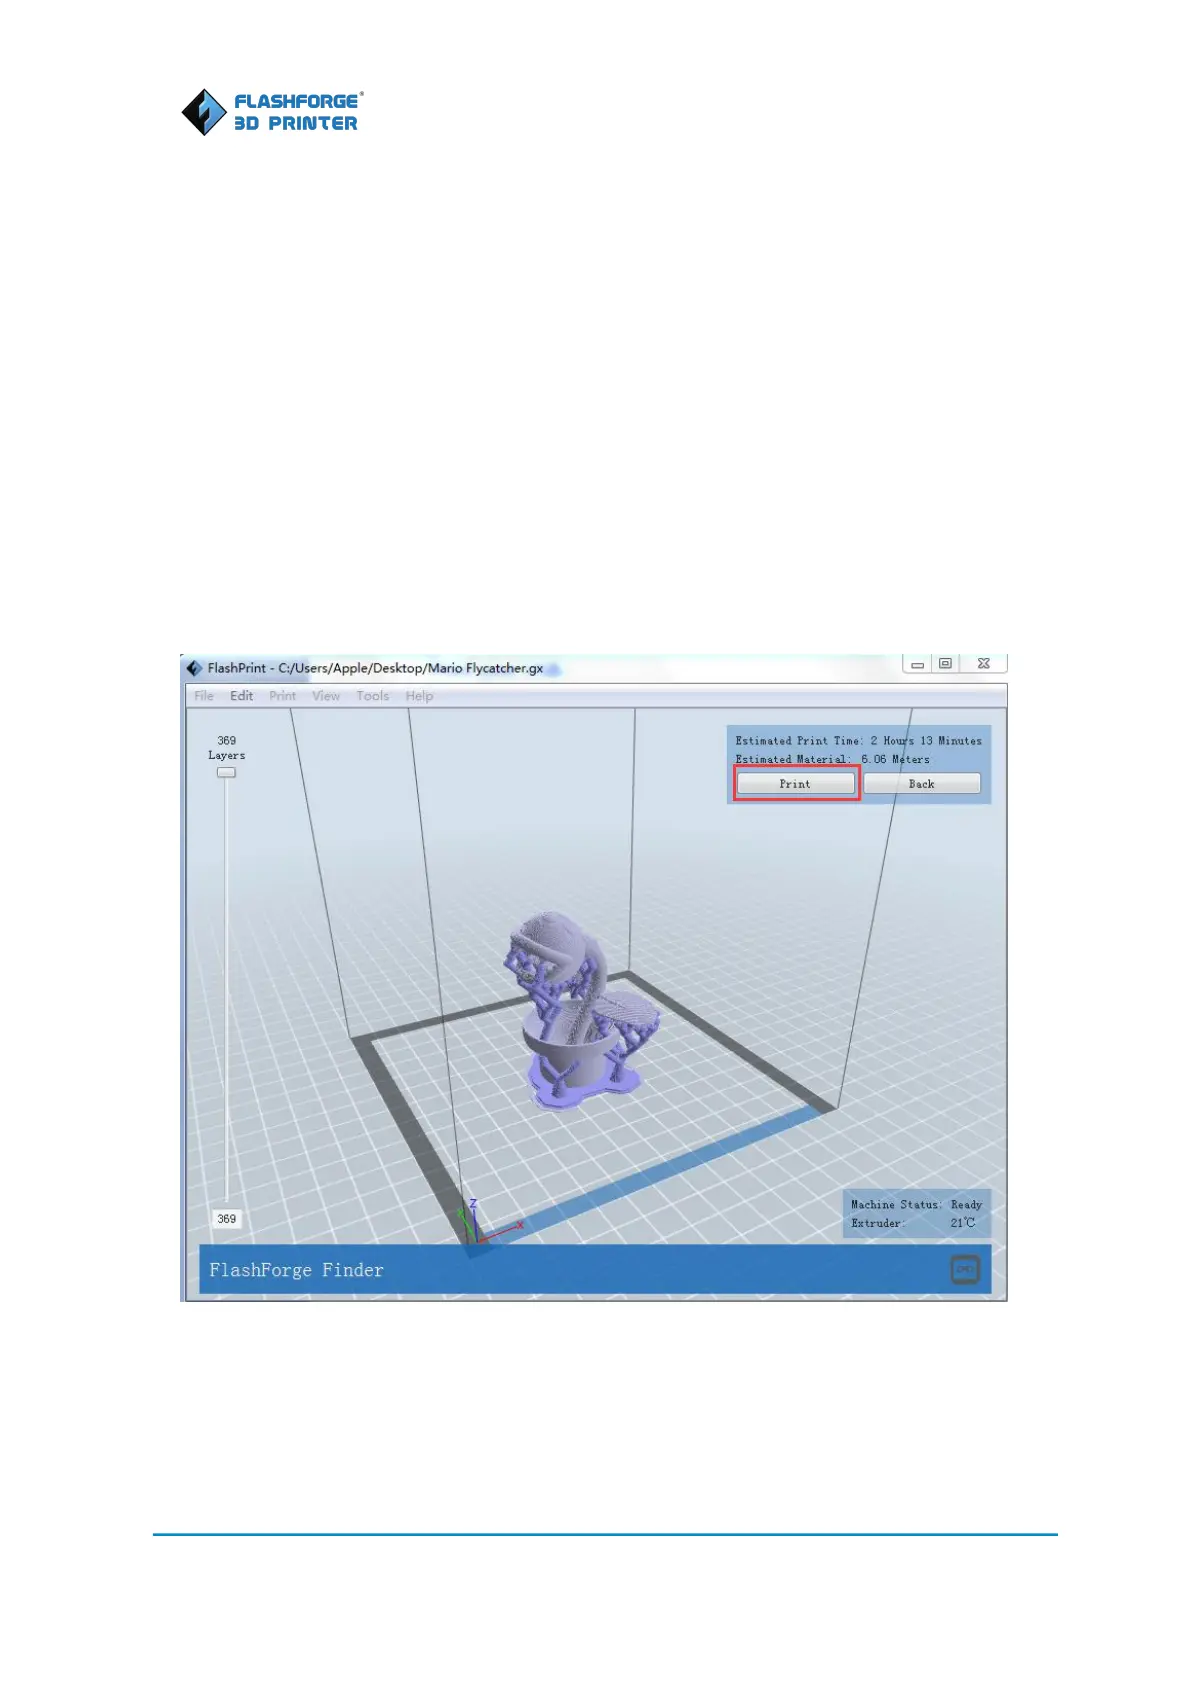
4. Load the Gcode you created in previous section “Creator A Gcode”, click [Print] at upper right
corner to send gcode to Finder. After done with gcode sending, Finder starts to print.
Printing over Wifi
Wifi Configuration