Hunter User Guide | www.FlashForge.com 400-699-1063
1. Connect Hunter to the computer with the USB cable.
3. Select [Print] from menu bar, then select [Connect].
4. Click on [Rescan], then [Connect].
5. Now the printer is connected with FlashPrint.
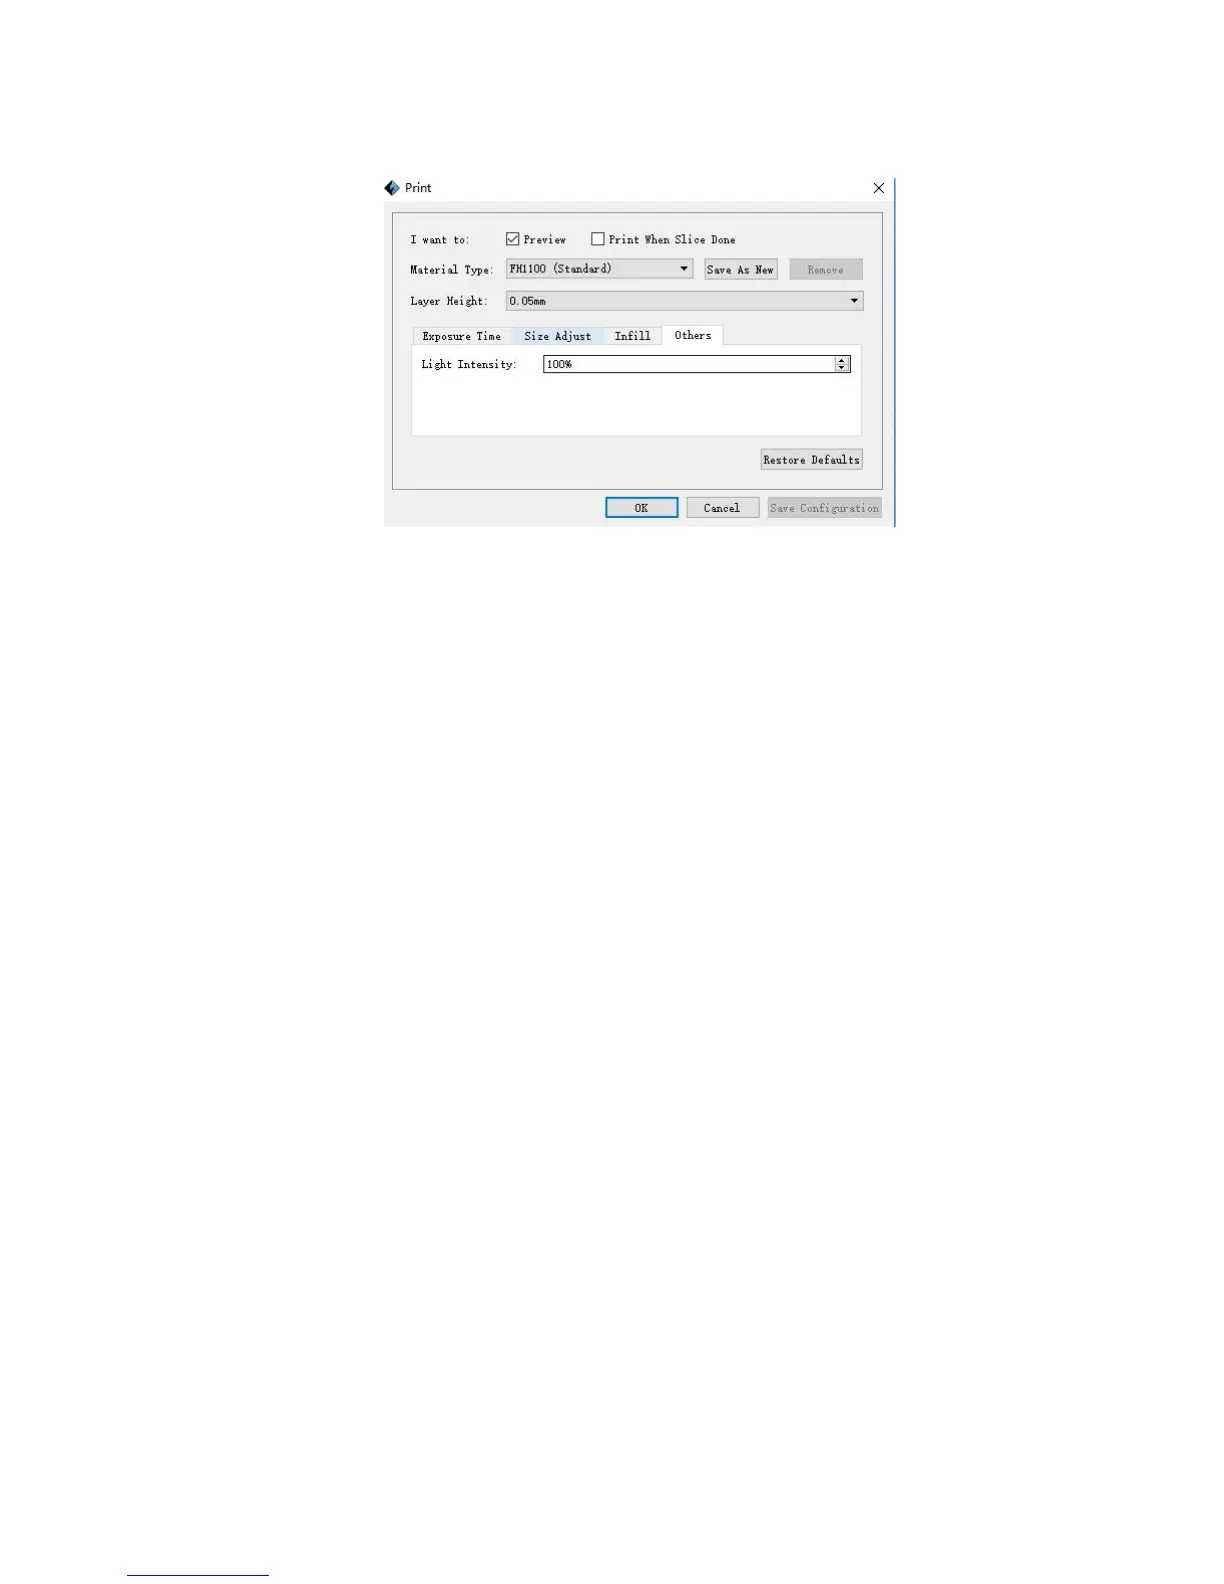
6. Click [Print] icon, and a printing options screen will appear.
7. Save the file at any location, and the object will start slicing.
8. After slicing the object, it will automatically upload the gcode to the Hunter.
1. Click [Print], and a printing options screen will show up.
3. Click [OK], and save the gcode file in the USB stick.
4. FlashPrint will begin slicing the 3D model.
5. After slicing the object, take the USB stick from the computer. Insert it into the
USB stick slot on the Hunter.