Handling the camera
7
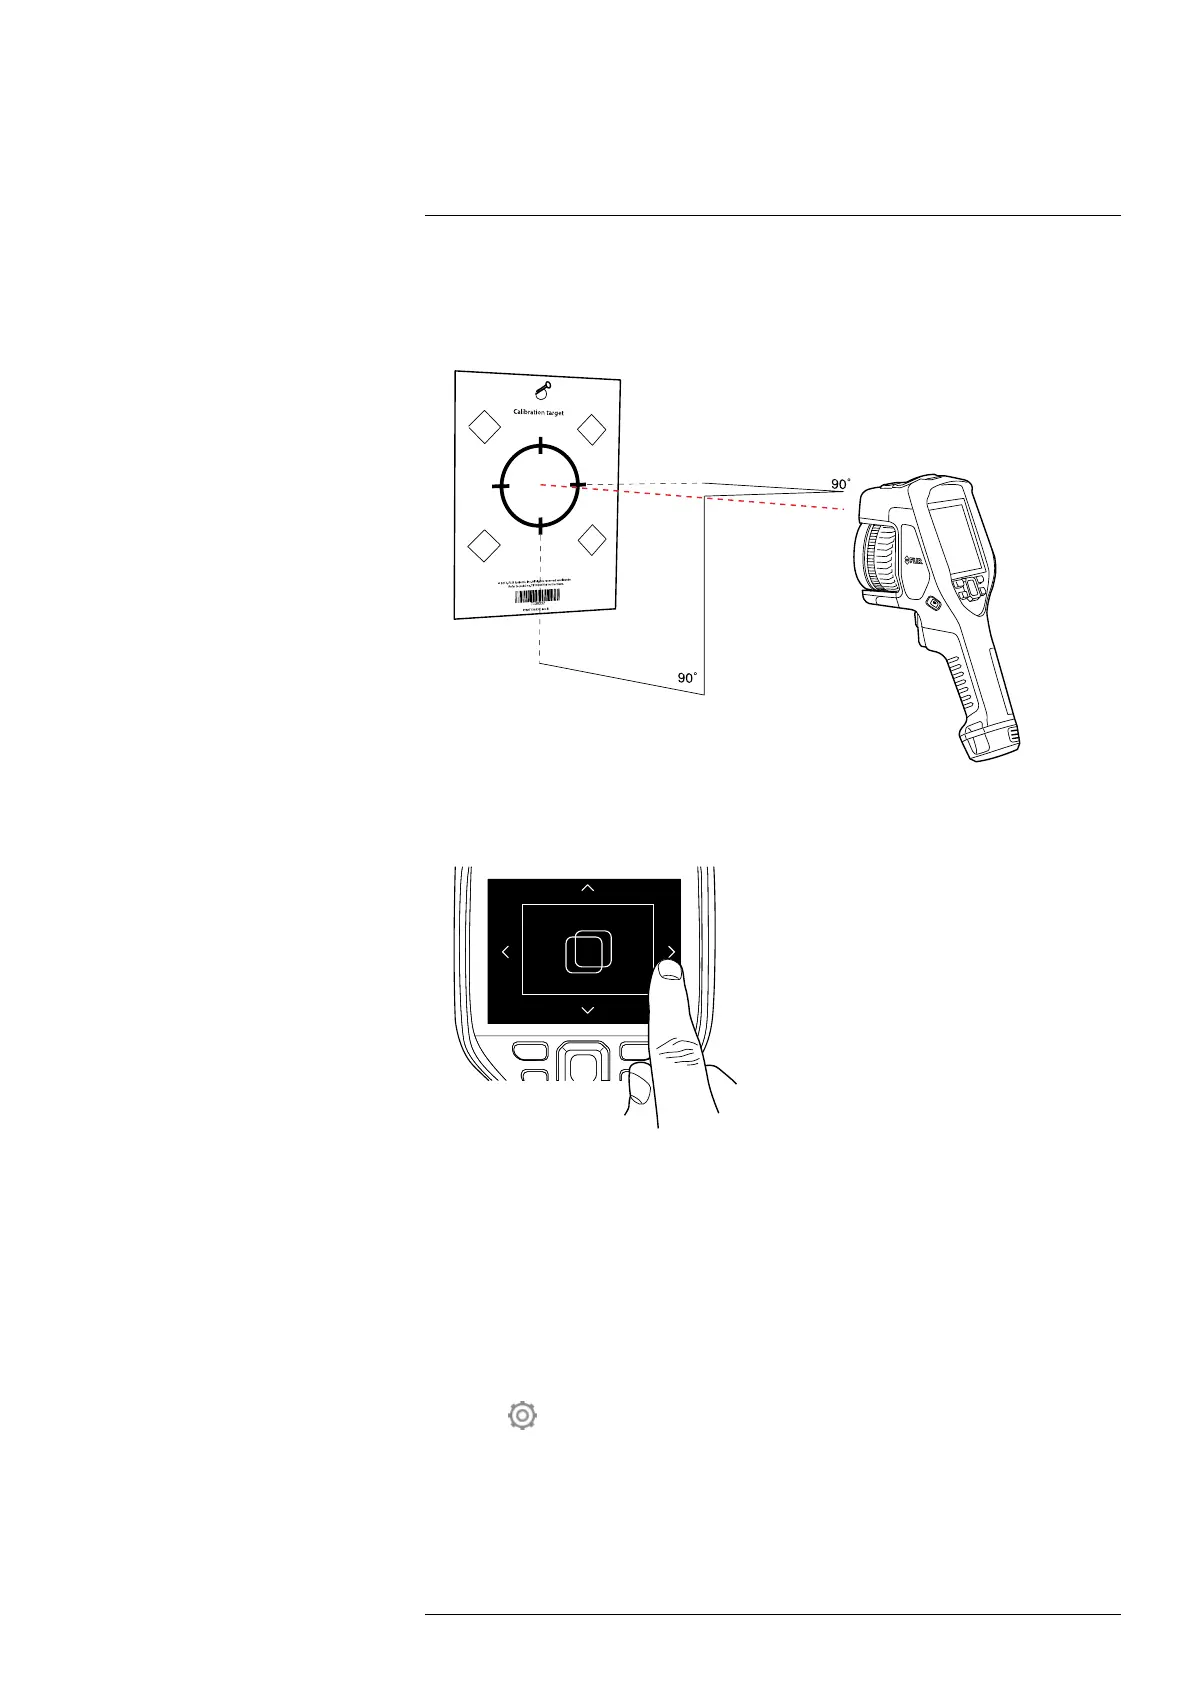
4. From a distance of 2 m (6.6 ft.), aim the camera toward the crosshair, using the laser
pointer. The camera will take a picture automatically.
Note Make sure the camera’s optical path is perpendicular to the calibration target.
See the image below.
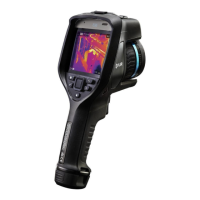
5. In the camera, align the thermal and visual images (indicated by the two squares in
the image below), using the touchscreen arrows. The lens–camera combination is
now calibrated.
To repeat the procedure at a later time, go to Settings > Camera information > Calibrate
lens....
7.17 Calibrating the compass
It is recommended that the compass is calibrated every time you move the camera to a
new location.
Follow this procedure:
1. Push the navigation pad to display the menu system.
2. Select
(Settings) and push the navigation pad. This displays the Settings menu.
3. Use the navigation pad to select Device settings > Geolocation > Compass.
4. If the Compass check box is unchecked, push the navigation pad to enable the
compass.
5. Select Calibrate compass and push the navigation pad. Follow the on-screen
instructions.
Note You must rotate the camera slowly.
#T810587; r. AA/74078/74713; en-US
39