Camera parts
12
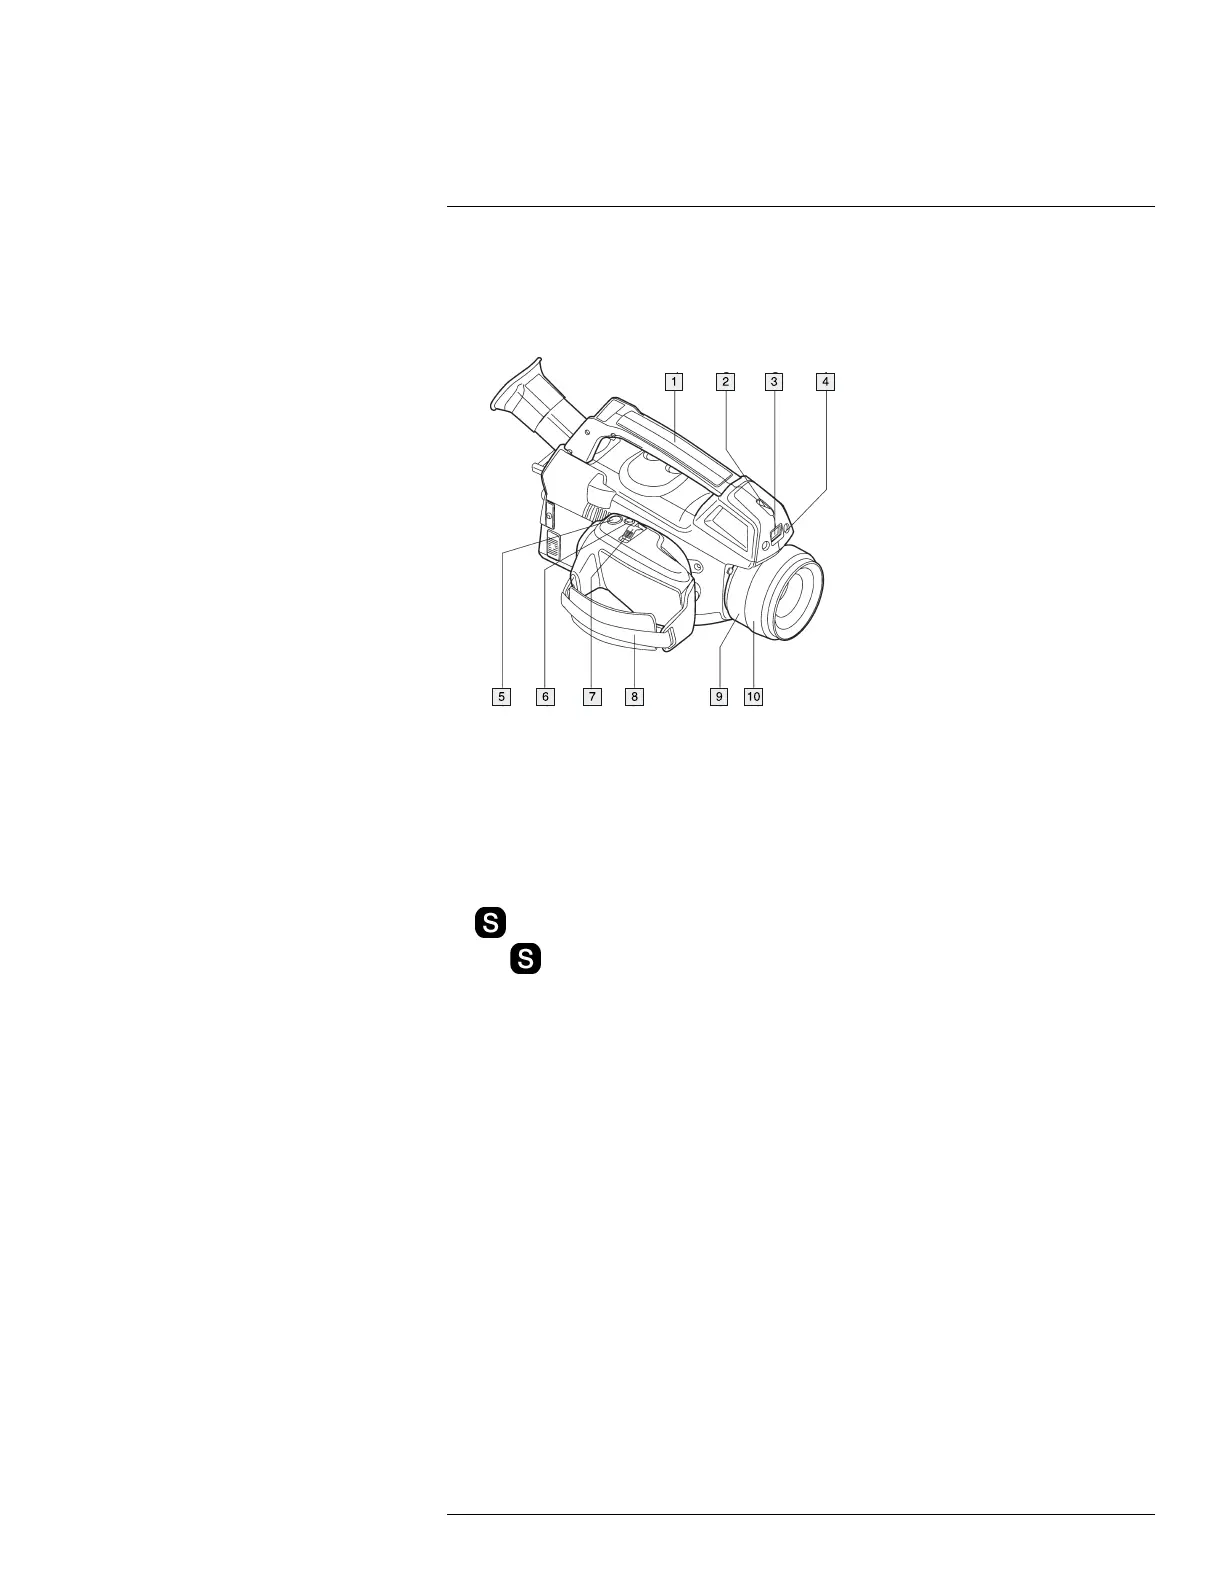
12.2 View from the right
12.2.1 Figure
12.2.2 Explanation
1. Camera handle.
2. Laser pointer.
3. Digital video camera.
4. Digital camera lamps. When you are in digital camera mode, you turn on the lamps by
pushing the joystick.
5.
button (Preview/Save).
The
button has the following functions (not applicable to video clips and video
sequences):
• To preview an image before saving it, push and release the button.
• To save an image directly, push and hold the button for more than 1 second.
6. A/M button (Auto/Manual).
The A/M button has the following functions:
• Push and release the button to change the image adjustment method between Auto,
Manual, and HSM.
Note HSM mode does not apply to the FLIR GF309.
• Push and hold down the button for more than 1 second to calibrate the camera.
Note This is typically not needed during normal operating procedures.
#T559157; r. AH/45951/45951; en-US
30
 Loading...