Programming Menu
9
9.1 Programming Menu Overview
The program menu allows you to perform the following actions.
• Set high and low alarm set points
• Set emissivity
• Change temperature units
• Enable/disable the auto-scan lock and set its timer
• Enable/disable the laser pointer
• Select 12 or 24 hour clock, and set the date/time
• Configure the automatic data logger (Auto Interval)
• Set APO to 5 or 15 seconds
• View last calibration date
9.2 Accessing the Programming Menu
1. Pull and release the trigger to access the HOLD mode.
2. Long press the MODE button until the menu opens, the selected preset
number will appear on the lower right (Px).
3. Short press the LOG button to select one of the five presets (P1...P5).
Each preset has a unique high/low alarm set point and emissivity setting.
9.3 Setting High and Low Alarms
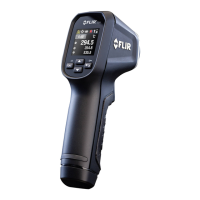
The first parameter shown in the menu is the high (HI) alarm set point as
shown in Figure 9.1, below. Use the arrow buttons to select a high alarm set
point. Press the LOG button to select a preset (P1...P5); you can program 5
sets of high/low set points. Press the MODE button to move to the low alarm
(LO) set point parameter. Use the arrow buttons to select the low alarm set
point.
Figure 9.1 Setting the high and low alarm set points in the programming menu.
#NAS100131; r. AC/92852/92852; en-US
17