Disassembly
The poppet, seat, seal ring, bearing, plunger, piston seal,
plunger seal, and o-rings are replaced in this procedure.
1. Shut down the system.
WARNING
Place the main electrical disconnect OFF and bleed
down all high-pressure lines. Place an “Out of Service”
tag on the main electrical disconnect and lock it out.
Failure to do so may result in equipment damage
or injury to personnel.
2. Reduce air pressure to 0 psi and remove the air and
drain lines from the PCV.
3. Remove the PCV from the manifold.
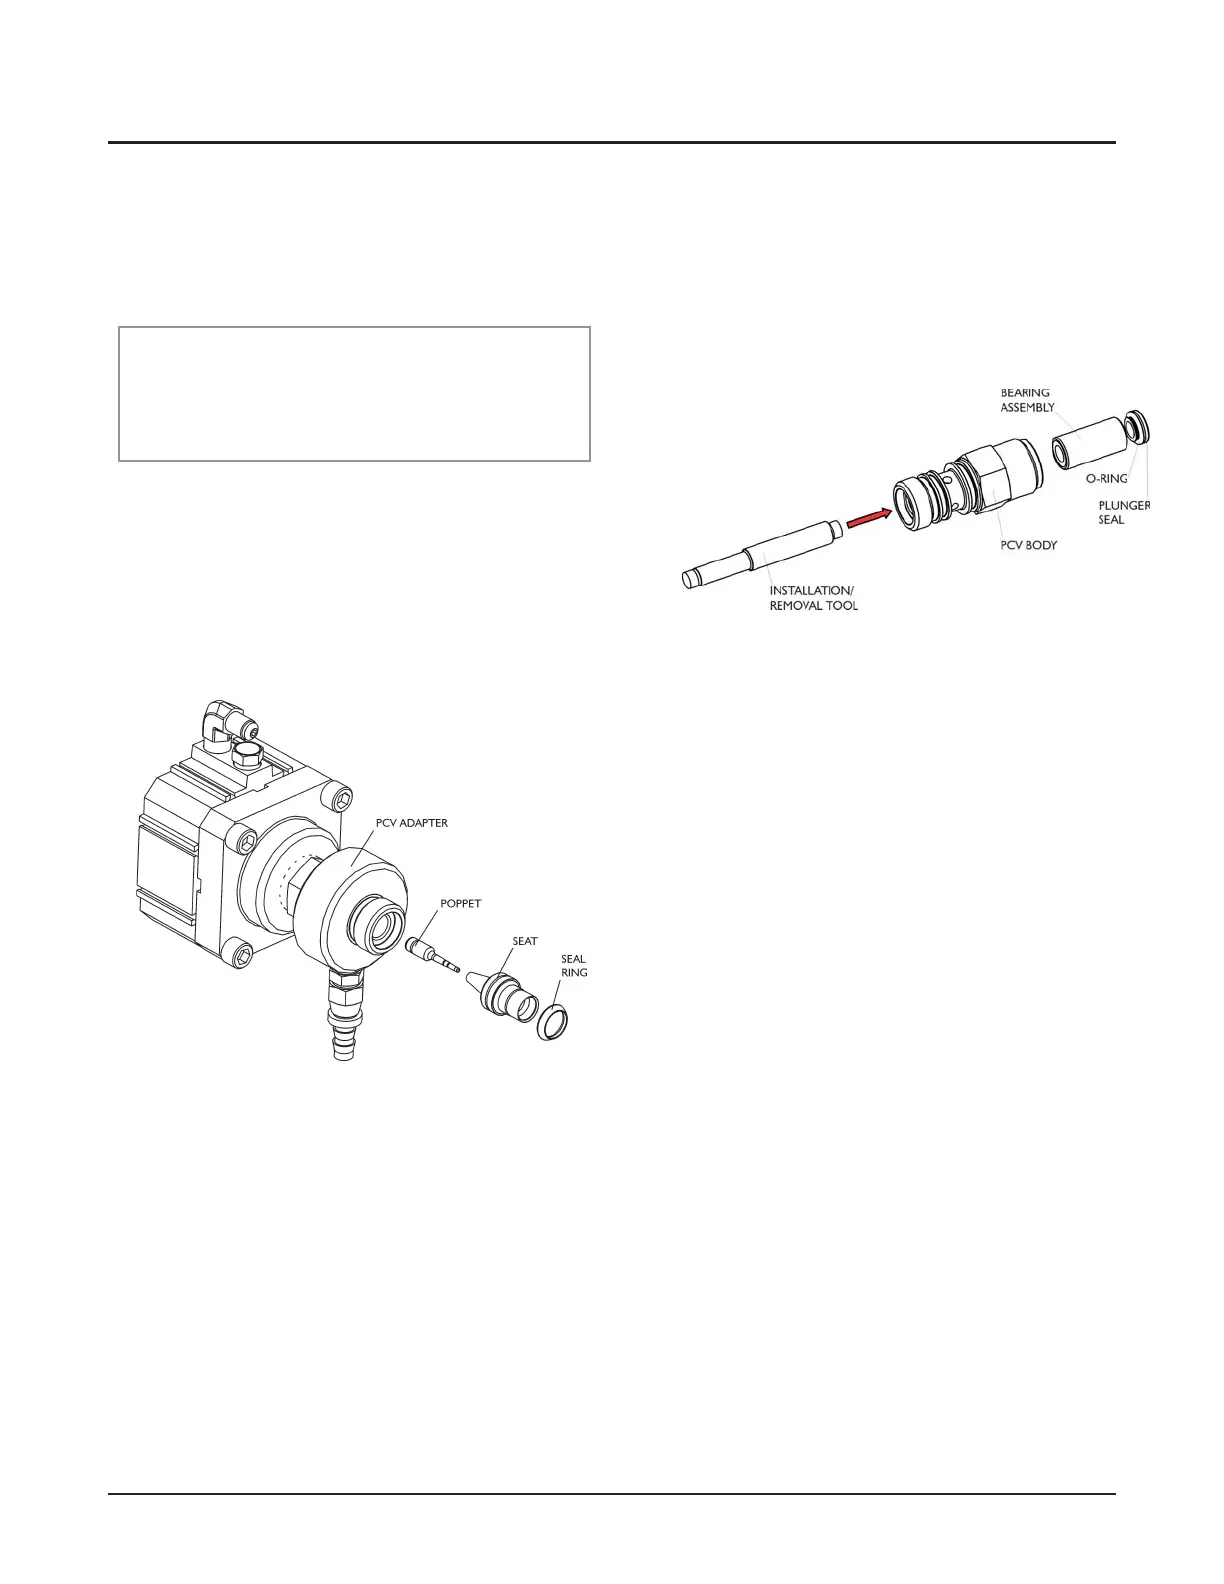
4. Remove the poppet, seat, and seal ring from the
PCV body.
Note: Needle nose pliers may be needed to remove
the poppet from the assembly.
5. Remove the PCV adapter from the valve body. Re
-
move and discard the o-rings from the valve body.
6. Place the air cylinder in a soft jaw vise. Use a 1-1/4
in. (32 mm) combination wrench to remove the PCV
body from the air cylinder.
7. Use a hex wrench to remove the four cap screws
from the air cylinder. Separate the mounting block
to access the plunger. Discard the plunger.
8. Push the bearing from the bore of the PCV body us
-
ing the bearing removal/installation tool (011172-1).
Remove the plunger seal and o-ring. Discard the
plunger seal, o-ring, and bearing assembly.
80 | M-416 ©FlowInternationalCorporation
HYPLEX PRIME PUMP
Maintenance & Service Manual