Installation and reassembly
1. Slide the new plunger through the bore of the cylin
-
der mounting block.
2. Reinstall cap onto housing and tighten the four cap
screws.
3. Inspect the other non-wear components for any
signs of deterioration; repair or replace as necessary.
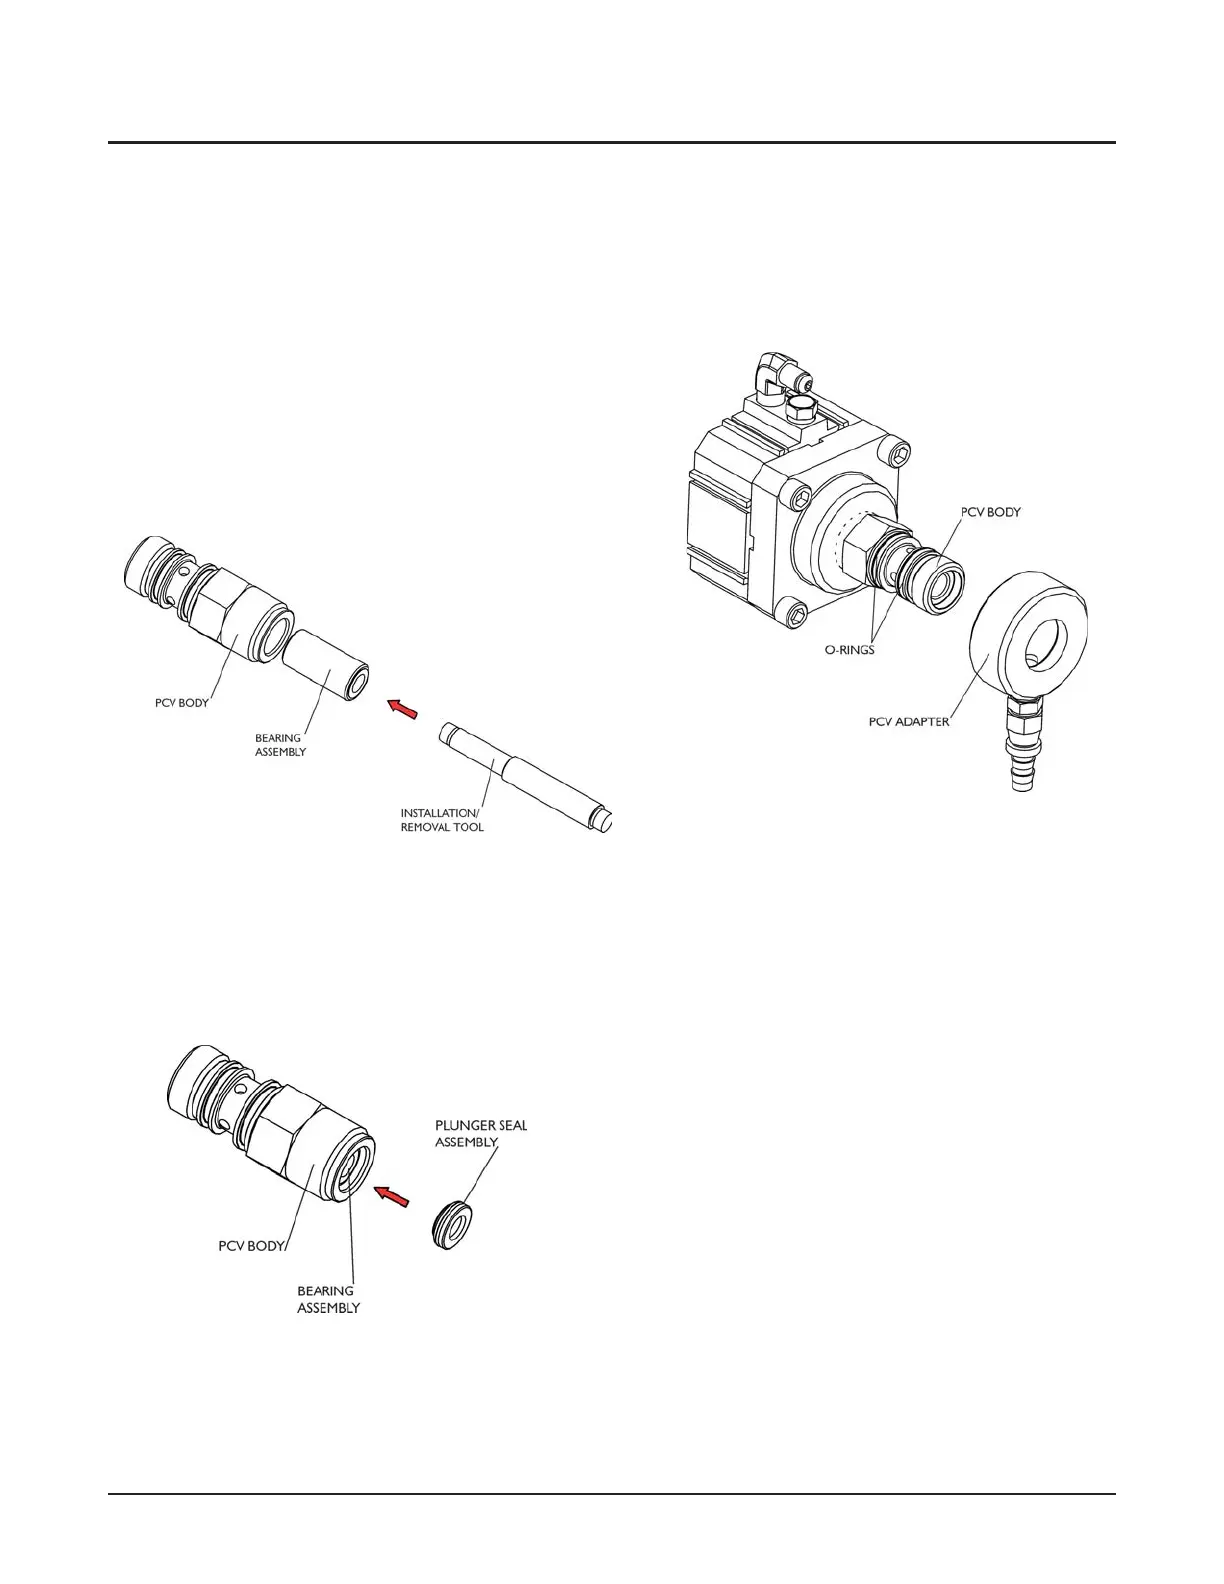
4. Use the bearing removal/installation tool to push the
new bearing assembly into the bore of the PCV
body.
5. Lubricate the plunger seal with the provided
food-grade grease. Install the o-ring onto the plunger
seal. Install the combination–with the o-ring side to
-
wards the valve body–into the valve body.
6. With the air cylinder in a soft jaw vise, slide the
body over the plunger and thread into the mounting
block until the PCV body is firmly seated. No ex
-
treme torque is needed.
7. Clean out any debris that remains in the high-pres
-
sure port of the manifold.
8. Lubricate the two new o-rings with food-grade
grease. Place new o-rings on the outer diameter of
the valve body.
9. Install the PCV adapter on the valve body.
10. Make sure the static seal ring is installed on the seat
and loosely install the poppet into the seat.
Note: Do not press poppet into the seat.
11. Place poppet and seat assembly into the end of the
valve body, then thread the PCV assembly into the
high-pressure manifold. Tighten to 190 ft-lb (258
N-m).
12. Reconnect the air supply and drain lines.
Follow the startup procedure on Page 14 before return
-
ing the HyPlex Prime pump to service.
© Flow International Corporation M-416 | 81
CHAPTER 4
Service