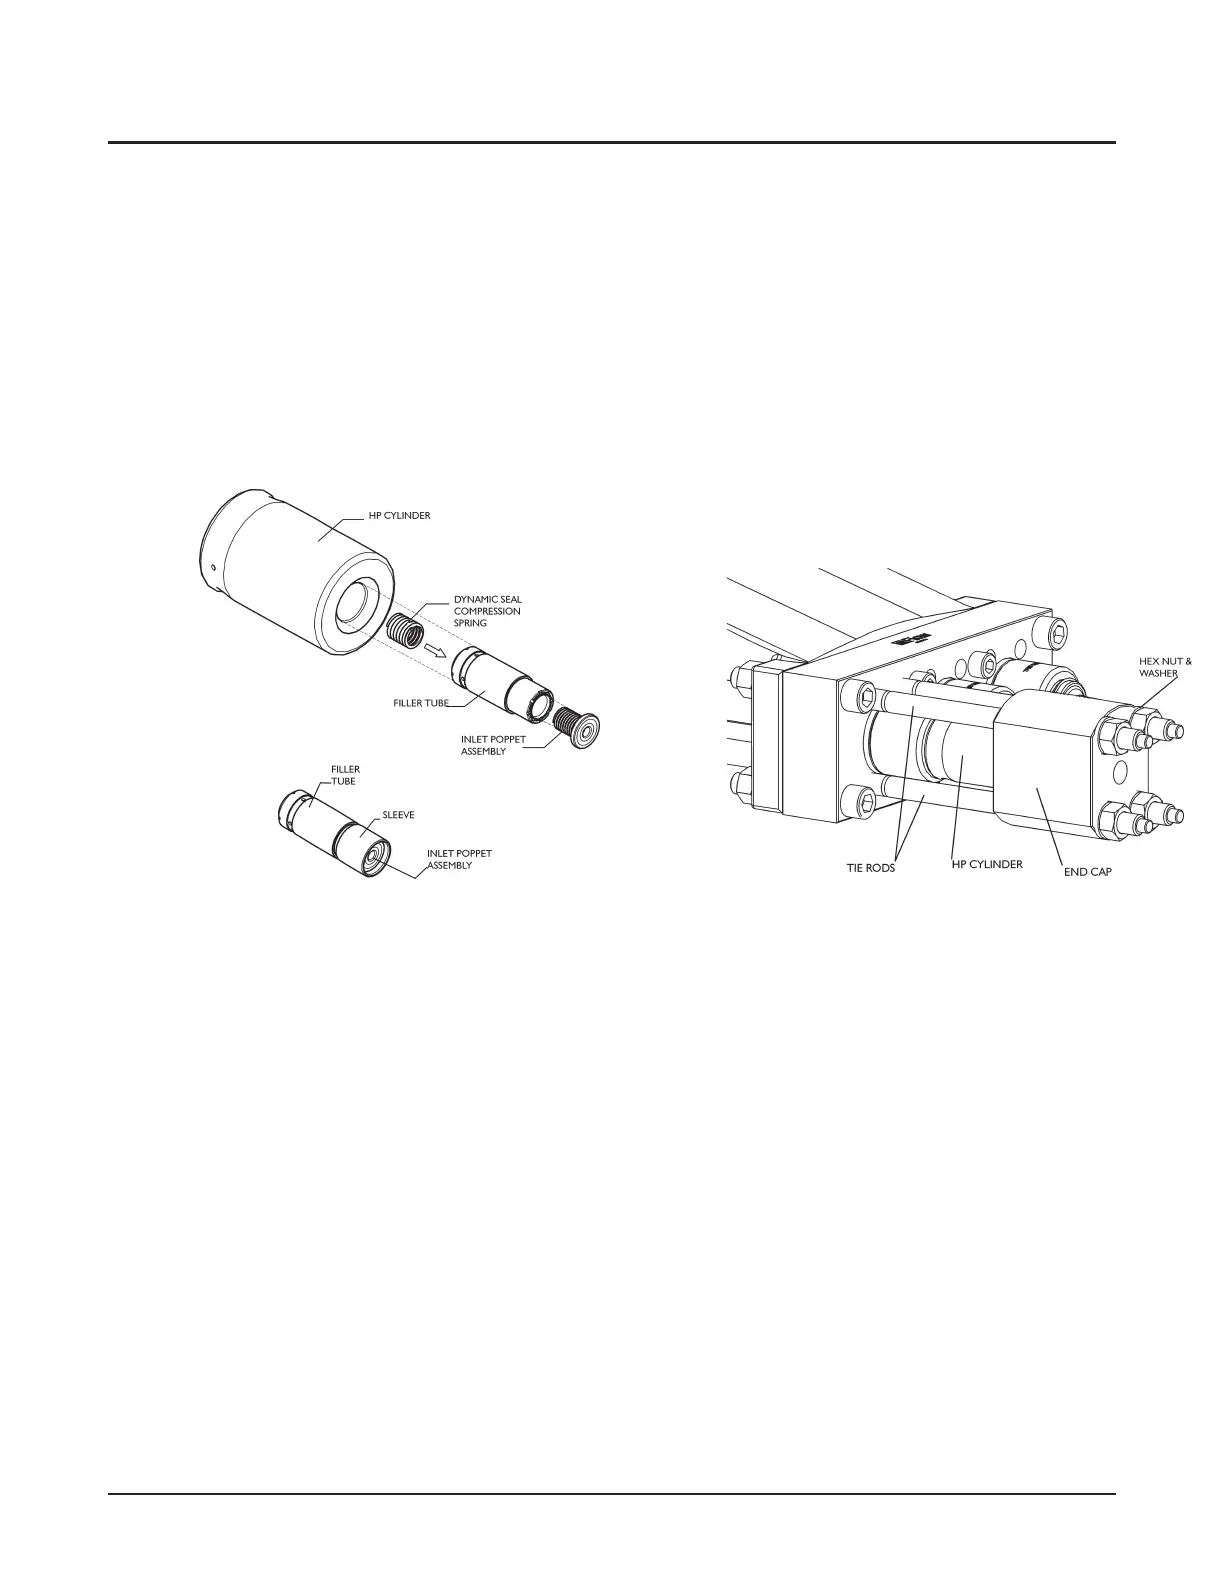
Install the filler tube assembly
1. Place the dynamic seal compression spring into the
tapered end of the filler tube.
2. Insert the inlet poppet assembly into the filler tube,
spring end first.
3. Install the filler tube sleeve so that it surrounds the
inlet poppet and spring.
Note: The filler tube sleeve helps align the poppet
with the check valve body and prevents pinching of
the poppet between the check valve and filler tube
during assembly.
4. Insert the filler tube–spring end first–into the
high-pressure cylinder, making sure to engage the
spring into the dynamic seal.
Repeat for the remaining filler tubes.
Install the end cap
CAUTION
It is important to install the end cap in one fluid
motion toward the crankcase. Do not let the
end cap move away from the high-pressure cylinder
while installing. If it does, the inlet poppet can be
pinched, causing damage.
1. Align the end cap so it will slide over the tie rods.
Carefully slide the end cap towards the HP cylinder
until the check valve body makes contact with the
inlet poppet.
2. Continue to slide the end cap until the high-pres
-
sure cylinder engages the o-ring in the end cap and
the check valve body seats itself against the
high-pressure cylinder.
3. Temporarily install one of the hex nuts, hand tight,
to prevent the end cap from springing back from
the HP cylinder.
Follow Steps 1–3 to install the other two end caps in the
same way, then continue with Step 4.
4. Apply a thin coat of anti-seize compound to both
sides of the washers and threads of the tie rods.
5. Install washers and hex nuts hand tight.
6. Remove the temporarily installed hex nuts. Apply
anti-seize to both sides of the washers and threads,
then reinstall the nuts.
7. Use the pressure loading tool to load the tie rods
(see Loading the tie rods on Page 44).
© Flow International Corporation M-397 | 88
CHAPTER 5
Service