LTQ008 – LTQ230 Series 3-Phase Products User Instructions – AIIOM000165 EN
Page 21 of 40
5.8.2 Adjusting CCW End-of-Travel
1. Reposition Mechanical Stop
a. Disconnect power.
b. Loosen the left-side mechanical stop. This is the CCW
mechanical stop limit adjustment. Using a 17 mm wrench
and a 5 mm hex key, hold the jam nut and turn the stops
screws 5 – 6 turns CCW so it clears the mechanical boss
inside the actuator.
i. This will allow the user to adjust the cam/switch stop
position without running into the mechanical stop screw.
c. Use the manual override handwheel to position the actuator
to the required CCW position. Keep all changes within ± 3° of
the factory settings.
2. Adjust CCW Cam (Second from Bottom)
a. Cam 2 is the second cam up from the bottom (green) and
the end-of-travel adjustment for the actuator CCW position.
With power off, and the actuator at its required CCW position,
use a sharp 2.5 mm hex key to free up the cam set screw. Take
care not to let the hex key slip at this stage; it can easily strip
out. Once the screw is free, adjust it as detailed below.
i. Rotate the hex key to the left 10 – 15° until an audible click
is heard. This will reset the switch roller arm.
ii. Gently tighten (CW) the set screw (only until slight pressure
is felt). Ideally, the set screw rides along the camshaft.
iii. Slowly rotate the hex key to the right, pushing the cam,
until an audible click is heard on the bottom switch. The
click means correct adjustment has been achieved.
iv. Tighten the cam set screw.
b. Apply power and test for the correct CCW position.
i. Drive the actuator CW at least 15 – 20°.
ii. Drive the actuator CCW until the cam stops the
electrical travel.
iii. Verify that the CCW position matches the one
required.
iv. Repeat step 2a if further adjustment is needed.
3. Tighten Mechanical Stop
a. With the actuator in the proper position, hold the 17 mm
wrench on the left-side jam nut to prevent the jam nut
from locking. Turn the 5 mm hex key CW until the end of
the stop screw bottoms out against the internal stop boss.
b. Turn the hex key one full turn CCW, and lock the position
with the jam nut. Now, the actuator will reach its end-of-
travel electrically before there is any interference from the
mechanical stop.
c. The CCW position calibration is now complete.
Figure 8: CCW mechanical stop
Figure 9: Cam 2 (second
from bottom, CCW cam)
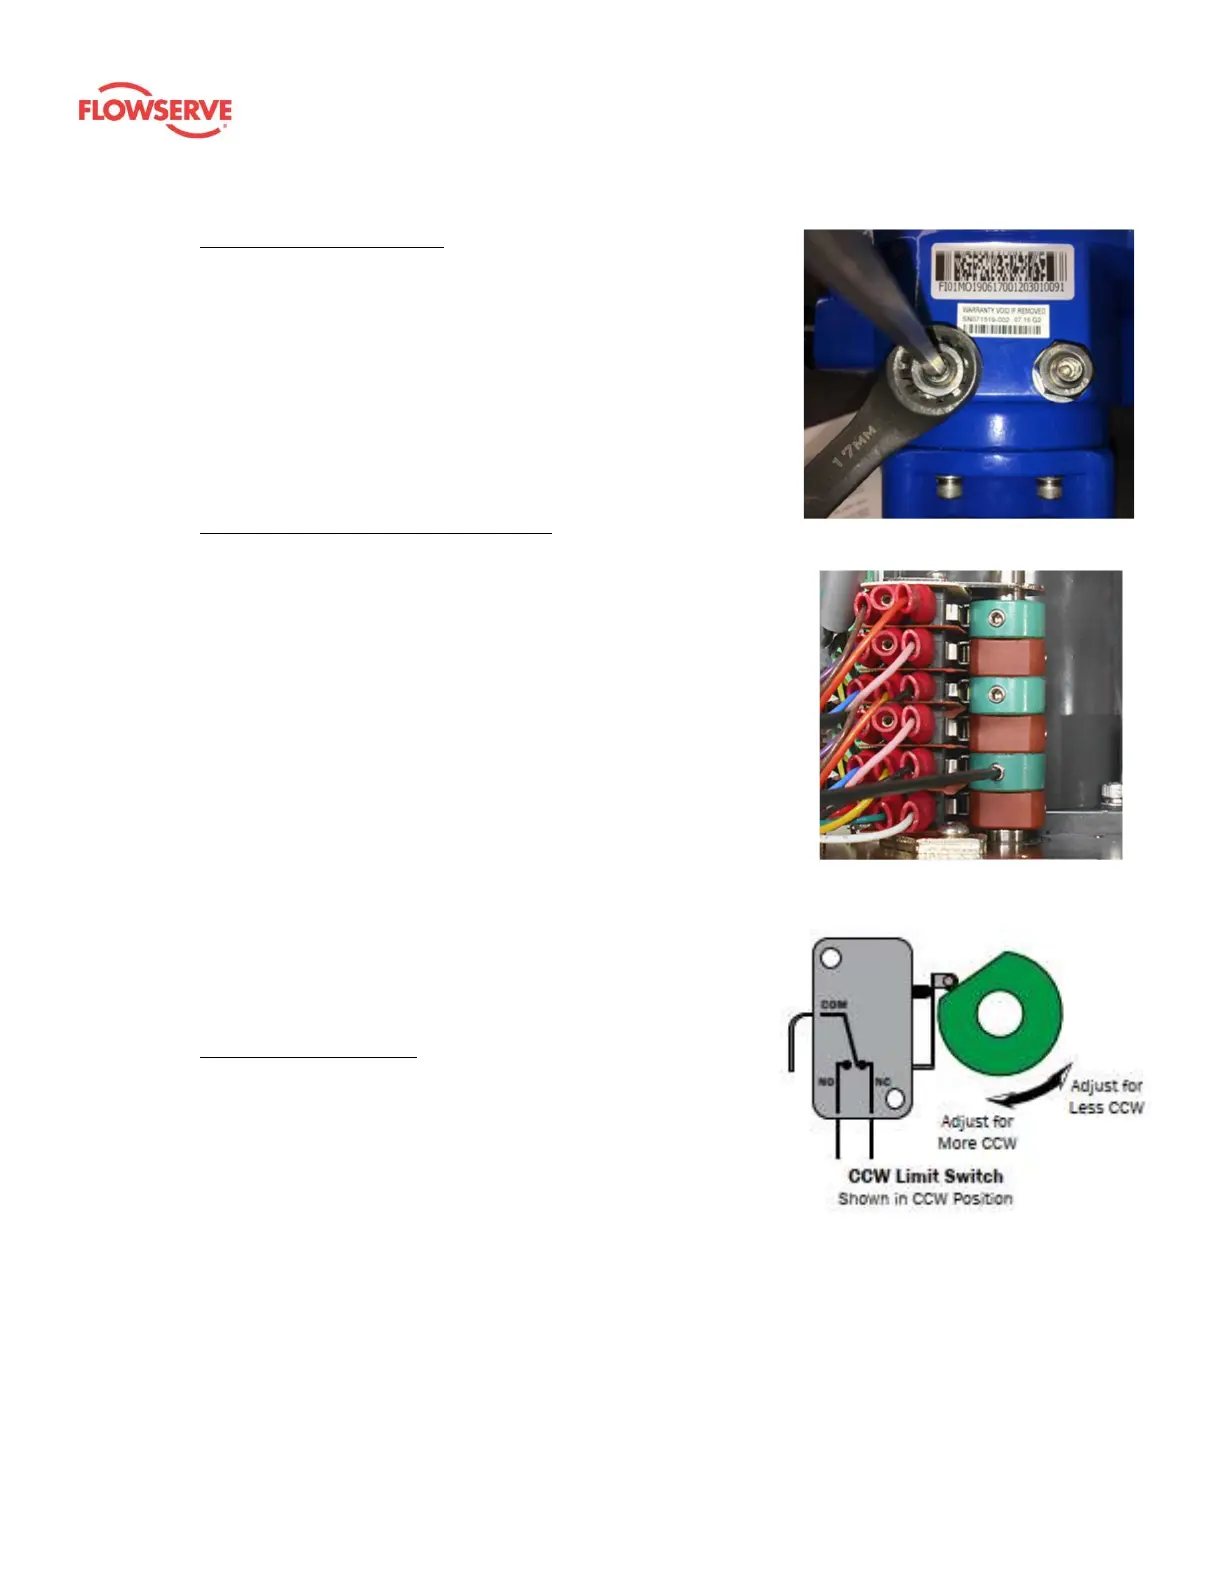
Figure 10: The CCW limit switch
shown in the fully CCW position