Hyperion Imaging System User Guide 23
Chapter 3: Operation
This section describes how to:
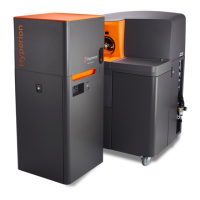
• Connect the Hyperion Tissue Imager to Helios.
• Start the Hyperion Imaging System.
• Disconnect the Hyperion Tissue Imager from Helios.
NOTE See CyTOF Software v7.0 Help for procedures related to instrument control, tuning,
and data acquisition.
Connect the Hyperion Tissue Imager to Helios
IMPORTANT Place the Hyperion™ Imaging System in a vibration-free environment.
The following procedure outlines the coupling of the Hyperion Tissue Imager to Helios™ .
Plumes of ablated material are transported through the coupling tube to Helios for mass
cytometry analysis.
IMPORTANT Connect the Hyperion Tissue Imager to the AUXILIARY power connection on
the right panel of the Helios instrument to allow for raising and lowering of the instrument on
its wheels and for efficient coupling to Helios.
WARNING The system must be correctly connected to a suitable electrical supply
For more details, see Helios, a CyTOF System Site Requirements Guide (PN
400252).
1 Inspect both ends of the Hyperion Tissue Imager (HTI™) Injector to check for debris or
material prior to beginning this procedure. Inspect under a microscope (if available).
NOTE Use compressed air to remove any debris from the Injector.