Chapter 4: Maintenance
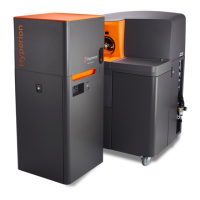
Disconnect the Hyperion Tissue Imager from Helios
Hyperion Imaging System User Guide
47
Table 20. Equipment required for maintenance and cleaning of the Hyperion Imaging System
Parts Equipment Company Product Name Part Number
Torch Glassware brushes Restek® Nylon Tube Brushes
and Pipe Cleaner
PN
Injector Glassware brush Gordon Brush Nylon .
Miniature Single-
Spiral brushes with a
stainless steel stem
and a cut end
PN
66BExterior Surfaces
NOTE This procedure may only be done when the Hyperion Tissue Imager has been
disconnected from Helios and moved out of the way.
1 Disconnect the Hyperion Imaging System from the power supply.
2 Wipe the instrument exterior surfaces only using a towel dampened with a lab-grade
cleaning agent (for example, isopropanol).
3 Repeat Step 2, using a towel dampened with DIW.
4 Dry the instrument exterior using a dry towel.
67BInjector Cleaning
1 Soak the Injector in 10% Contrad for up to 1 hr.
2 Scrub the Injector with the recommended glassware brush (PN 01023,
42TGordon Brush42T).
3 Insert the brush into the tip of the Injector and pull it in and out a few times to dislodge
any buildup around the tip.
4 Rinse thoroughly with DIW.
5 Spray isopropanol on the Injector and air-dry.
6 Alternatively, completely dry the Injector with a blow dryer or heat gun.
NOTE Ensure that the parts are completely dry before reinstalling.
68BTorch Cleaning
See the Helios User Guide (PN 400250) for procedure on Torch Assembly, removal,
Cleaning, and for reassembly of the Injector and Torch.
1 Soak in the Torch in 10% Contrad for up to 1 hour.