Service item Action
Mechanical seal Replace with new seal units.
Service in case of alarm
For information about indication values for sensors, see Sensor-connection (page 32).
Alarm source Action
FLS10 1. Drain the fluid in the inspection chamber. Fill with new coolant if
necessary.
2. Check the freezing point (lower than -13°C or 9°F).
Check the inspection chamber again after one week of operation. If
leakage has occurred:
1. Drain the fluid.
2. Change the mechanical seal unit.
3. Replace with new coolant.
The thermistor/Thermal contact 1. Check the coolant level (pump with cooling jacket).
2. Check the start and stop levels.
The overload protection Check that the impeller can rotate freely.
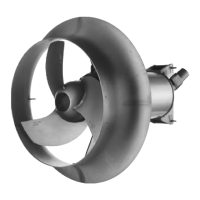
Replace the impeller
Required tools:
• 17 mm hexagon bit adapter with an extension of at least a 100 mm (4 in.)
• Rod (wood or plastic) for locking the impeller in place.
WARNING:
• If you fail with the impeller installation, you must redo the installation procedure from
the beginning.
• A worn impeller and/or pump housing can have very sharp edges. Wear protective
gloves.
• When laying the pump on its side, do not allow the weight of the pump to rest on any
portion of the impeller. The impeller must not be allowed to make contact with the
concrete floor or other hard and rough surfaces.
Replace the impeller for wet installation
Remove the impeller: wet installation
CAUTION:
Wear heavy work gloves when you handle impellers. The sharp edges can cause physical
injury.
1. Place the pump in a horizontal position.
2. Remove the impeller:
a) Remove the flush valve cover and its O-ring.
b) Lock the impeller in place by inserting a rod through the hole.
c) Remove the impeller screw.
Maintenance
Flygt 3202 Installation, Operation, and Maintenance Manual 47