Do you have a question about the Focusrite Logic Pro and is the answer not in the manual?
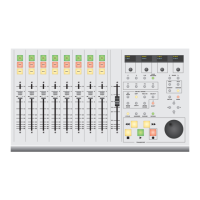
Explains the 8 fader strips that switch between analogue and DAW control.
Details the centre section controls for DAW parameters, including encoders and displays.
Illustrates the HUI/MIDI automation system connecting DAW to Control 2802 analogue channels.
Outlines the need for Ethernet connection and DAW software configuration for automation.
Guides on connecting the Control 2802 to a DAW computer via Ethernet cable.
Details setting up IP addresses and DHCP for direct or router-based connections.
Instructions for setting up Logic Pro to recognize the Control 2802 as a HUI™ controller.
Ensures the Focusrite Control 2802 software is running before booting Logic.
Explains how to switch between DAW and analogue fader control layers.
Describes the displays for channel information and parameters on the console.
Details the purpose of channel encoders, bank keys, and select mode buttons.
How to navigate and select tracks using BANK and 5-8 switches.
Explains the function of transport buttons like Play, Stop, Rewind.
How to select tracks, regions, and zoom using cursor controls.
Describes the use of CYCLE, MARKER, and NUDGE switches for session control.
Explains SELECT, REC EN, AUTO MODE, and GRP functions for DAW control.
Details SIP Safe, AUTO SAFE, and UNITY modes for analogue layer control.
Explains how the DAW METERS switch affects console bargraph meters.
How to adjust track parameters like Pan, Aux, and Inserts using rotary encoders.
Guides on using the PAN switch to control channel panning via encoders.
How to assign inputs and outputs using the ASSIGN switch with PAN mode.
Explains how to assign bus sends to rotary encoders using the AUX switch.
Details assigning busses to send positions (Snd1-Snd5) using AUX + ASSIGN.
Guides on assigning plug-ins to insert slots and controlling their parameters.
How to configure networking, host software, and factory reset via the SETUP switch.
Describes the default configuration of programmable function keys F1-F4.
Steps to set up dummy tracks in DAW for analogue automation.
Using the console transport to record and playback analogue fader/cut automation.
Recommends Touch, Latch, and Read modes for automation workflow.
How to hide analogue automation tracks to tidy the Logic session.
The Focusrite Control 2802 is a console designed for integration with Digital Audio Workstations (DAWs) like Logic Pro, Pro Tools, and Cubase/Nuendo. It functions as both a DAW control surface and an analogue fader automation system, connecting to a computer via Ethernet and supporting the HUI™ control surface protocol.
The Control 2802 offers dual functionality:
| Brand | Focusrite |
|---|---|
| Model | Logic Pro |
| Category | Recording Equipment |
| Language | English |