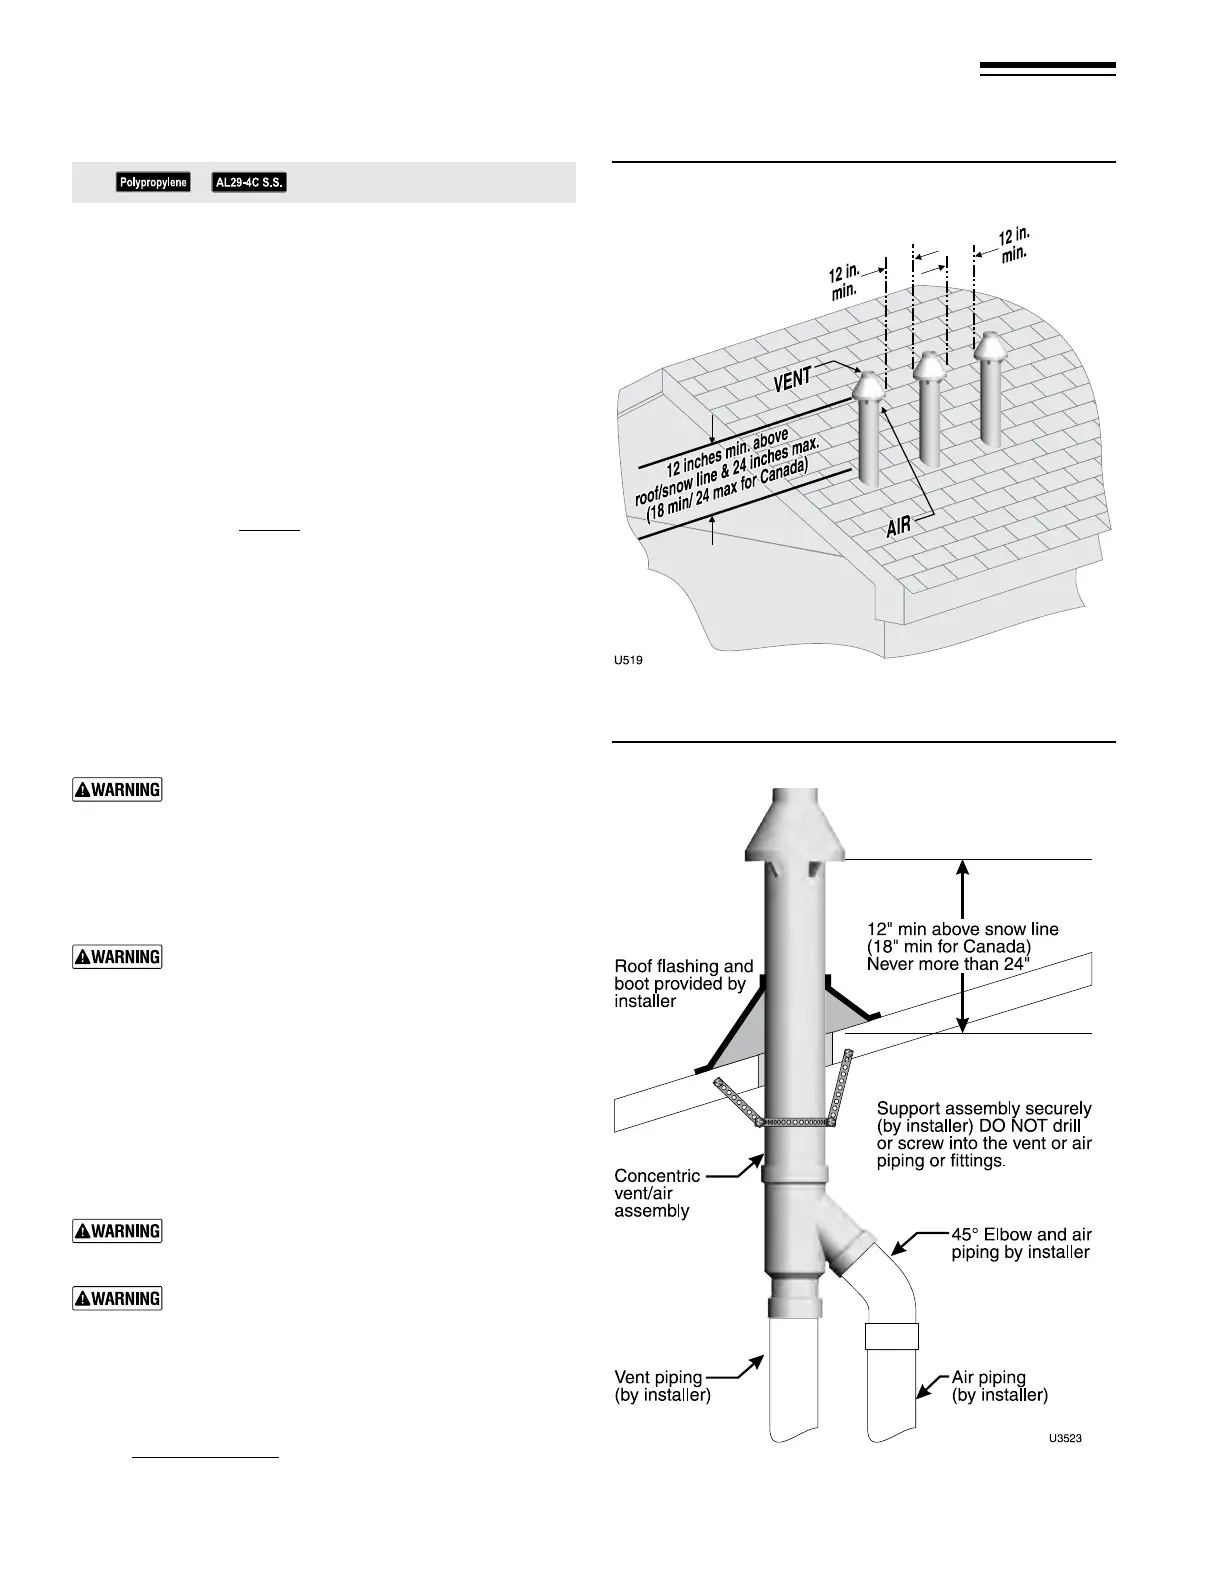
Figure 33 Vertical termination — 3” PVC concentric —
single or multiple boilers
Figure 34 3” PVC concentric termination supports
See notices on previous page.
Part number 550-142-950/0122
28
FreeStyle
®
series
2
wall mount gas-fired water boiler – boiler manual
Prepare roof penetrations
1. Roof penetration hole:
a. Cut a clearance hole to clear the termination outside
diameter as prescribed in the kit instructions.
b. Insert a galvanized metal thimble in the vent pipe hole.
2. Follow all local codes for isolation of vent pipe when passing
through oors, ceilings and roofs.
3. Provide ashing and sealing boots sized for the concentric
termination outside diameter.
Mount concentric termination
1. Assemble the vent termination as described for concentric
terminations, on page31.
2. Mount the termination as shown in Figure34.
3. Support the concentric vent/air termination at the roof
penetration as shown in Figure34 or per concentric kit
instructions.
y e supports/bracing used must support the termina-
tion assembly to prevent vertical slippage or sideways
movement.
y e clamps used on the outside of the termination pipe
must not cut into the pipe or contain sharp edges that
could cause a crack to form.
e vent and air piping must be securely sup-
ported, and must not rest its weight on the boiler
ttings. DO NOT drill or screw into either the
vent pipe or air pipe. Failure to properly support
the vent and air piping could result in vent pip-
ing damage, resulting in possible severe personal
injury, death or substantial property damage.
When inserting the partially-assembled termi-
nation kit through the roof penetration, wrap
plastic or other protection over the end of the
exposed assembly to prevent debris from enter-
ing the pipes. If the air passages become blocked,
the boiler will not operate. Once the rain cap
has been cemented to the assembly, there is
no way to correct the problem. The assembly
would have to be replaced if it were cut to be
removed and cleaned. Altering the assembly in
any way could result in severe personal injury
or death due to toxic flue product emissions.
If using AL29-4C stainless vent pipe, use the vent
pipe manufacturer’s PVC adapter if connecting to
a PVC concentric vent attachment.
Do not connect any other appliance to the vent
pipe or multiple boilers to a common vent pipe.
4. Aer the assembly has been positioned in the roof opening
and all supports have been attached, install a bird screen
(purchased separately if not included with the kit) and rain
cap as follows:
a. Place the bird screen on the end of the inner pipe as in
Figure38,page31, or per kit instructions for polypro-
pylene kits.
b. Cement the rain cap in place.
13 DIRECT VENT — Vertical concentric (continued)