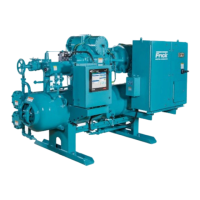
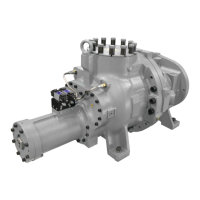
RWB II PLUS ROTARY SCREW COMPRESSOR UNITS
FORMS
S70-200 IOM
Page 51
COMPRESSOR PRESTART CHECKLIST
The following items MUST be checked and completed by the installer prior to the arrival of the Frick
Field Service Supervisor. Details on the checklist can be found in the IOM. Certain items on this
checklist will be reverifi ed by the Frick Field Service Supervisor prior to the actual start-up.
Mechanical Checks
__ Confi rm that motor disconnect is open
__ Isolate suction pressure transducer
__ Pressure test and leak check unit
__ Evacuate unit
__ Remove compressor drive cou pling guard
__ Check compressor and driver shaft alignment
__ Remove cou pling center and do not reinstall
__ Check for cor rect po si tion of all hand, stop, and check
valves prior to charg ing unit with oil or re frig er ant
__ Charge unit with correct type and quan ti ty of oil
__ Lubricate motor bearings (if applicable)
__ Check oil pump align ment (if applicable)
__ Check for cor rect econ o miz er pip ing (if ap pli ca ble)
__ Check separate source of liquid re frig er ant sup ply (if
applicable, liquid in jec tion oil cooling)
__ Check water sup ply for water-cooled oil cooler (if ap-
pli ca ble, water cooled oil cooling)
__ Check ther mo sy phon receiver re frig er ant level (if ap-
pli ca ble, ther mo sy phon oil cooling)
Electrical Checks
__ Confi rm that main disconnect to motor starter and mi cro
is open
__ Confi rm that electrical contractor has seen this sheet,
all pertinent wiring information, and draw ings
__ Confi rm proper power supply to the starter package
__ Confi rm proper motor protection (breaker sizing)
__ Confi rm that all wiring used is stranded copper and is
14 AWG or larger (sized properly)
__ Confi rm all 120 volt control wiring is run in a sep a rate
con duit from all high voltage wiring
__ Confi rm all 120 volt control wiring is run in a sep a rate
con duit from oil pump and compressor motor wir ing
__ Confi rm no high voltage wiring enters the micro pan el
at any point
__ Check current transformer for correct sizing and in stal -
la tion
__ Check all point-to-point wiring between the micro and
motor starter
__ Confirm all interconnections between micro, mo tor
start er, and the system are made and are cor rect
After the above items have been checked and verifi ed:
__ Close the main disconnect from the main power supply to the motor starter
__ Close the motor starter disconnect to energize the micro
__ Manually energize oil pump and check oil pump motor rotation
__ Manually energize compressor drive motor and check motor rotation
__ Leave micro energized to ensure oil heaters are on and oil temperature is correct for start-up
Summary: The Frick Field Service Supervisor should arrive to fi nd the above items completed.
He should fi nd an uncoupled compressor drive unit (to verify motor rotation and alignment) and
energized oil heaters with the oil at the proper standby temperatures. Full compliance with the
above items will contribute to a quick, effi cient and smooth start-up.
The Start-up Supervisor will:
1. Verify position of all valves
2. Verify all wiring connections
3. Verify compressor driver rotation
4. Verify oil pump motor rotation
5. Verify the % of FLA on the micro display
6. Verify and fi nalize alignment
7. Calibrate slide valve and slide stop
8. Calibrate temperature and pressure readings
9. Correct any problem in the package
10. Instruct operation personnel
Note: Customer connections are to be made per the electrical diagram for the motor starter
listed under the installation section and per the wiring diagram found in S90-010 M (Quantum
panel) or S70-200 OM (Plus panel).
Sign this form & fax to 717-762-2422 Signed: ___________________________________
as confi rmation of completion. Print Name: ___________________________________
Company: ___________________________________
 Loading...