070-450 IOM (NOV 13)
Page 16
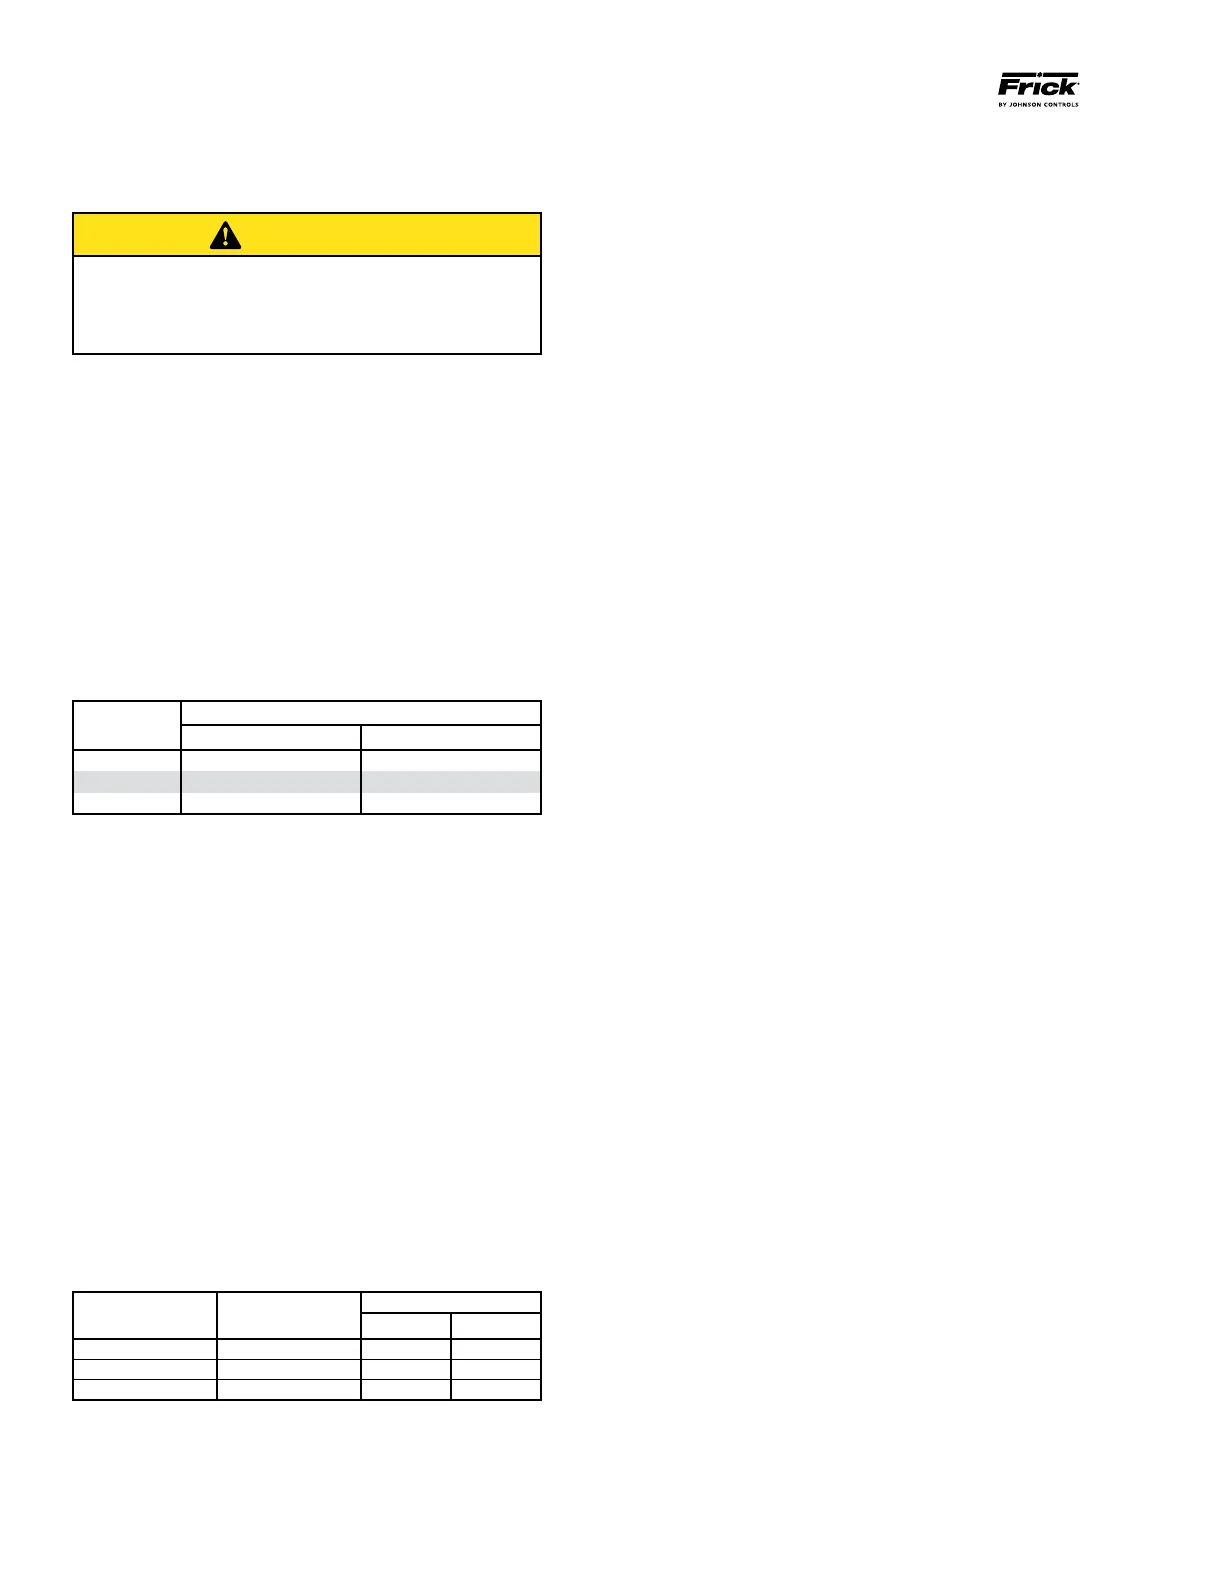
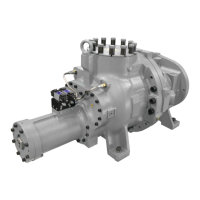
XJF ROTARY SCREW COMPRESSOR
INSTALLATION
COMPRESSOR
MOUNTING
CAUTION
To prevent injury or damage to components, and for
complete details regarding pressurized refrigerant vapor
transfer and recovery, see the current Installation-
Operation-Maintenance Manual for your unit.
1. Place a new gasket on the oil separator ange. (Contact
the Baltimore Parts Center for replacement gaskets, Ph:
800-336-7264). Assemble the new compressor to the tunnel
and hand tighten the bolts in a star pattern. Then torque to
1/3 of table value in star pattern increasing by 1/3’s to full
torque. Refer to Table 3 for torque specications.
2. Set the compressor and motor assembly on the separator
ange and align the oil separator ange bolt holes to the
compressor discharge ange bolt holes while supporting
the assembly with a hydraulic piston underneath the motor.
The hydraulic piston must support the motor weight, motor
support / tunnel weight, plus 1/2 the compressor weight.
Reference Table 2 for compressor weights.
TABLE 2 - COMPRESSOR WEIGHT
XJS/XJF
Compressor Weight - Approximate
lb kg
95 600 272
120 845 383
151 1,210 549
3. Insert the bolts through the oil separator ange and into
the compressor discharge ange. Tighten bolts using a star
pattern. Lube bolts then nger tight on all bolts, then torque
to 1/3 of table value in star pattern increasing by 1/3’s to full
torque. Reference Table 3.
4. The motor feet should rise above the support base. If
not, remove the compressor, add another gasket on top of
the oil separator ange and repeat steps 4 & 5.
5. While the assembly is still supported, measure the
clearance between the motor feet and base plate with a
feeler gage. Shim the motor feet to gage reading plus .002”
gap between each motor foot and the support base. Then,
bolt the motor to the mounting base and torque the motor
mounting bolts to 250 ft-lb.
6. Connect all tubing and pipe connections to the
compressor and all wiring to the motor.
7. Remove the lifting assembly.
TABLE 3 - BOLT TORQUE VALUE
Compressor
Model
Screw Size
Torque
ft-lb NM
XJF 95
1/2 or 5/8
58 79
XJF 120 1/2 or 5/8 58 79
XJF 151
5/8 or 3/4
144 195
COMPRESSOR/MOTOR COUPLING REQUIREMENTS.
XJF compressors are arranged for direct motor drive and
require a exible drive coupling to connect the compressor
to the motor.
If you are using the Johnson Controls – Frick motor mount,
the mount is machined to ensure that motor to compressor
alignment is in specication (see the above “MOTOR
MOUNTING” section for mounting details).
If you are using a foot mounted motor, it is essential that
the coupling be properly aligned to ensure proper bearing
and seal performance.
1. Coupling must be selected and installed so that it
doesn’t transmit any axial load to the compressor
shaft.
2. Set up the minimum distance between compressor
shaft and motor shaft to allow for seal removal (see
Outline drawings).
3. Coupling must be able to take up any misalignment
between motor and compressor. It is critical to the
life of the shaft seal that misalignment is kept to the
minimum possible value. Be sure to follow the coupling
manufacturer’s guidelines for checking and correcting
any misalignment. See the next section for Johnson
Controls–Frick requirements.
COUPLING ALIGNMENT REQUIREMENTS
(FOOT MOUNTED ONLY)
Coupling alignment must be performed prior to start-
up. After the compressor has been installed on the job
site, alignment must be checked again and if necessary
corrected prior to start-up. After a few hours operation,
the alignment must be checked while the package is still
hot. Correct hot alignment is critical to ensure the life of the
shaft seal and compressor bearings.
Maximum radial runout is .004” total indicator reading.
Maximum axial runout is .004” total indicator reading.
A dial indicator or another appropriate measuring device is
to be used to determine the Total Indicator Runout.
Indicator bracket sag must be checked as all brackets have
some exibility. The best way to measure this is to attach
the dial indicator and bracket on a pipe at the coupling span
distance. Zero the indicator in the 12:00 position, and rotate
the pipe so the indicator is in the 6:00 position. The reading
on the indicator in the 6:00 position is the bracket sag. This
value must be included in the dial indicator readings when
afxed to the coupling for an accurate alignment.
OIL HEATER(S)
Your package must be equipped with oil heaters that
provide sufcient heat to prevent condensation from
occurring during shutdown cycles.