IMPORTANT!Repeat the procedure if the cable has been disconnected and is to
be re-connected.
Requirements
for the neutral
conductor
Note!
-
Ensure that the grid neutral conductor is grounded. This may not be the case
for IT grids (insulated grids with no grounding); it will then not be possible to
use the inverter.
-
In order to use the inverter, the neutral conductor must be connected. A
neutral conductor that is too small may adversely affect the inverter feeding
energy into the grid. The neutral conductor must therefore be the same size
as the other live conductors.
Connecting the
inverter to the
public grid (AC)
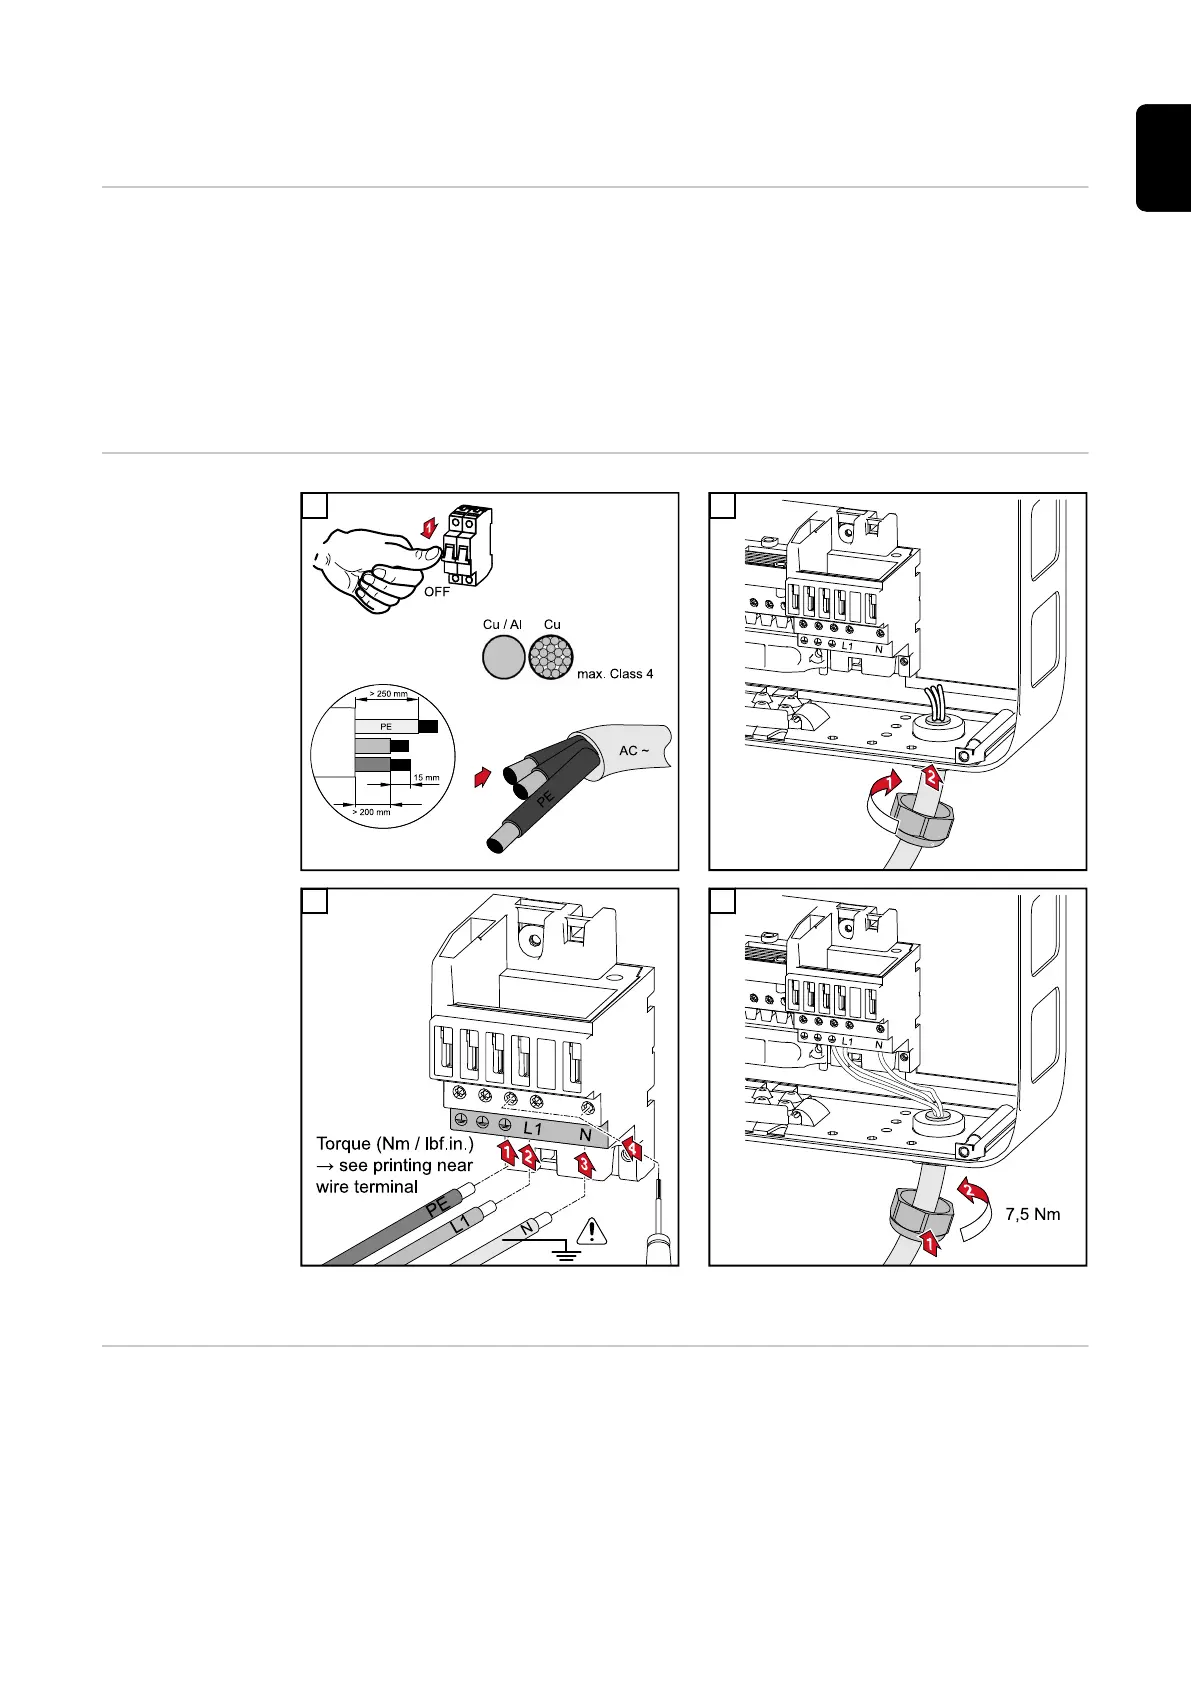
1 2
Note! Observe the torque values marked on the
side underneath the terminals.
3 4
Routing the AC
cables
Note!
-
Form loops with the AC cables when connecting them to the AC terminals.
-
When securing the AC cables using a metric screw joint, ensure that the
loops do not protrude beyond the connection area.
Otherwise, under certain circumstances it may no longer be possible to close
the inverter.
17
EN

 Loading...