264 Maintenance
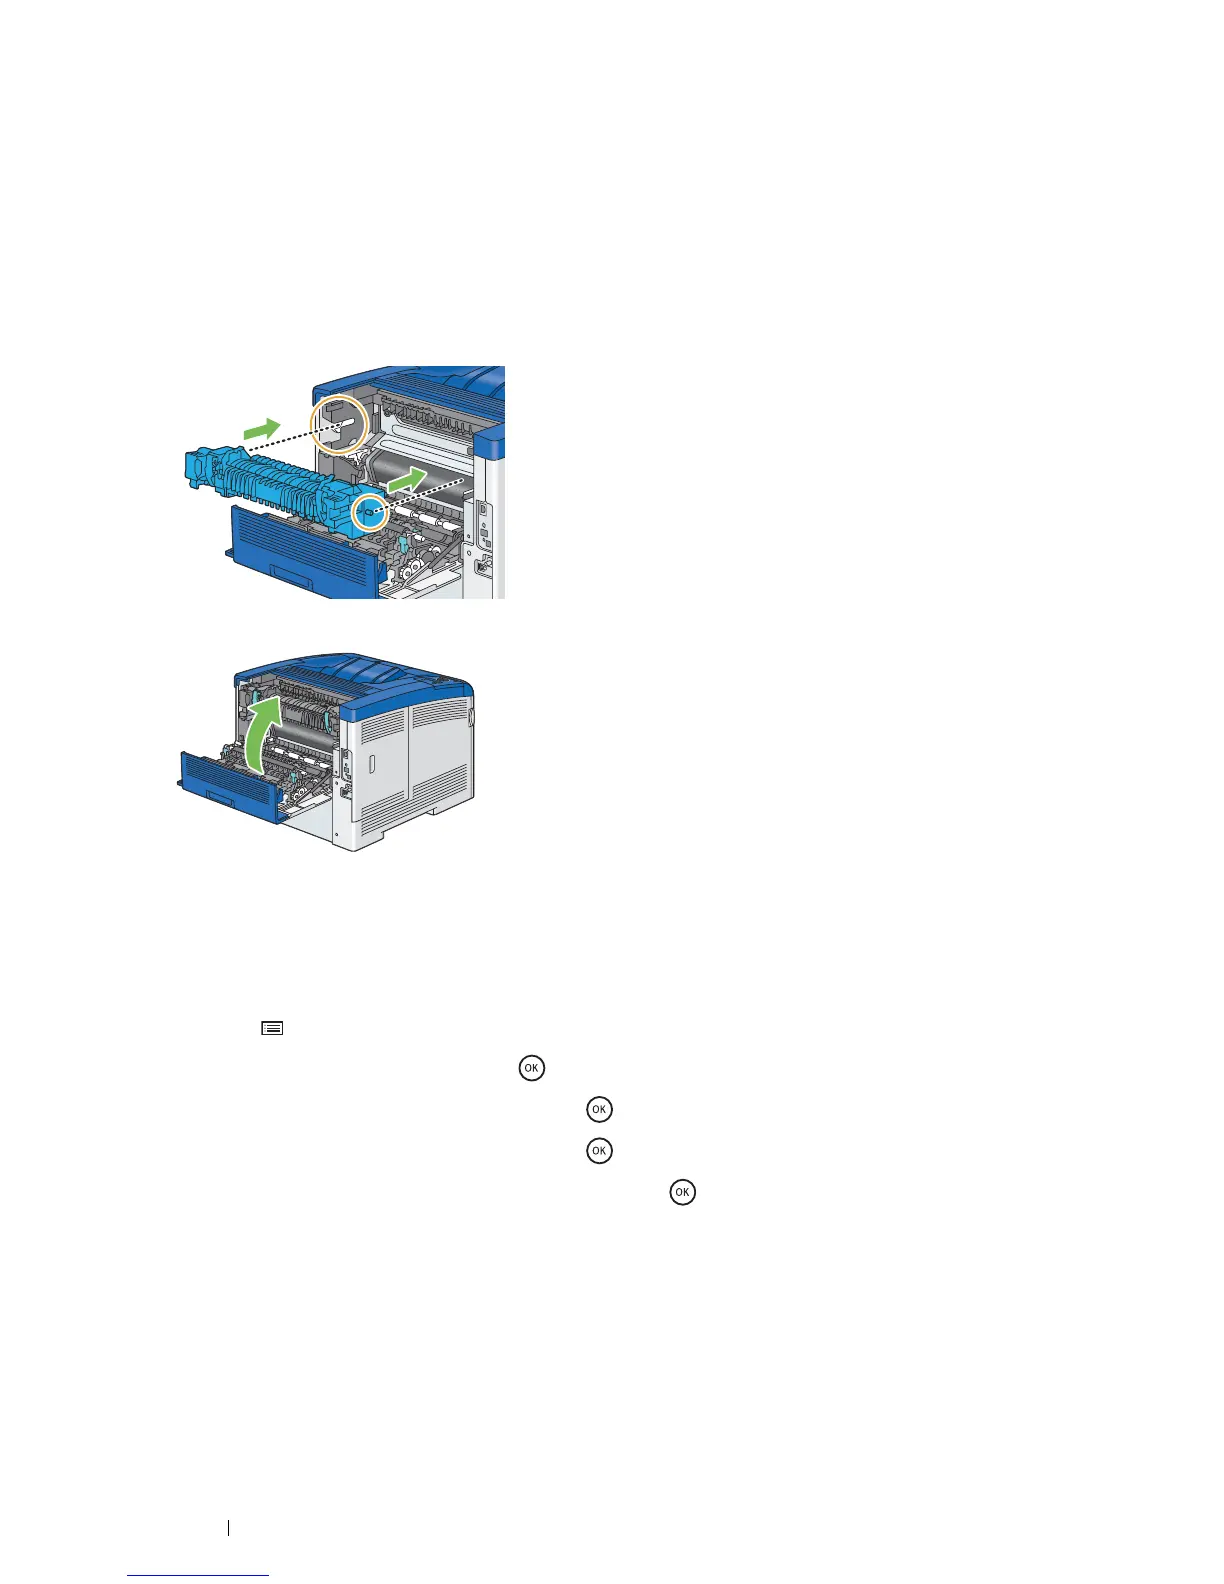
Installing a Fusing Unit
1 Unpack a new fusing unit.
2 Remove the packing material from the fusing unit.
3 Make sure that the two tabs of the fusing unit align with the grooves on the printer, and then insert it into the
printer until it clicks.
NOTE:
• Hold both sides of the fusing unit with your hands.
• Make sure that the fusing unit is firmly set in the slots and cannot be moved easily.
4 Close the rear cover.
5 Reconnect the power cord to the power connector and turn on the printer.
Resetting the Counter of the Fusing Unit
After replacing the fusing unit, use the operator panel to reset the counter of the fusing unit.
1 Press the (Menu) button.
2 Select Admin Menu, and then press the button.
3 Select Maintenance Mode, and then press the button.
4 Select Reset FusingUnit, and then press the button.
5 Ensure that Are You Sure? appears, and then press the button.

 Loading...


