En-7
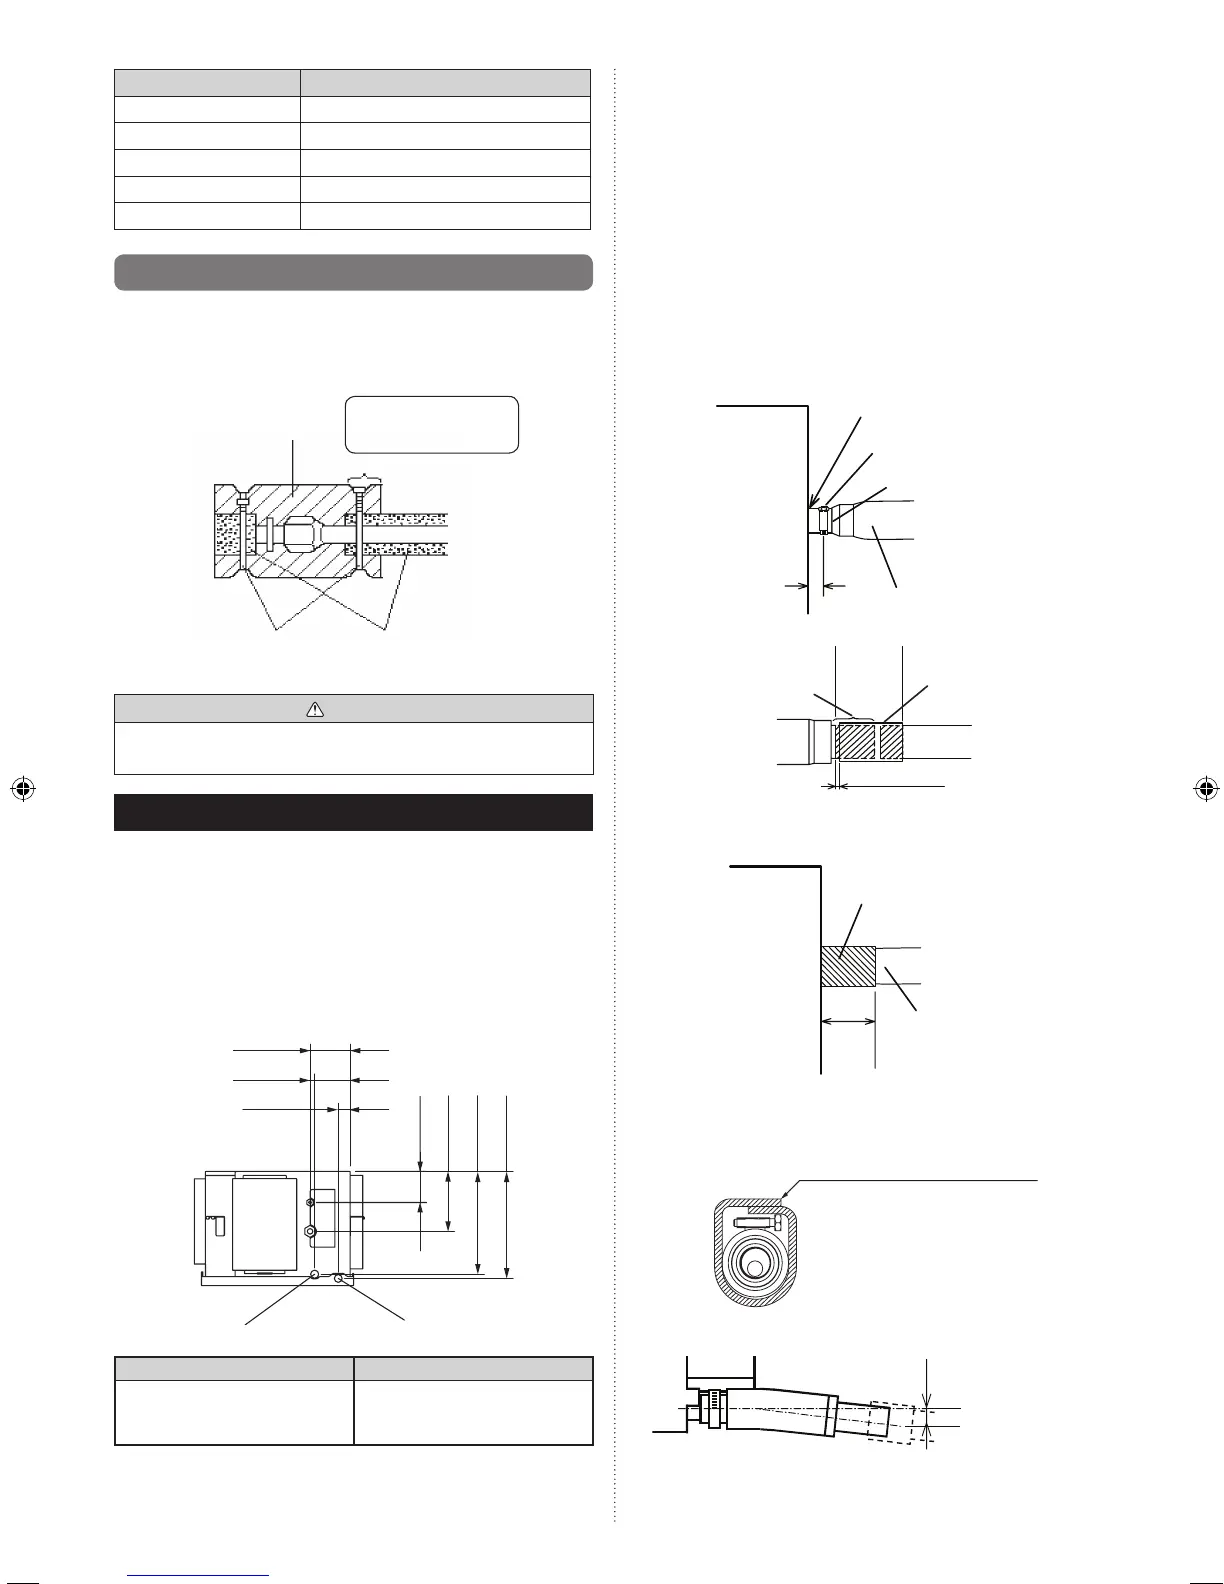
Flare nut [mm (in.)] Tightening torque [N·m (kgf·cm)]
6.35 (1/4) dia. 16 to 18 (160 to 180)
9.52 (3/8) dia. 32 to 42 (320 to 420)
12.70 (1/2) dia. 49 to 61 (490 to 610)
15.88 (5/8) dia. 63 to 75 (630 to 750)
19.05 (3/4) dia. 90 to 110 (900 to 1,100)
4.4. Installing heat insulation
Install the coupler heat insulation after completing the
refrigerant leak check (for details, refer to the Installation
Manual for the outdoor unit).
Coupler heat
insulation
(Accessories)
Binder (Large)
(Accessories)
Heat insulation
Cover this portion with
heat insulation.
CAUTION
•Thereshouldbenogapsbetweentheinsulationandthe
product.
5. INSTALLING DRAIN PIPES
• Usegeneralhardpolyvinylchloridepipe(VP25)and
connect it with adhesive (polyvinyl chloride) so that there is
no leakage.
• Thepositionoftheinstalleddrainpipeshouldhavea
downward gradient of 1/100 or more.
• Topreventthepipefromfreezing,useaheatinsulation
material as needed.
Position of drain piping
108 mm
139 mm
Main drain port
Safety drain port
41 mm
123 mm
208 mm
356 mm
371 mm
O.D.
Drainpipe
•
For main drain port
•
For safety drain port
32 mm (VP25)
• Thisproducthasdrainportsintwolocations.Followthe
procedureintheguretoconnectdrainhoseanddrain
pipes to each of them.
INSTALL THE DRAIN HOSE TO THE MAIN AND
SAFETY DRAIN PORT
Working procedure
(1) Install the attached drain hose to the main and safety
drain port of the body. Install the hose band from the top
ofthehosewithinthegraphicdisplayarea.Securermly
with the hose band.
(2) Use vinyl adhesive agent to glue the drain piping (PVC
pipe VP25) which is prepared on site or piping socket.
(Apply color adhesive agent evenly until the gauge line
and seal)
(3) Check the drainage.
(4) Install the heat insulation.
(5) Use the attached heat insulation to insulate the drain port
and band parts of the body.
Drainhose
(Accessories)
10~15mm
Hose Band
(Accessories)
Soft PVC side
Ensure there is no space
Drainpan
Applying
area of
adhesive
Hard PVC side
Joint pipe
(Field supply)
Drainpipe(VP25)
(Field supply)
4 mm or less
WraptheDrainhoseinsulationaroundthedrainhose
connection.
Drainpan
Drainhose
100mm
Drainhoseinsulation
(Accessories)
Hose opening view
Wind the attached heat insulation
around the hose band. Make sure
the alignment is on top.
AfterinstallingtheDrainhose,checkifthedrainageissmooth.
Downwardgradient
2.5-5.0mm