En-5
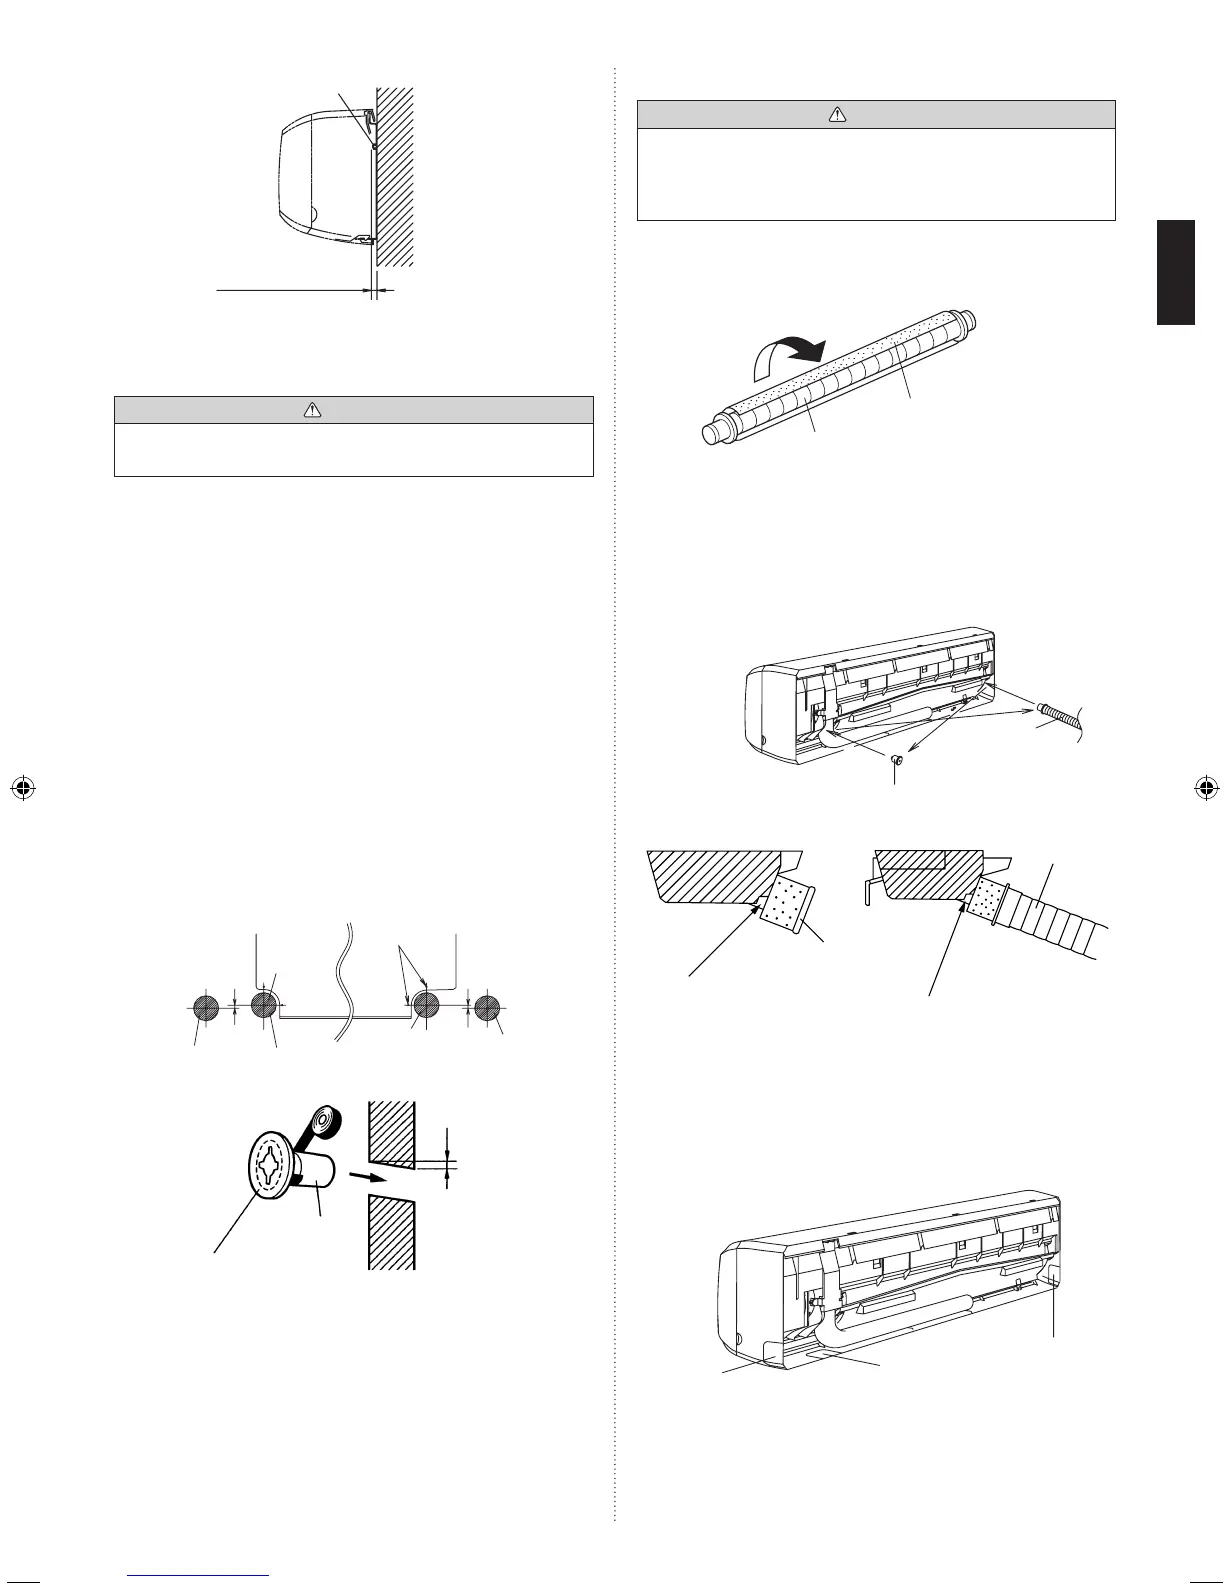
3.3.3. Attach the drain hose
CAUTION
•Insert the drain hose and drain cap into the drain port,
making sure that it comes in contact with the back of
the drain port, and then mount it. If the drain hose is not
connected properly, leaking will occur.
• Wraptheinsulationaroundthedrainhose,makingsurethat
there are no gaps.
• AttachtheInsulation(Drainhose)tothedrainhose.
Drainhose
Insulation(Drainhose)
(Accessories)
[For
1
Rear piping,
2
Right piping and
3
Bottom piping]
• Thedrainhoseanddraincapareusedastheyare.
[For
4
Left rear piping,
5
Left piping and
6
Center
piping]
• Removethedraincapanddrainhose.Mountthedraincap
and drain hose to the drain port on its opposite side.
Left side
Right side
Draincap
Drainhose
Draincap
Drainhose
Insert the drain hose until it butts
against the drain port.
Insert the drain cap until it butts
against the drain port.
3.3.4. Cut-out for piping on front cover
[For
2
Right piping,
3
Bottom piping and
5
Left piping]
• Useametalshearsorothercuttingtooltocutalongthe
groove in the plastic for the piping that will coming out of the
front cover.
For
2
Right piping
For
5
Left piping
For
3
Bottom piping
Bolt
Wall
18mmmax.
3.3.2. Cutting the hole in the wall for the
connecting piping
WARNING
•If the wall pipe is not used, the cable may touch metal
and cause electric leakage.
(1) Cut a 80 mm diameter hole in the wall at the position
shown in Fig. B.
(2) For
1
Rear piping and
4
Left rear piping, cut the hole to
a point of intersection of center marks (Fig. B).
For
2
Right piping and
5
Left piping, cut the hole at least
10 mm below the holes for the rear piping and left rear
pipingforthedrainwatertoowfreely(Fig.B).
For
6
Center piping, cut a hole in the lower, center
section of the wall hook bracket.
(RefertoFig.A.Donotcutaholeoutsideoftheindoor
unit outline.)
(3) Cut the hole so that the outside end is lower (5 to 10 mm)
than the inside end.
(4) Always align the center of the wall hole. If misaligned,
water leakage will occur.
(5) Cut the wall pipe to match the wall thickness, stick it into
the wall cap fasten with vinyl tape, and stick the pipe
through the hole.
Fig. B
(For
2
Right
piping)
Lower
80 mm
dia. hole
Center mark
Lower
10 mm
or more
(For
5
Left
piping)
(For
1
Rear
piping)
(For
4
Left rear
piping)
10 mm
or more
Fasten with
vinyl tape
Wall cap
(Wall pipe)
(Inside) Wall (Outside)
5 to 10 mm
low