En-16
8. FINISHING
Before performing this section, perform a sealing test.
(Refer to the installation Manual for the outdoor unit.)
]1
8.1. Connection pipe, cable and drain hose
Insulate the drain hose, if necessary, to prevent it from
freezing.
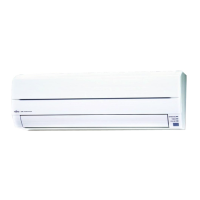
(1) Insulate between pipes.
• For
1
Rear,
2
Right and
3
Bottom piping, overlap the
connection pipe heat insulation and indoor unit pipe heat
insulation and bind them with vinyl tape so that there is no
gap.
• For
4
Left rear,
5
Left and
6
Center piping, butt the
connection pipe heat insulation and indoor unit pipe heat
insulation together and bind them with vinyl tape so that
there is no gap.
(
1
Rear,
2
Right and
3
Bottom piping)
Indoor unit pipe (heat insulation)
Overlap the insulation.
Connection pipe
(heat insulation)
Bind the pipes together
so that there is no gap.
Vinyl tape
(For
4
Left rear,
5
Left and
6
Center piping)
• Wraptheareawhichaccommodatestherearpipinghousing
section with cloth tape.
• Bindtheconnectioncablewithvinyltape.
• Bundlethepipinganddrainhosetogetherbywrapping
themwithclothtapeovertherangewithinwhichtheytinto
the rear piping housing section.
Connection pipe
Indoor unit pipe
Cloth tape
Wrap with cloth tape.
Connection cable (Transmission and Remote control cable)
Connection cable (Power supply cable)
Vinyl tape
Pipe
Pipe
Cloth tape
Drainhose
Wrap with cloth tape
(2) Temporarily fasten the connection cable along the
connection pipe with vinyl tape.
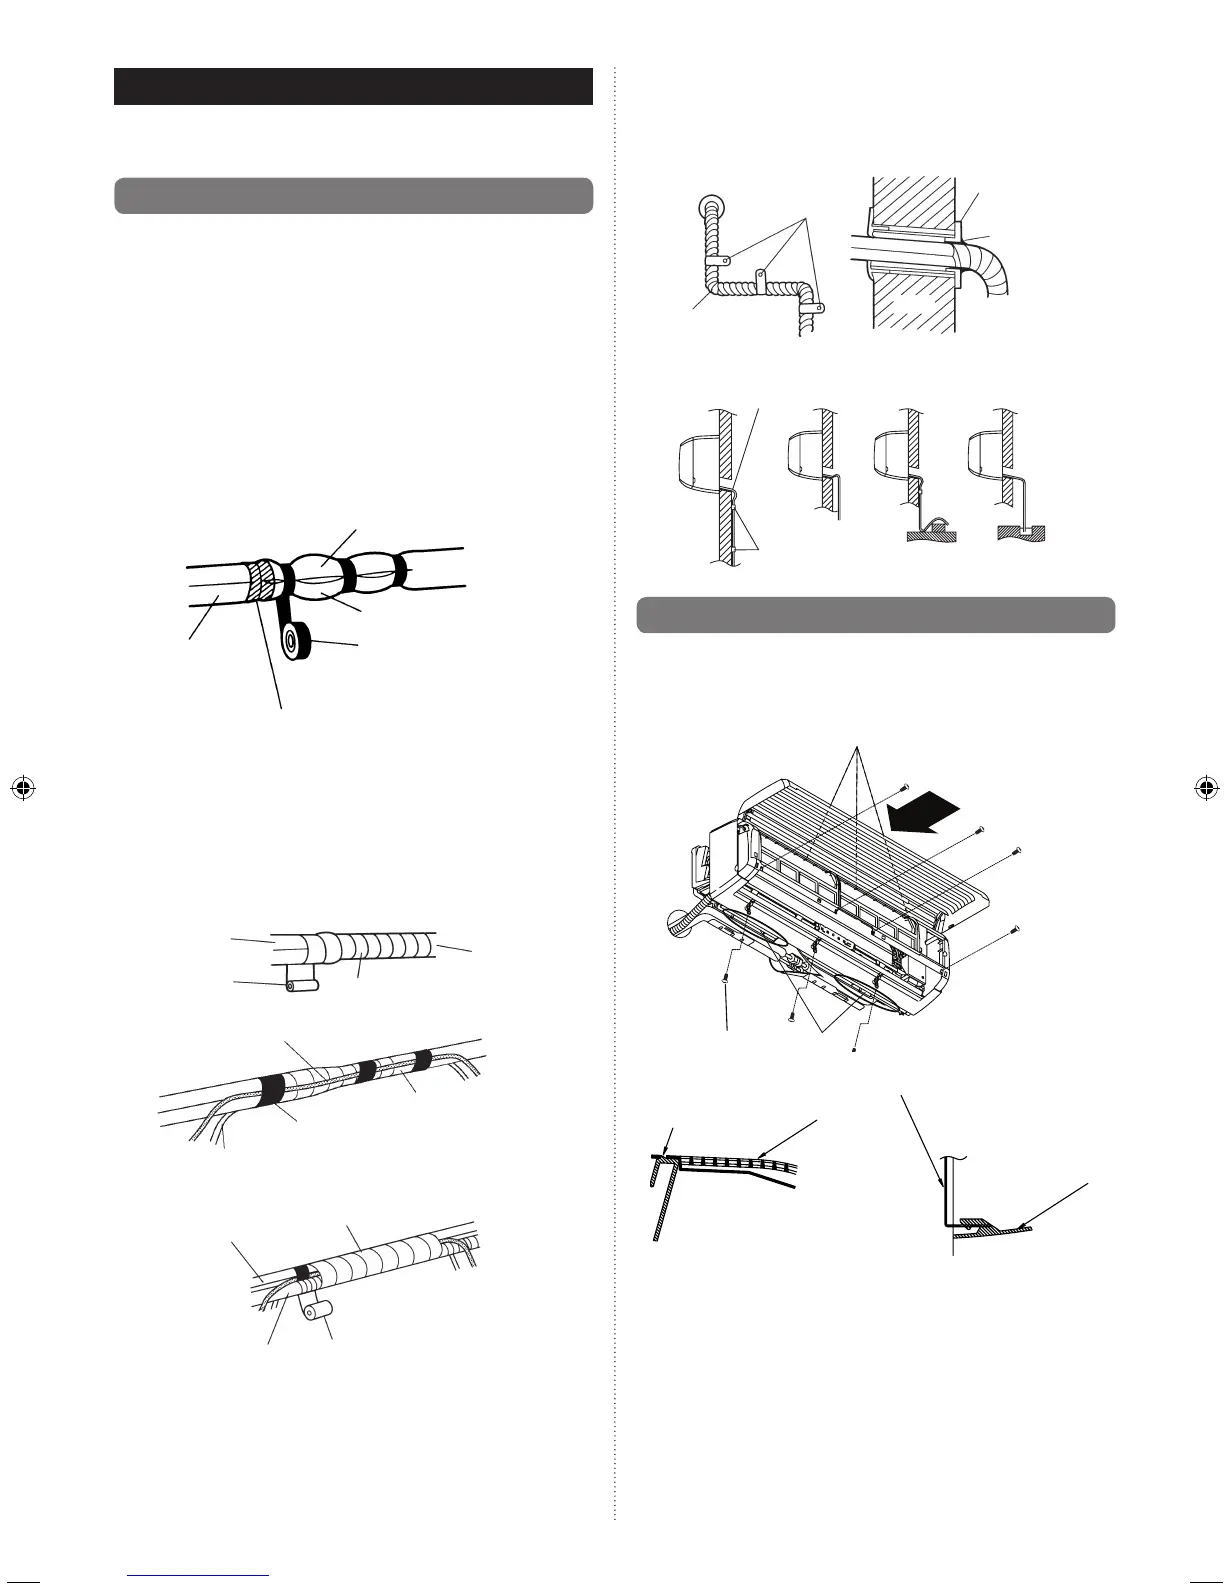
(3) Fasten the connection pipe to the outside wall with a
saddle, etc.
(4) Fill the gap between the outside wall pipe hole and the
pipe with sealer so that rain water and wind cannot blow
in.
(5) Fasten the drain hose to the outside wall, etc.
Saddle
Pipe
Outside wall cap
Wall
(Outdoors)
Sealer putty
OK
Drainhose
Saddle
Lifted up
Wave End in water
NOGOOD NOGOOD NOGOOD
]1
8.2. Installing front cover
(1) Hang the inside panel hook and then mount the panel and
secure it with seven tapping screws.
A
B
Tapping screw
Hook
Panel
Wall hook bracket
Section A detailed view Section B detailed view
Panel
Hook
(2) Secure the cable holder with tapping screw.
 Loading...