2. Notes and Cautions When Using This Product
Notes and Cautions When Starting the ETERNUS AX/AC/HX
Notes and Cautions When Using This Product
15
(2) Make sure that the status LED is green.
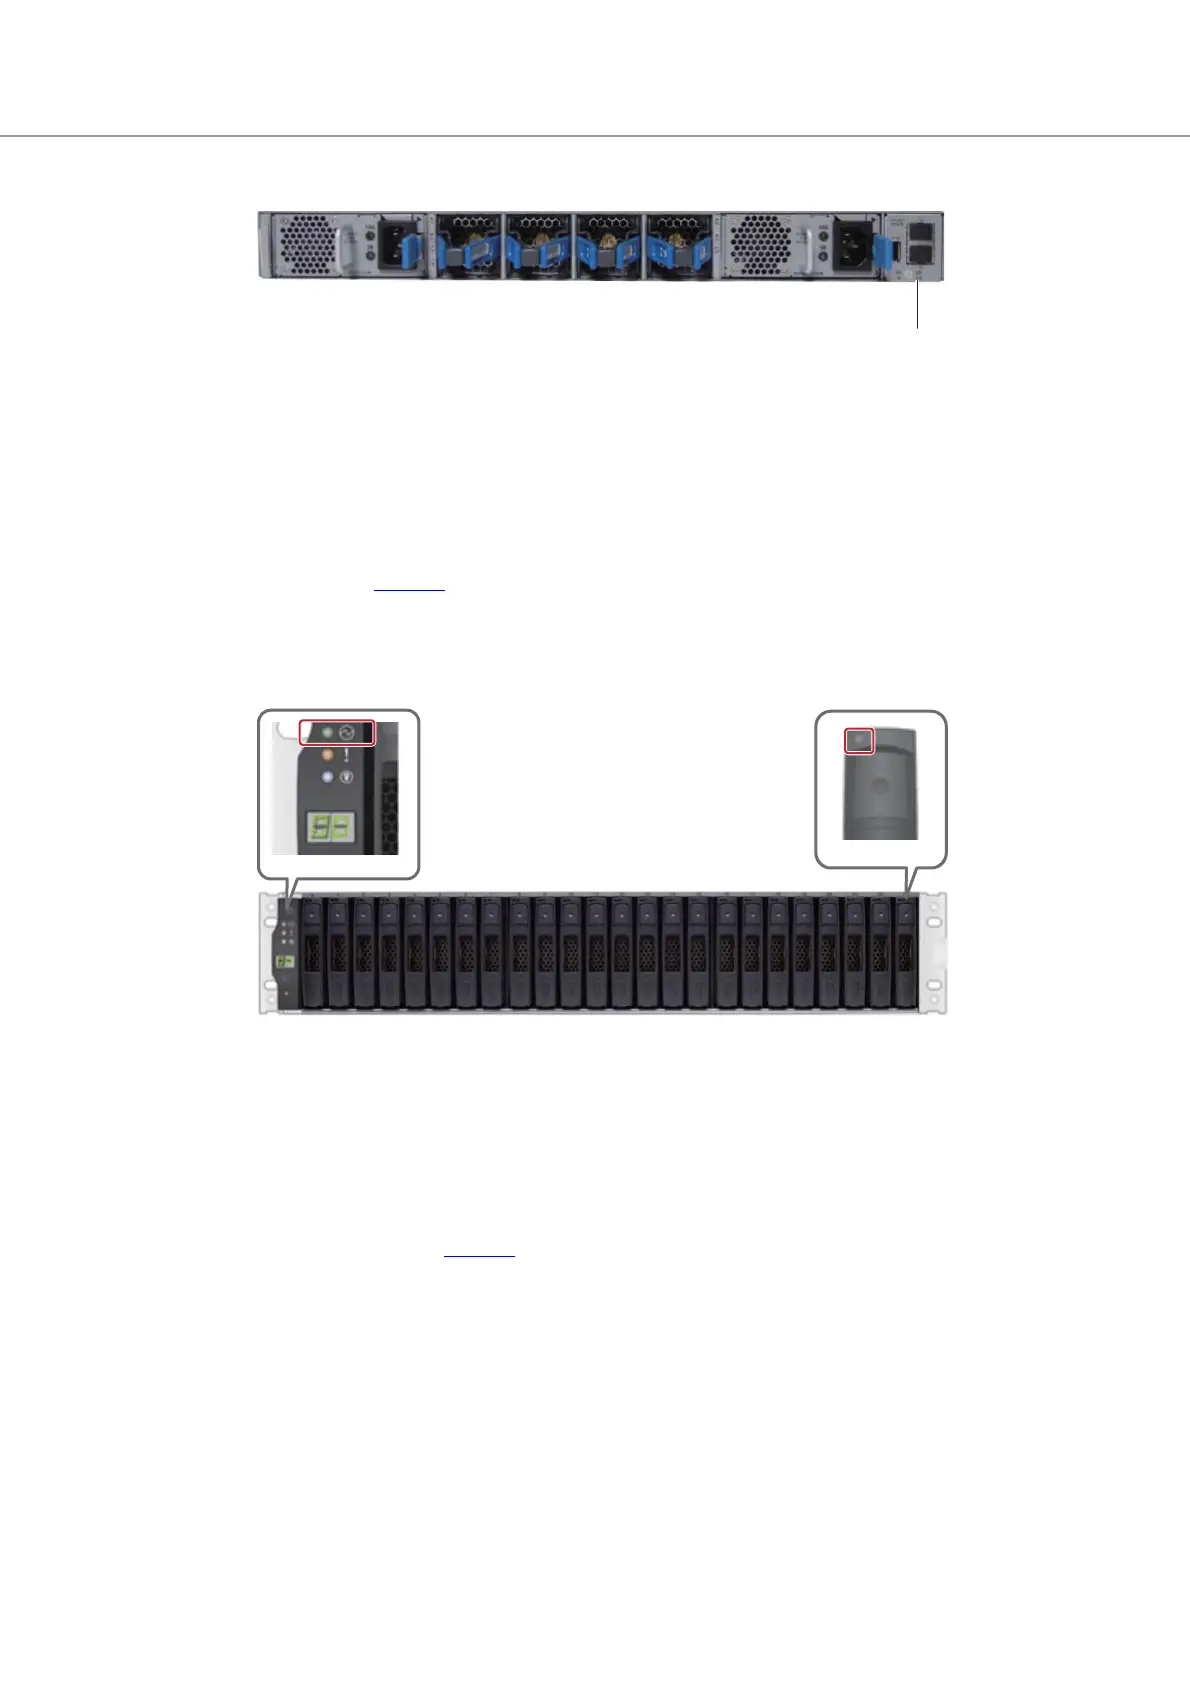
■ Drive Shelf
(1) Turn the AC switch of all the power supply units to the ON position (marked "|").
An AC switch is not installed on the power supply units of the NS224 drive shelves. Con-
nect the power supply units with two power cords.
(2) Turn the breaker of the power supply units connected to the drive shelf to the ON position
(marked "|").
This step is unnecessary if the power distribution unit option is not used. The drive shelf is
turned on in Step (1)
.
(3) Wait approximately two minutes.
(4) Make sure that the Shelf Power LED on the front left of the drive shelf is green.
(5) Make sure that the Activity LED of the installed drives is green.
■ Controller Shelf
(1) Turn the AC switch of all the power supply units to the ON position (marked "|").
An AC switch is not installed on the ETERNUS AX4100 or ETERNUS HX6100 controller shelf.
Connect the power supply units with four power cords.
(2) Turn the breaker of the power supply units connected to the controller shelf to the ON
position (marked "|").
This step is unnecessary if the power distribution unit option is not used. The controller
shelf is turned on in Step (1)
.
(3) Wait approximately three minutes.
Activity LED
Shelf Power LED
 Loading...


