13
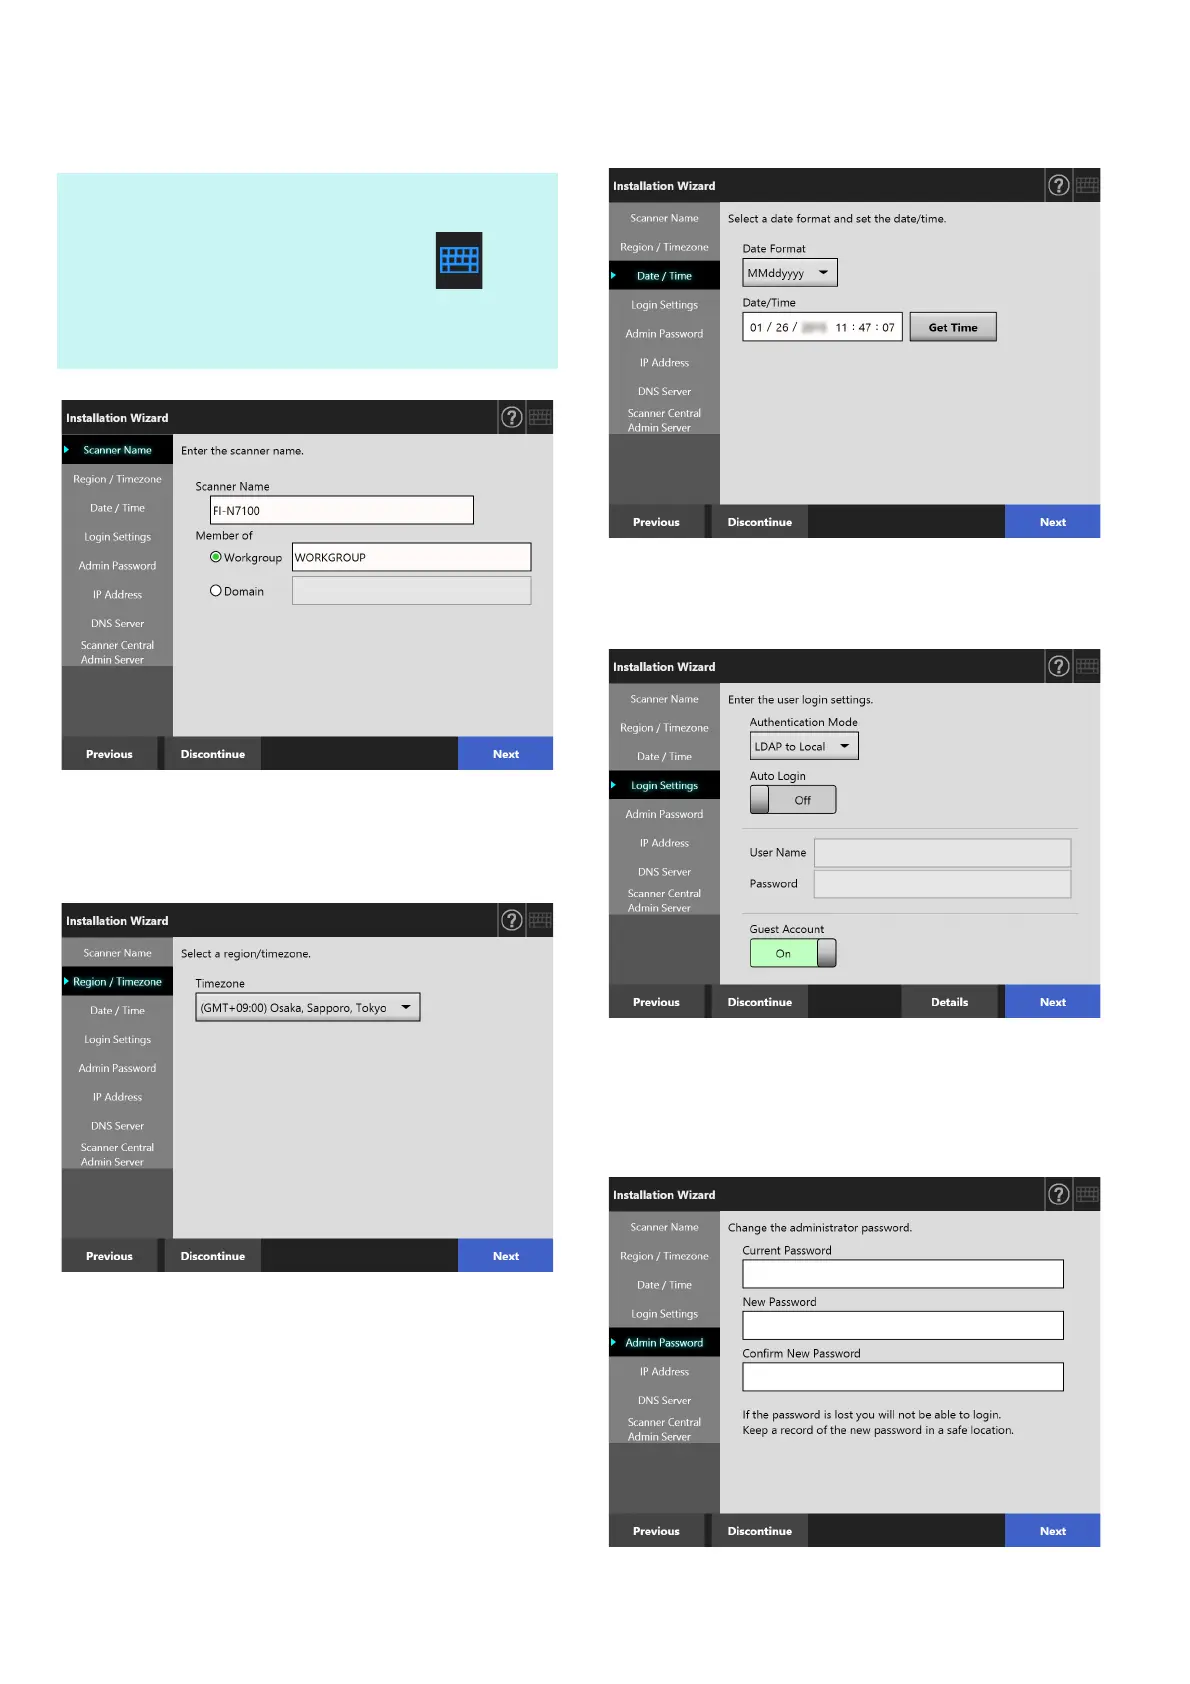
4. Set the scanner name.
On the [Scanner Name] window, specify the scanner
name and workgroup or domain for joining the
network, and press the [Next] button.
5. Set the region/timezone.
On the [Region / Timezone] window, select the
region/timezone and whether to apply daylight
saving time, and press the [Next] button.
6. Set the date and time.
On the [Date / Time] window, specify the date format
and the current date and time, and press the [Next]
button.
7. Specify the login settings.
On the [Login Settings] window, specify the settings
for login, and press the [Next] button.
8. Change the admin password.
On the [Admin Password] window, specify the
administrator password, and press the [Next] button.
The default value for the [Current Password] is
"password".
HINT
Simply touch an input field to show the on-screen
keyboard. After entering characters, press to hide
the on-screen keyboard.
For the on-screen keyboard layout, refer to the
Operator’s Guide.
 Loading...