Do you have a question about the Fujitsu Mobile Color Scanner and is the answer not in the manual?
Provides information on the safe use of the Mobile Color Scanner and how to use the manual.
States compliance with VCCI standards for information technology equipment and potential interference.
Explains that the product is for general use and not intended for mission-critical applications.
Lists product names and their abbreviations used throughout the manual.
Explains the meaning of symbols used within the manual for notes and guidance.
Details items that cannot be legally scanned or reproduced due to copyright or legal restrictions.
Defines the meaning of WARNING and CAUTION signals used in the manual to prevent injury or damage.
Provides examples of warning symbols and their corresponding meanings, indicating caution or prohibition.
Lists safety precautions for installing and moving the scanner to prevent electric shock, fire, or injury.
Details critical warnings to prevent electric shock, fire, or product damage during scanner operation.
Outlines cautions to prevent fire or damage to the scanner or peripheral devices.
Instructions for deleting existing files before reinstalling the scanner driver.
Steps to uninstall the scanner driver from the computer.
Steps to uninstall software bundled with the scanner.
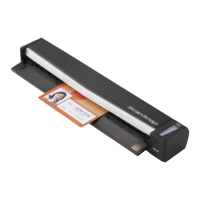
Describes the scanner's compact size and light weight.
Details the scanner's scan resolution capabilities from 100 to 600 dpi.
Explains the image stitching function for scanning large originals.
Illustrates how the scanner handles originals scanned with different orientations.
Describes the automatic resolution adjustment for scanning fine images regardless of speed.
States the scanner's conformance to the TWAIN standard for scanner drivers.
Lists the components included in the packing box for the Mobile Color Scanner.
Identifies and describes the function of parts on the top of the scanner, including scan button and ready lamp.
Identifies and describes the function of parts on the bottom of the scanner, including scan window and rollers.
Instructions for mounting the core to reduce electromagnetic interference.
Covers checking contents, inserting CD, installing driver, connecting scanner, and performing calibration.
Describes options like Readme, Install Software, and Exit on the installation menu.
Instructions to manually start the installer if the main menu does not appear.
Steps before installing, including powering on and inserting the driver CD.
Important note advising not to connect the scanner at this stage of setup.
Clicking through the driver installation wizard, selecting options and proceeding.
Waiting for file copy, exiting the installer, and restarting the computer.
Restarting the computer and connecting the scanner for the first time.
Warning about software without a digital signature during installation.
Starting the calibration process by pressing the scan button.
Placing the scanner on the sheet and moving it between white and black areas.
Clicking OK on the completion screen and troubleshooting tips.
Managing calibration errors by rescanning the sheet as instructed.
Confirmation that the scanner is set up and ready for operation.
Getting the original ready and placing the scanner onto it.
Pressing the scan button to begin scanning.
Moving the scanner during scanning and stopping at the desired point.
The scanned image is automatically saved on the computer.
Explains FUJITSU Launch icon and its menu for managing scanner operations.
Setting how scanned images are saved or processed via FUJITSU Launch.
Configuring save folders, file types, and applications for FUJITSU Launch.
How to exit and restart the FUJITSU Launch application.
Describes the main tab of the scanner driver interface and its various functions.
Explains the Image Adjustment tab for modifying scanned images with various settings.
Details the preview screen and its tools for viewing and manipulating scanned images.
Lists acceptable original conditions and prohibited types of documents for scanning.
Lists supported original sizes and provides guidance on using TWAIN software for scanning.
Proper placement of originals and using the holder for small or delicate items.
Steps for scanning via software and controlling image transfer with a checkbox.
Explains automatic and manual direction settings for scanning and stitching.
Methods for ending scanning, including stopping, cancelling, and automatic termination.
Modifying images on the preview screen and transferring them to software.
Memory needs and preparation for scanning large documents for stitching.
Guidelines for scanning documents to ensure successful stitching, including skew and orientation.
Visual examples of images that can and cannot be stitched.
Specific instructions for scanning photographs for successful stitching.
Choosing the correct stitching mode and specifying image size for large documents.
Setting scan counts, starting scanning, and processing multiple images for stitching.
How to stop stitching and reasons why images might not be stitchable.
Instructions for cleaning the exterior surfaces of the scanner.
Procedures for cleaning internal parts, disconnecting the scanner, and carrying/storing.
Steps to recalibrate the scanner when needed.
Step-by-step instructions for uninstalling the scanner driver.
Guide to uninstalling software programs provided with the scanner.
Verifying the scanner driver installation and connection status.
Using Device Manager to confirm the system recognizes the scanner.
Steps to resolve driver installation issues and procedures for reinstallation.
Explains common error messages like data file errors and scanning errors.
Troubleshooting errors such as scanner in use, I/O errors, and insufficient memory.
Solutions for errors like aborted scans, setting conflicts, missing data, and USB device not found.
Provides understanding of submessages that offer specific error information.
Steps to diagnose and resolve issues when the scanner does not operate correctly.
Navigating to Control Panel and System Properties to check scanner connection.
Checking Device Manager, removing unrecognized devices, and manual setup disk launch.
Solutions for streaks, blurriness, dark images, and software compatibility problems.
Resolving aliasing artifacts and adjusting for non-white margins in scanned images.
Tips for slow scanning and issues when the scanner is unusable after resume.
Details on scanning method, resolution, speed, interface, and original sizes.
Scanner dimensions, weight, input power, and power consumption.
Requirements for operating systems, CPU, memory, and hard disk for the driver.
Specifies optimal conditions for dust, illumination, temperature, and humidity.
Details to gather and provide when contacting Fujitsu for assistance.
Information regarding the scanner's connection type and cable details.
Definitions of important terms like calibration, install, resolution, scanner driver, stitching mode, and TWAIN.




 Loading...