14
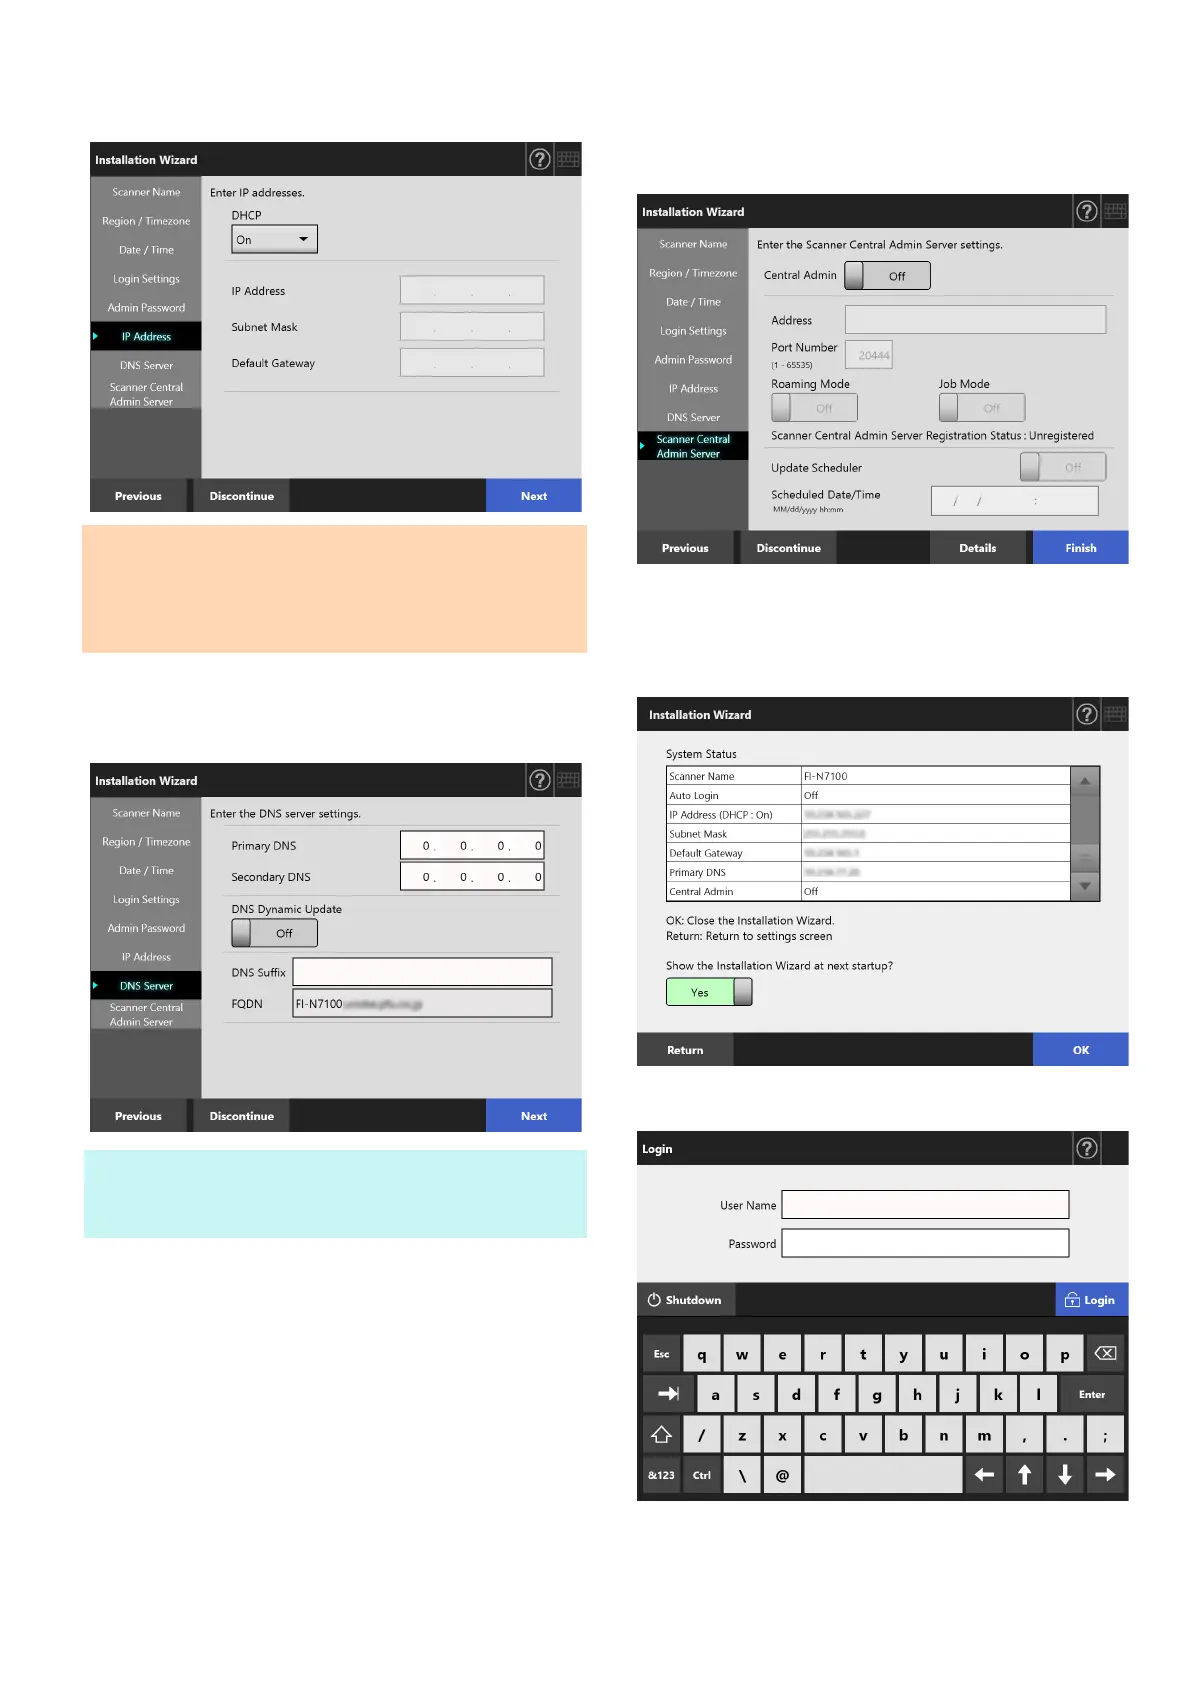
9. Set the scanner's IP address.
On the [IP Address] window, set the scanner's IP
address, and press the [Next] button.
10.Set the DNS server.
On the [DNS Server] window, set the IP address for
the DNS server, and press the [Next] button.
11.Set the Central Admin Server.
On the [Scanner Central Admin Server] window, set
whether to enable the Central Admin Server and the
Central Admin Server settings, and press the [Finish]
button.
12.Confirm the configured settings.
On the settings confirmation window of the
installation wizard, confirm the configured basic
settings, and press the [OK] button.
The installation wizard finishes and the login
window appears.
ATTENTION
When DHCP is not used, do not use an IP address that
already exists in the network.
If you try to set an IP address that already exists, an error
occurs.
HINT
If the scanner is not connected to the network, the FQDN
may not be displayed correctly.
 Loading...