2. WIRING
2-29
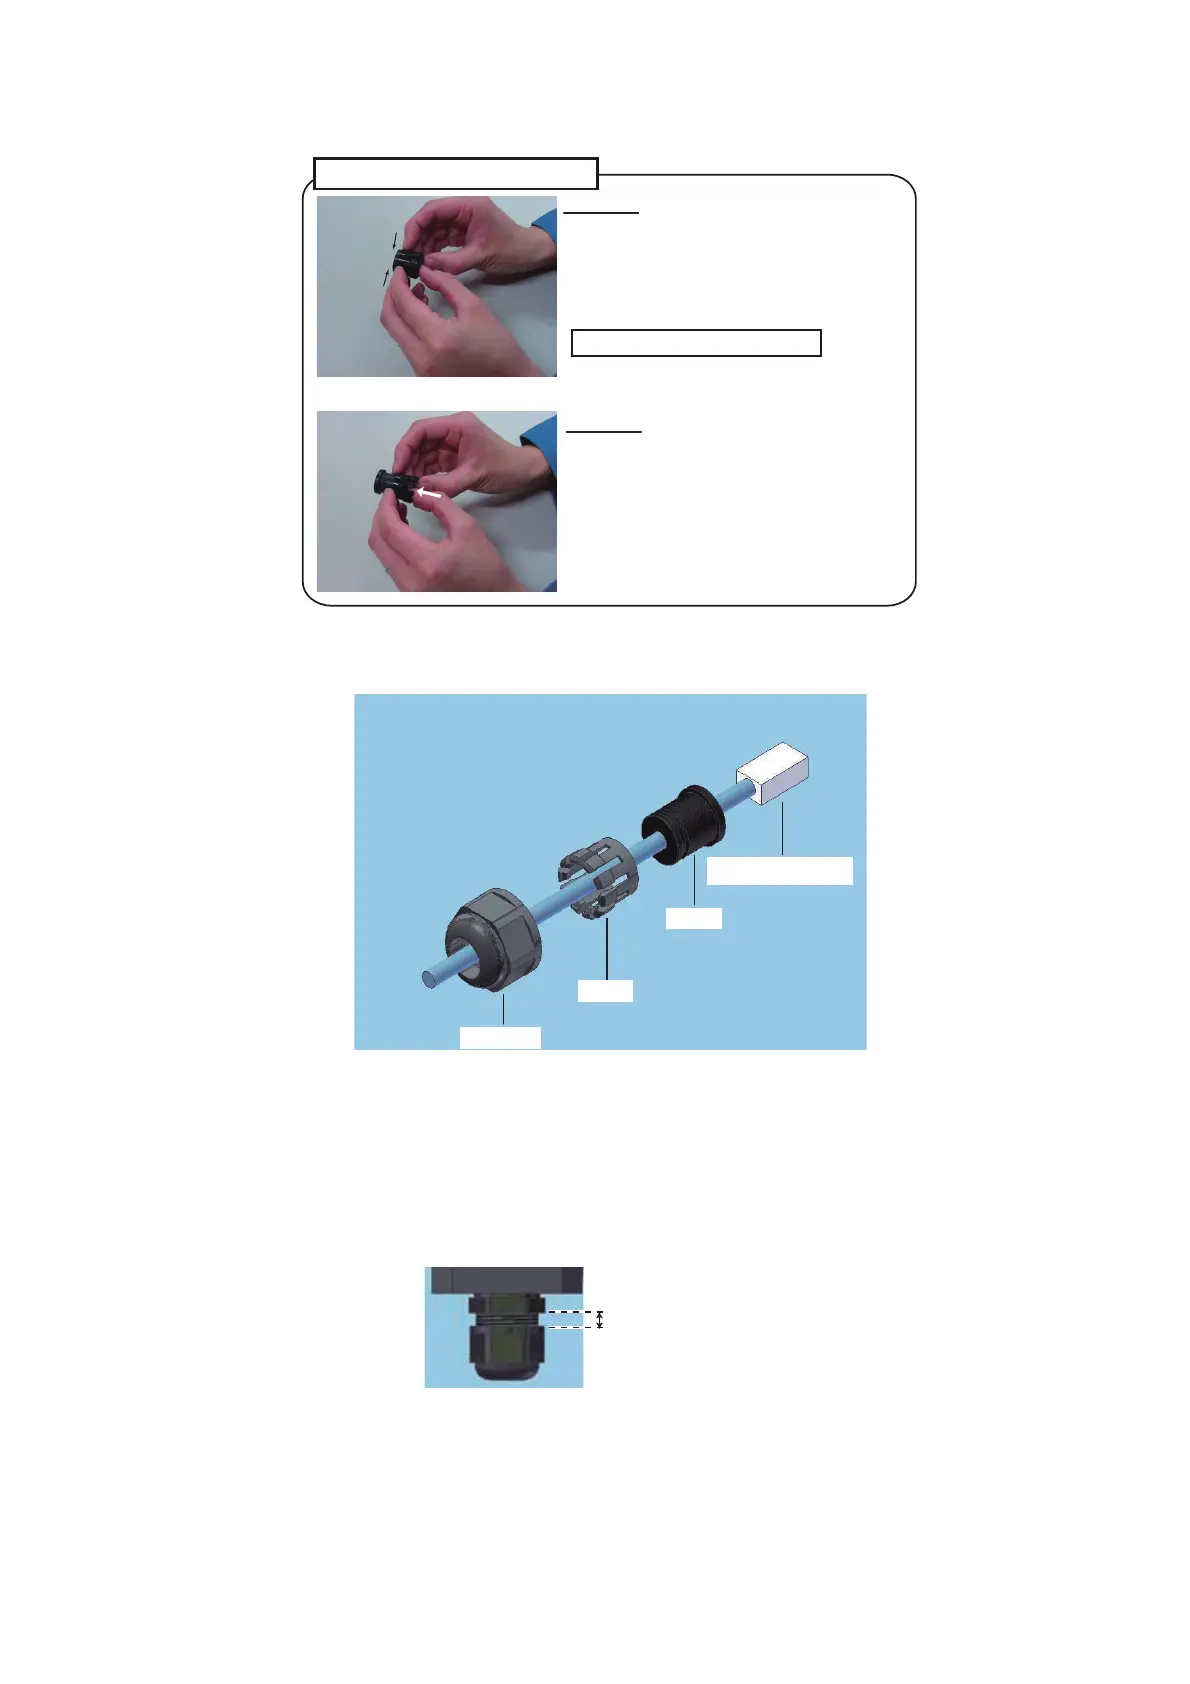
2. Dismantle the seal assembly as shown below.
3. Referring to the figure below, pass the LAN cable through the seal nut, then the
claw and finally the seal.
4. Connect the LAN cable to the connector.
5. Join the claw and seal to form the seal assembly, then firmly join the seal
assembly to the LAN connector.
6. Fasten the seal nut and secure the cable. Continue to fasten the nut until the
space between the two nuts is approximately 3 mm. See the figure below for
reference.
Dismantling the seal assembly
STEP 1:
Hold the fat end of the seal assembly
with both thumbs while placing the
index fingernails between the seal
and the claw.
Use caution to avoid injury.
STEP 2:
Using the thumbs, gently push the
seal out of the claw.
Seal
Claw
Seal nut
LAN connector
Gap between nuts is
approximately 3 mm.