79
11.7 Adjusting Configuration Values
Many parameters for your printer can be changed as needed in the SD card/sys/config.g file. Unlike the F306 and
other 3D printers, you do not need to reflash your firmware to update these parameters.
11.7.1 Changing the Z Probe Offset
The most common parameter you may need to adjust is the probe offset. This value tells your printer how far
away from the bed the tip of the nozzle is when the probe triggers. You might need to adjust this value if:
You remove and reinstall the print head
You install a different print head than the one that shipped on your printer
The probe is shifted (either by accidental contact or on purpose)
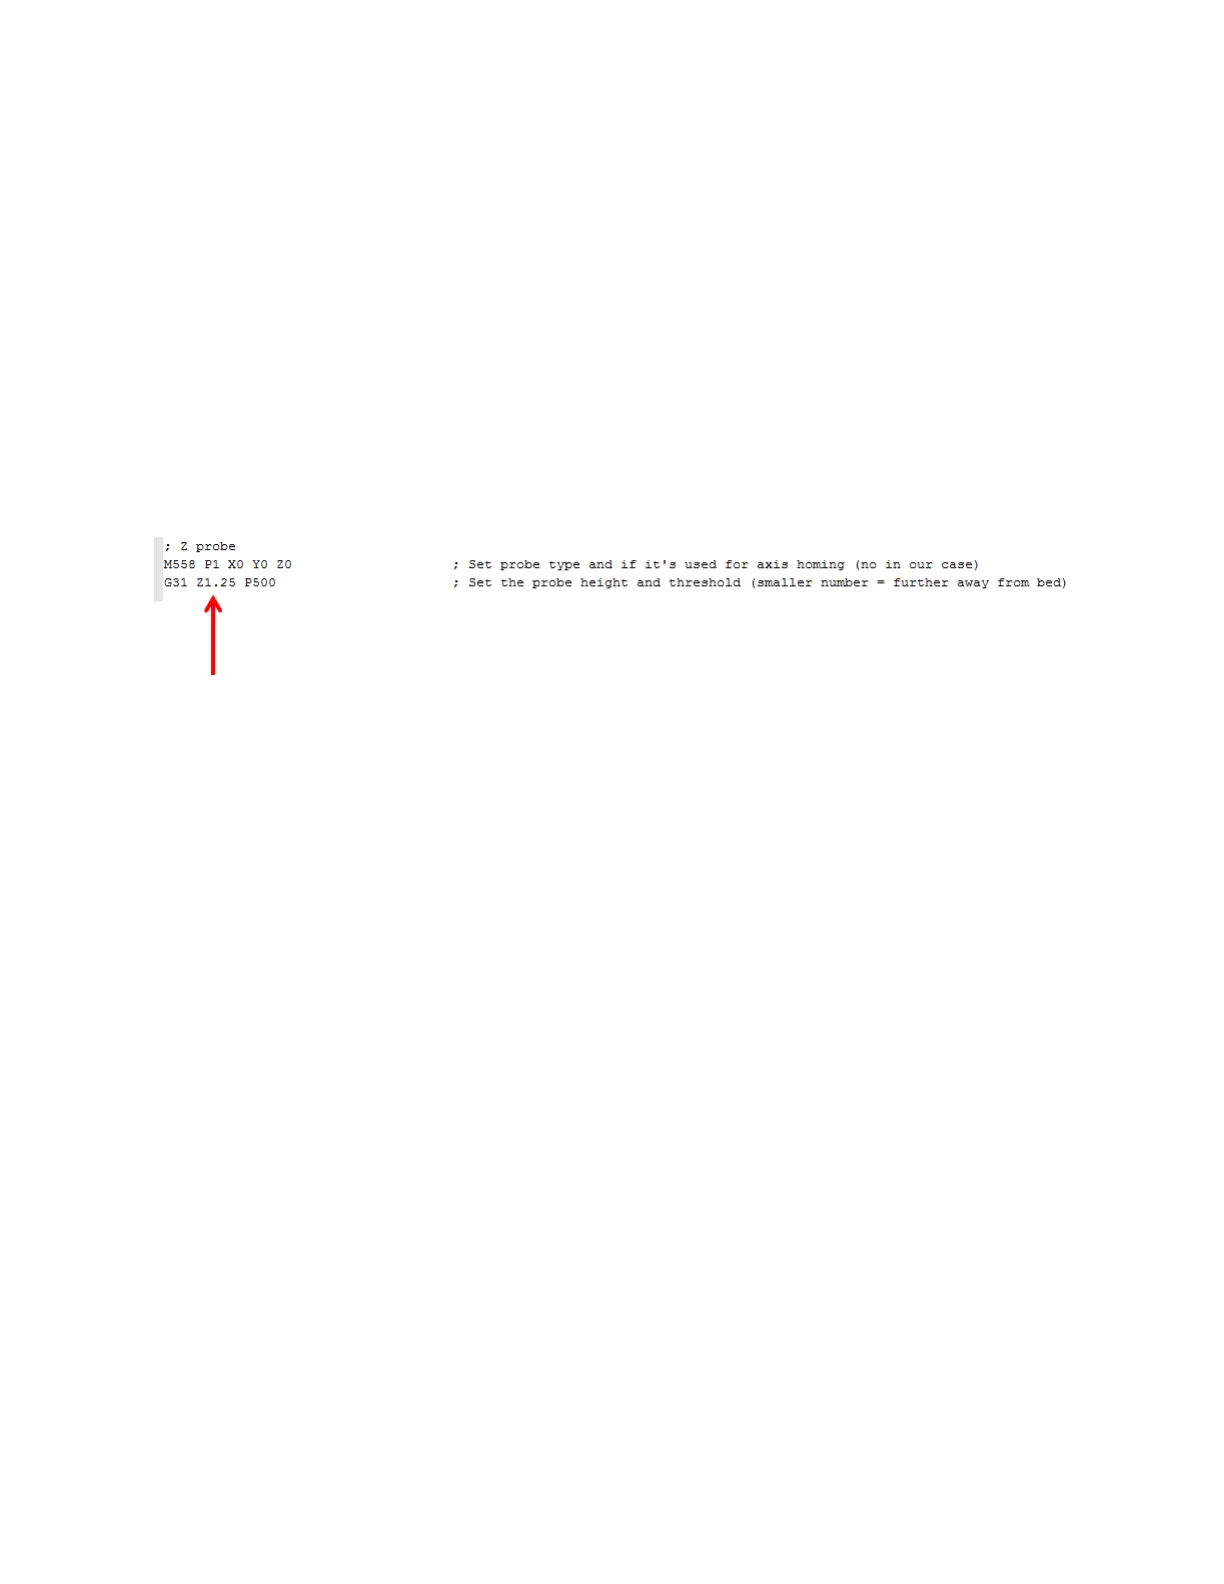
The line you need to adjust is:
The simple way to adjust this value is by observing your first layer height and just bumping it higher or lower in
increments of 0.1mm.
If your first layer is too close, you need to make the value smaller
If your first layer is too far away, the value needs to be larger
11.7.2 Figuring out What Your Offset Should Be
1. On the control panel, click home all axes
2. Go to the console tab and type in "G32" and press enter. The bed probing sequence will run.
3. When it's done, go back to the control tab and move the z axis up 10mm. It's likely you will see a small
gap (1mm or so) between the nozzle and bed. ONLY do the following steps if the nozzle is not touching
the bed.
4. Use the move menu to move the head to approximately the center of the bed.
5. Go back to the console tab and type "G92 Z5" and press enter.
6. Go back to the control tab and jog the Z axis up in 0.05 increments until you see the tip JUST touch the
glass.
7. The z position will show a value slightly less than 5. Subtract this number from 5. You should get a value
in the 0.05 to 0.15 range.
8. Open config.g and ADD this number to the value on the Z probe line. Save config.g and reboot the
printer.
9. Home all axes again, then run G32 again.
10. Jog the head to the center and make sure there is either a tiny gap or the nozzle is just touching the glass.
11.8 Removing & Installing the Print Bed
Loosen the 2 front bed clips completely so that the screws drop out of the clips.