Puma II Users manual 3-1
C
C
C
C
C
h
h
h
a
a
a
p
p
p
t
t
t
e
e
e
r
r
r
3
3
3
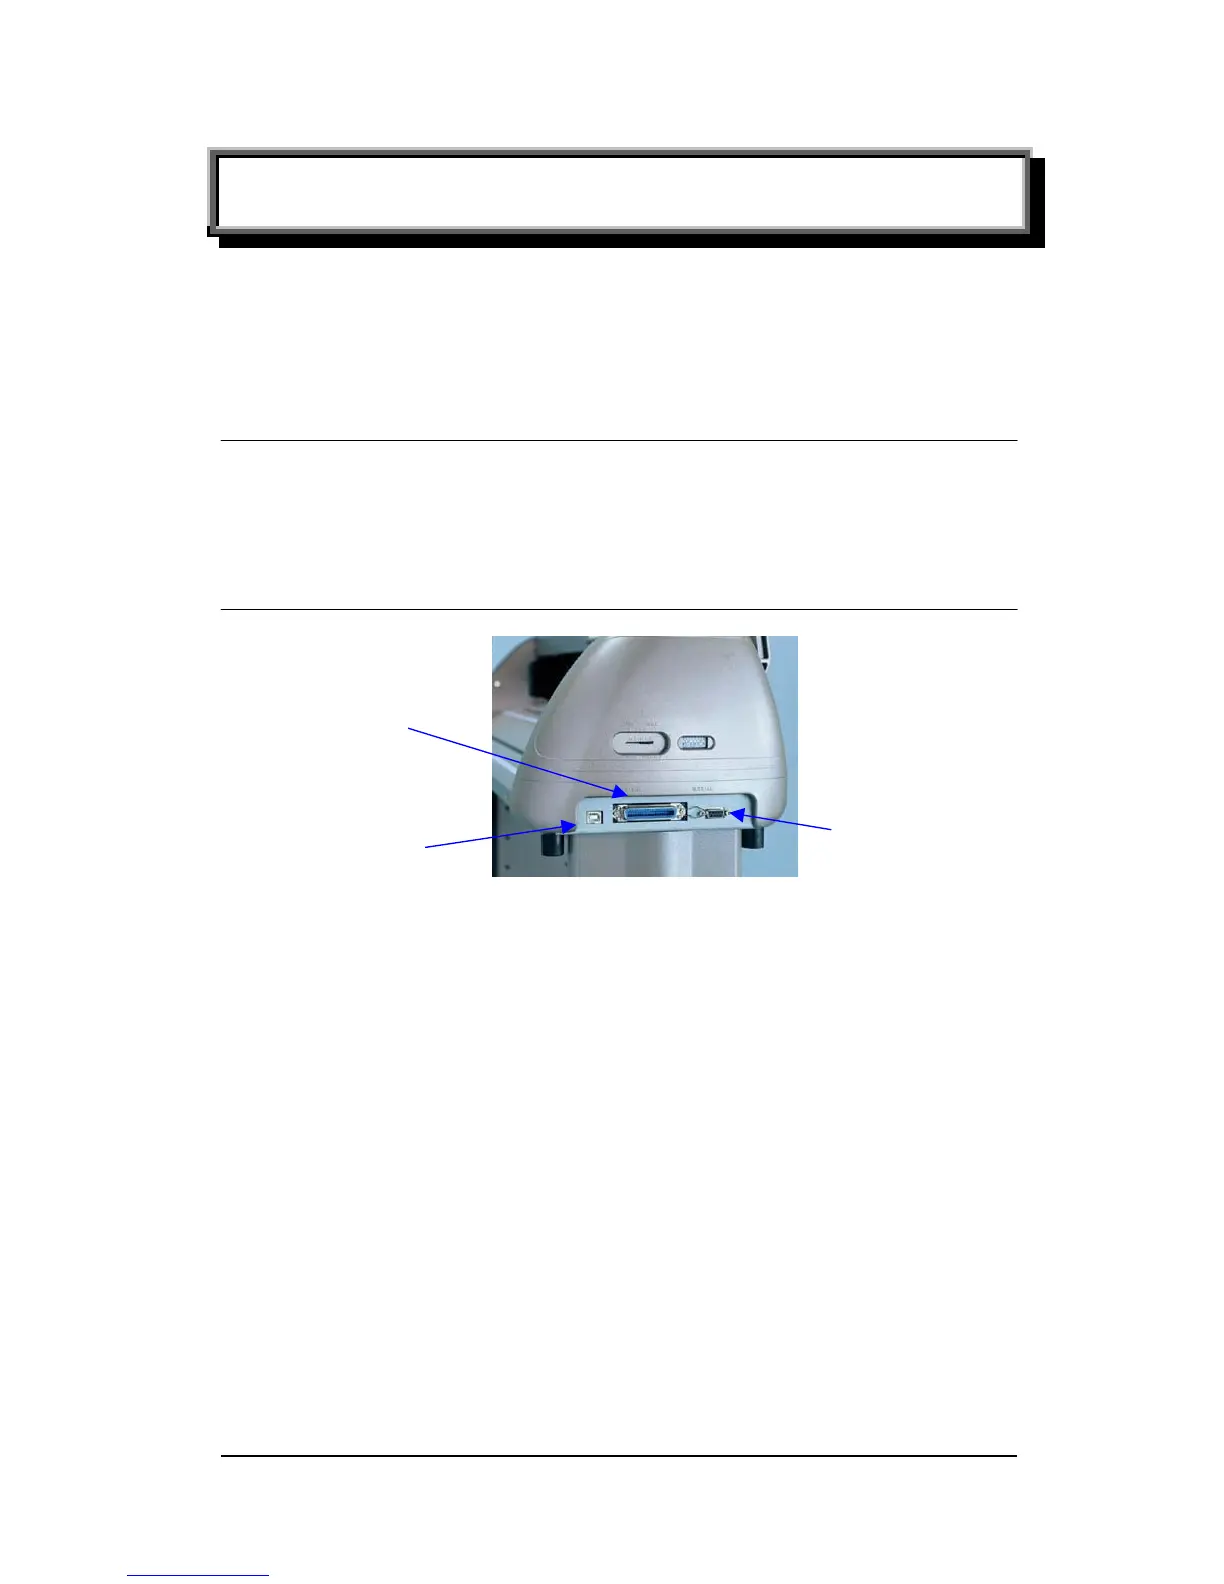
Connecting Cutting Plotters
The cutting plotter communicates with a computer through a USB (Universal Serial
Bus), Parallel port (Centronics) or a Serial port (RS-232C). This chapter shows you
how to connect the cutting plotter to a host computer and how to set up the
computer/cutting plotter interconnection.
!! Notice:
1. When USB connection is enabled, both parallel port and serial port will be disabled
automatically.
2. Please don't plug in USB cable when you install the driver
Parallel Interface
Serial Interface
USB Interface
Figure 3-1
3.1 Universal serial bus
Puma II build-in USB interface are based on the Universal Serial Bus
Specifications Revision 1.1. USB is not available in Windows 95, Windows NT.
3.1.1 USB driver installation
Insert “Installation CD”, and then click on “USB driver” to install USB driver.
3.1.2 Connection
Plug the cable connector into the Puma II’s USB interface connector. Plug the
other end of the cable into the PC’s USB interface connector.
3.1.3 Cutting driver or sign cutting software installation
Install Puma II driver or sign cutting software.