Puma II User’s Guide 2-21
2.14 Cut Test
Before carrying out actual cutting, it is necessary to perform a cutting test to determine
the appropriate cutting force and offset value for your media.
The cutting test should be repeated until you get an appropriate cutting condition.
Once you finish the cutting test, the new origin is also set to the current tool carriage
position.
There are two adjustments you should do when perform cutting test. First one is cutting
force adjustment; the second one is blade-offset adjustment.
Procedures :
1. After sizing the media, press the ON/OFF LINE key to switch to off-line mode.
2. Then use arrow keys to move the tool carriage to the position where you will make
cut test.
3. Press the CUT TEST key to make the cutting test. The CUT TEST LED turns on.
2.14.1 Adjust Cutting Force
First, move the “Pen Force Control Slider” to the min blade force, then increase the
blade force gradually by moving the slider, until an optimum force is obtained to cut
through the media.
When the cutting test is completed, a square cut out appears. If the square can be easily
peel off from the media, the setting of cutting force is appropriate. If not, adjust the tool
force again.
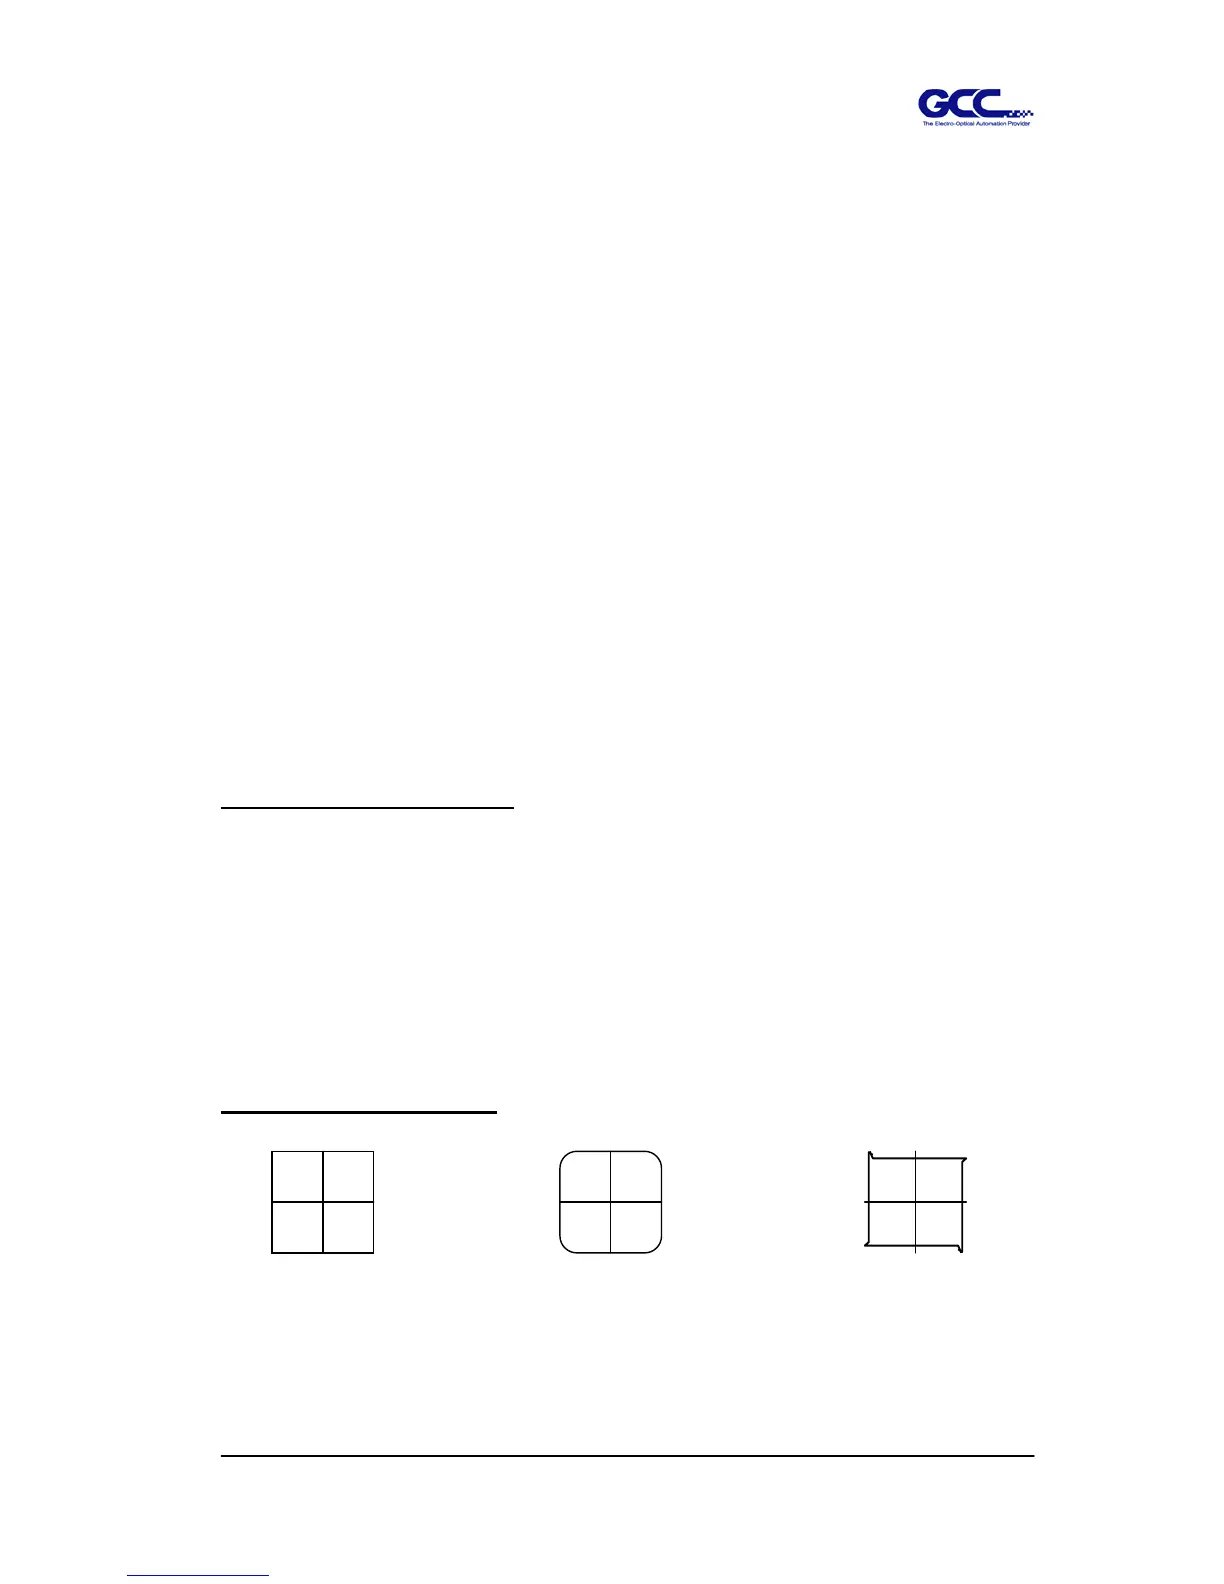
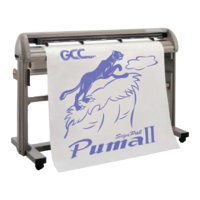
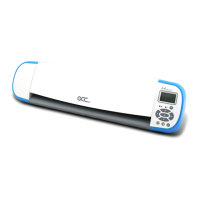
2.14.2 Adjust Offset Value
The square cut out should appear as one of the follow figure:
AA BB CC
Appropriate offset value offset too low offset too high
Or over-speed