– 26 –
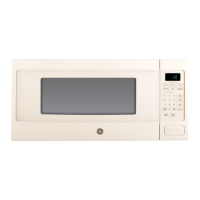
5. Slide the control panel assembly up and
out. Make note of the locations of the 7 wire
connectors, 2 relay connectors, and then
disconnect them.
Control Panel Assembly
The control panel assembly consists of a smart
board, frame, and touch pad assembly.
To remove the control panel assembly:
1. Disconnect power to the microwave oven.
2. Open the oven door.
3. Remove the grille assembly. (See Grille Assembly.)
4. Remove the Phillips-head screw that attaches
the control panel assembly to the oven.
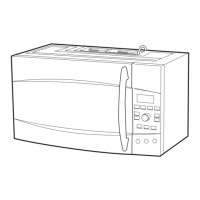
2. Remove the Phillips-head screw from the top of
the oven and the 2 Phillips-head screws from
the rear of the oven.
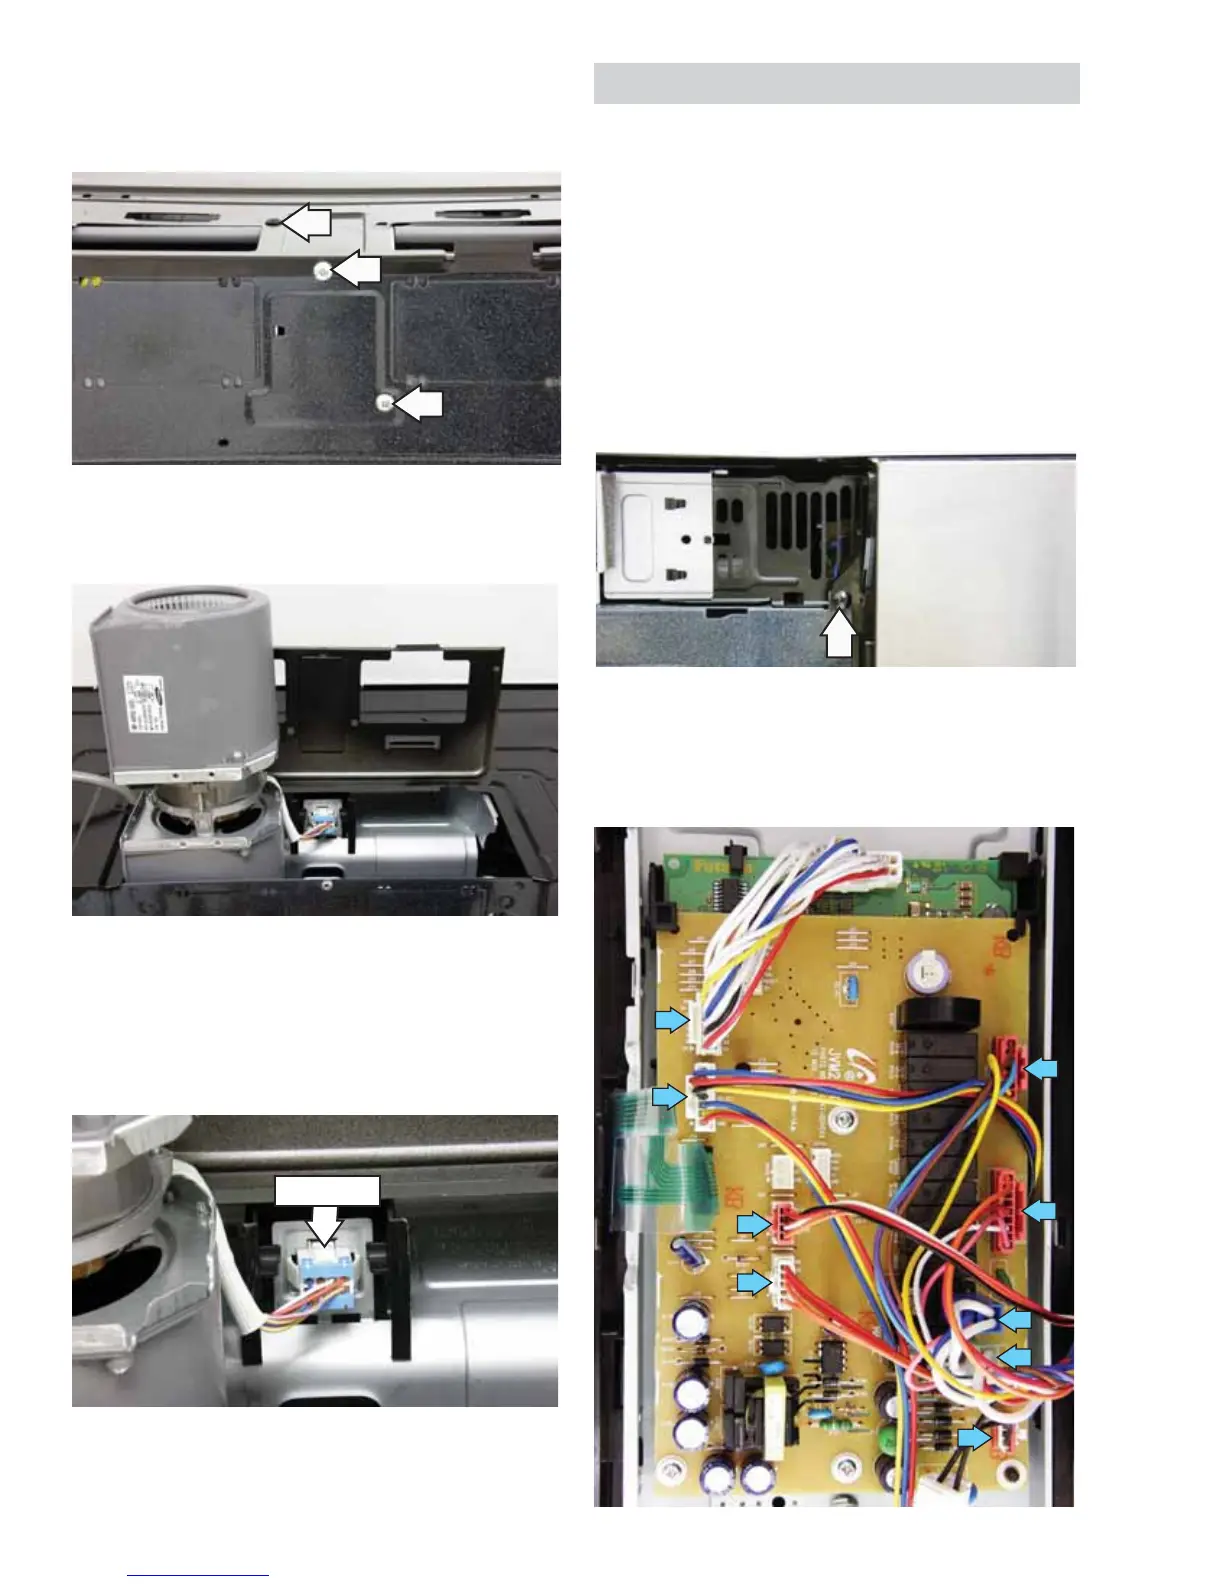
View From Rear
3. Lift the vent blower cover to expose the vent
blower assembly.
4. Lift the vent blower assembly straight up,
rotate it left, and set it on its end inside the
cavity.
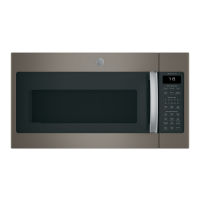
5. Disconnect the vent blower assembly wire
harness.
6. Remove the vent blower assembly.
(Continued next page)
Disconnect