Owner’s Manual for Snow Blower 21
Maintenance
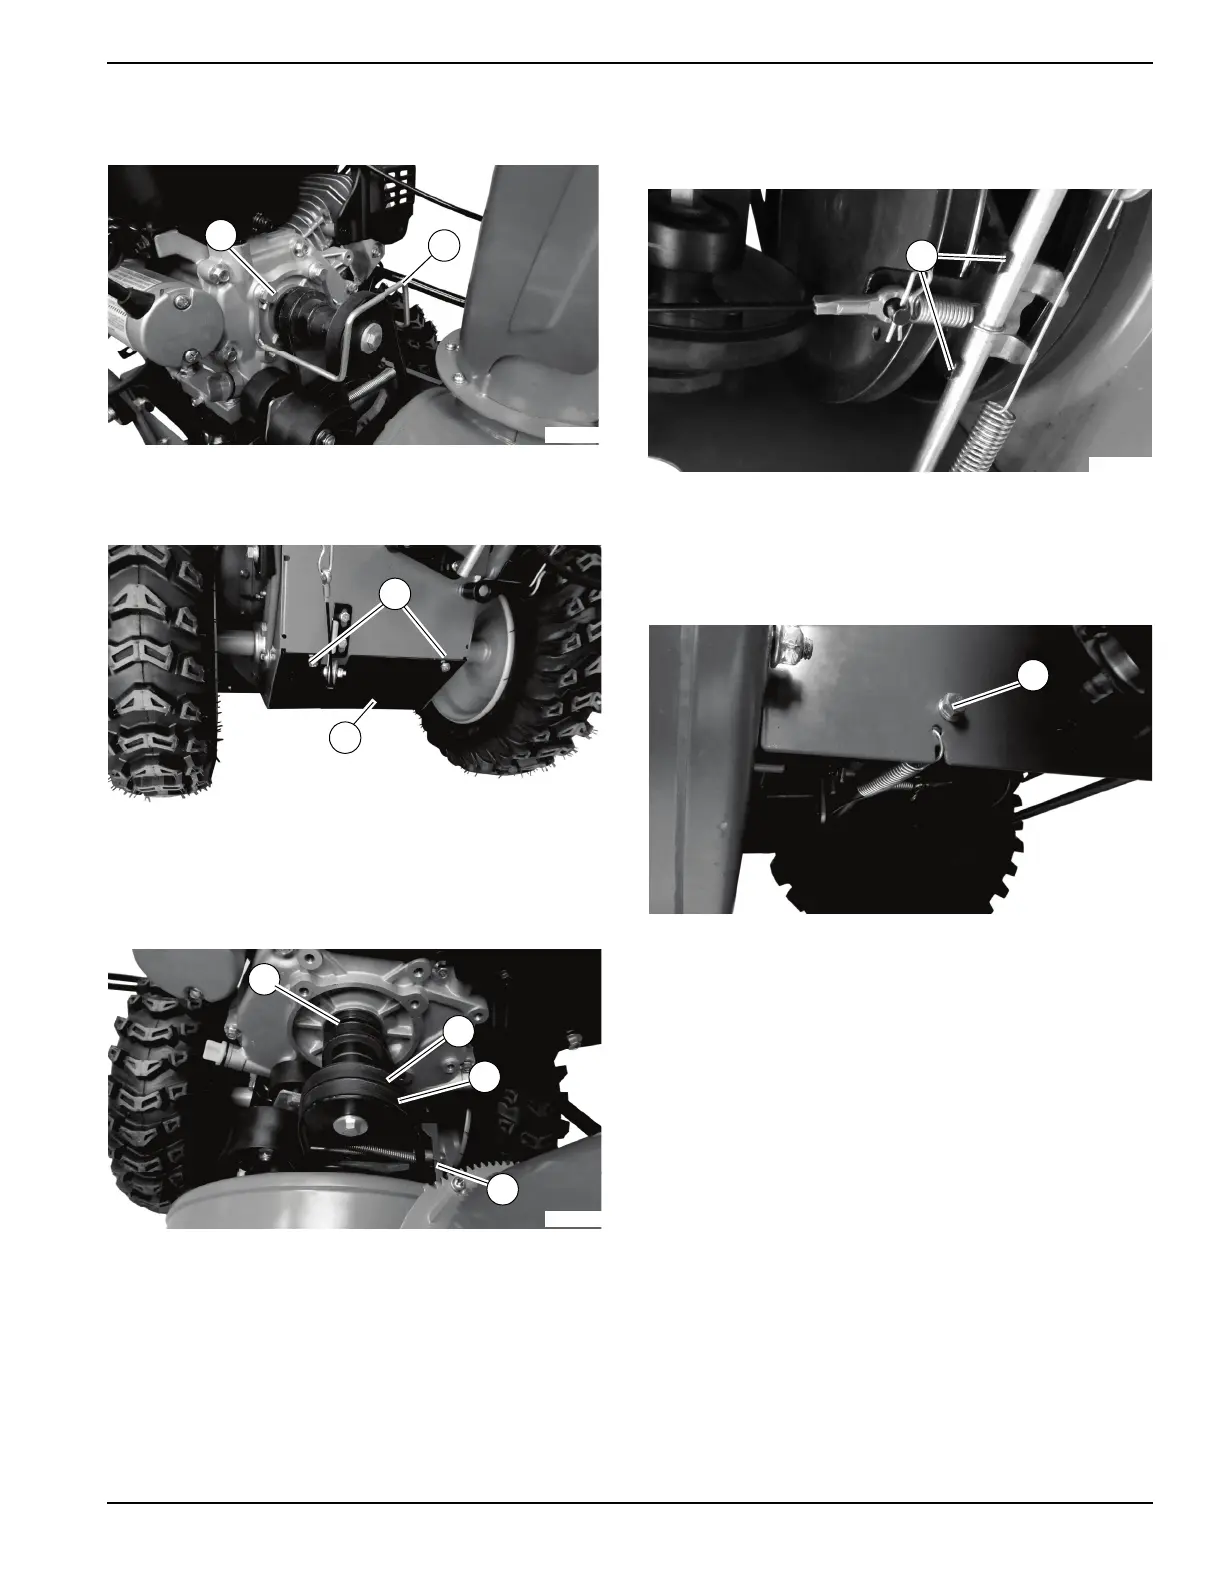
2. See Figure 4-13. Remove two bolts, lock washers,
and flat washers (C) securing belt guide (D) using
a 13
mm wrench. Remove belt guide.
Figure 4-13. Removing Belt Guide
3. See Figure 4-14. Remove the two bolts (E) secur-
ing transmission cover (F) using a 10mm wrench.
Figure 4-14. Transmission Cover Bolt Locations
4. See Figure 4-15. Roll front auger belt (G) off front
of engine drive pulley (H) and rear auger belt (I) off
th
e back of engine drive pulley.
Figure 4-15. Engine Pulleys
NOTE: A
13mm wrench may be used on the engine
shaft bolt and turned clockwise to aid in rolling belts off
the pulley.
5. Re
move traction drive spring (I) from the frame
using pliers.
6. Rem
ove traction drive belt (J) from engine pulley
and let it rest in front of the pulley.
7. See Figure 4-16. Observe how end tabs (K) of the
friction disc bracket are located on both sides of
the
front strut. It must be installed this way when
reassembled.
Figure 4-16. End Tabs of Friction Disc Bracket
8. See Figure 4-17. Remove bolts, lock washers, and
flat washers (L) securing fr
ont strut to frame. The
friction disc bracket will now move out of the way
for belt removal.
Figure 4-17. Removing Front Strut Hardware
9. Remo
ve traction drive belt from drive pulley and
pull it up so it can be removed from the pulleys on
the engine shaft.
10. Insta
ll new traction drive belt onto pulleys.
11. Secure front strut to frame w
ith bolts, lock washers,
and flat washers.
12. V
erify friction disc bracket end tabs are on both
sides of the strut.
13. Insta
ll traction drive spring to the frame.
14. Insta
ll front and rear auger belts onto the pulleys.
15. Inst
all transmission cover.
16. Insta
ll belt guide and belt cover.
 Loading...