Administrator Mode
4
[Date & Time on GV-IPCAM] Displays the current date and time on the camera.
[Time Zone] Sets the time zone for local settings. Select Enable Daylight Saving Time to
automatically adjust the camera for daylight saving time. Type the Start Time and End Time to
enable the daylight saving function.
[Synchronized with a Network Time Server] By default, the camera uses the timeserver of
time.windows.com
to automatically update its internal clock every 24 hours. You can change
the host name or IP setting to the timeserver of interest. To change the time of automatic
update, use the drop-down lists to specify the time.
[Synchronized with your computer or modify manually] Manually changes the camera
date and time or synchronize its date and time with those of the local computer.
[Date and time overlay setting] Select the display format of date and time stamps on the
image. For this function to work, you must also enable the Overlaid with date stamps and
Overlaid with time stamps options in Figure 4-2B.
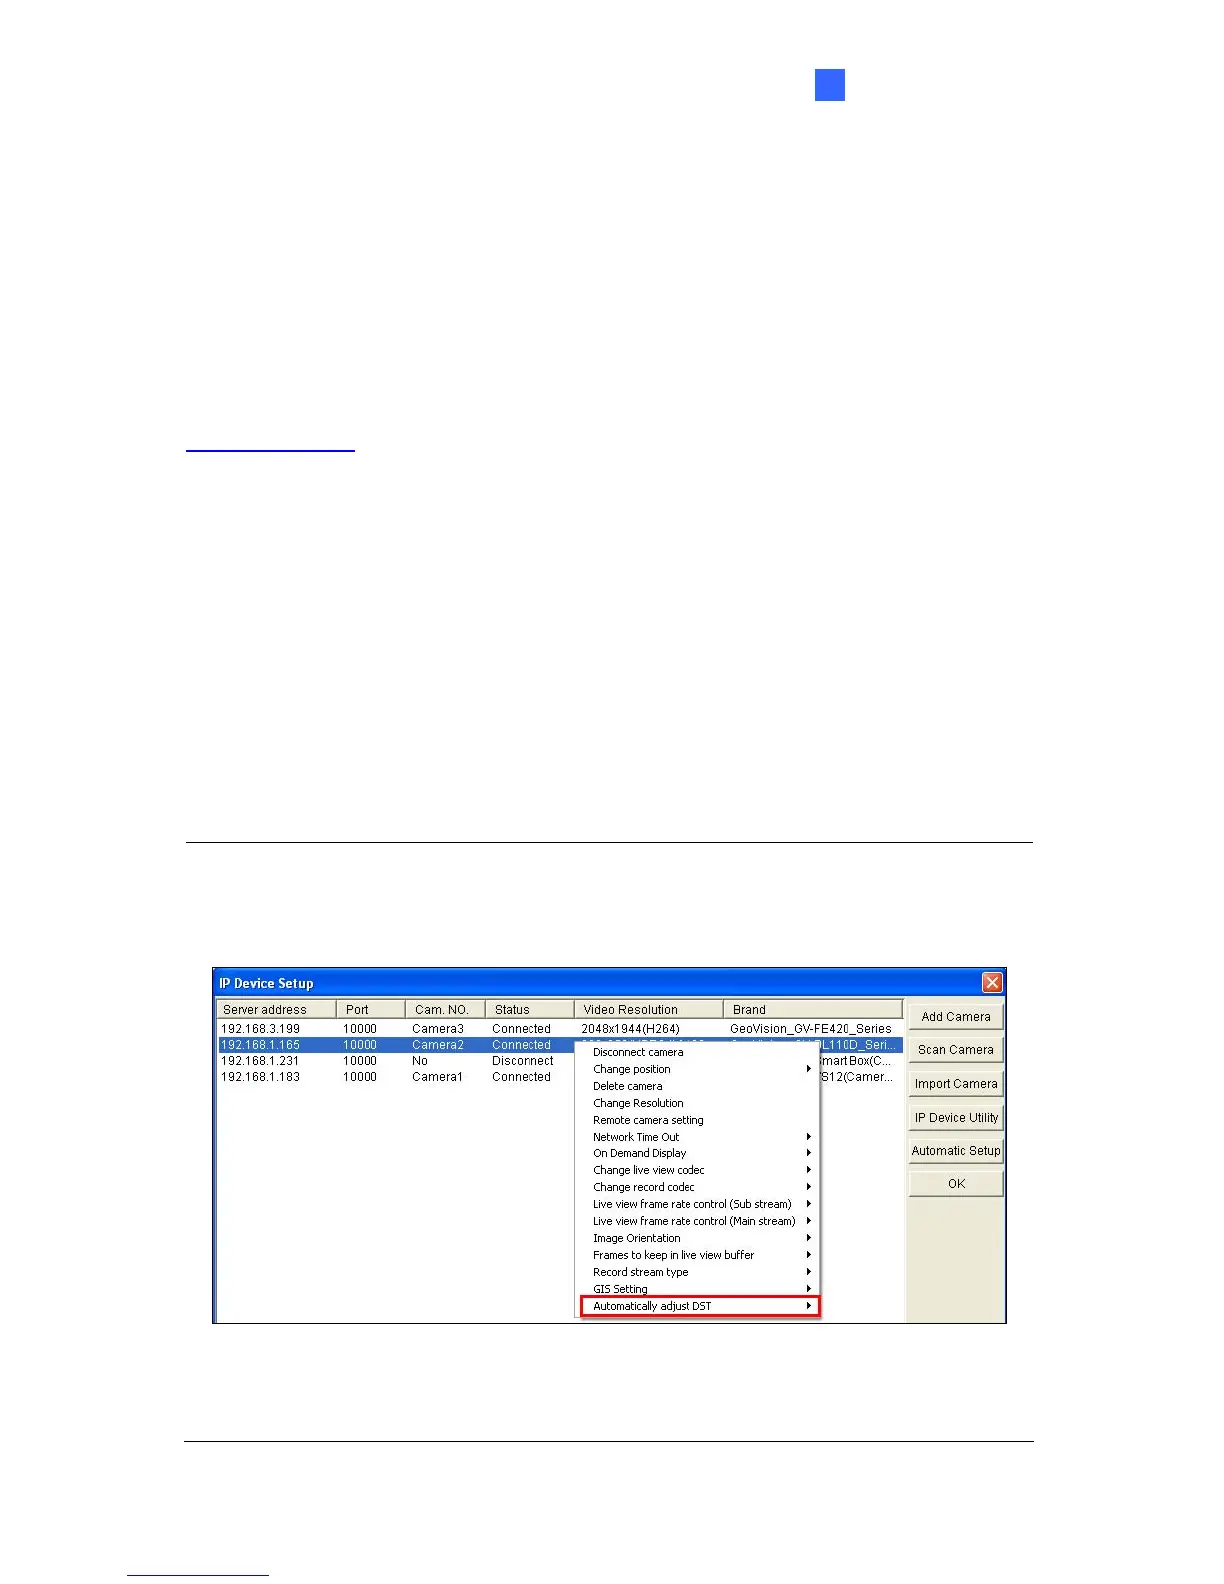
Note: When connecting to GV-System (V8.5.7.0 or later), the Daylight Saving Time of the
camera can be synchronized automatically with that of GV-System by enabling
Automatically adjust DST (Configure button < Camera Install < IP Camera Install).
Figure 4-37
GV-System: Configure button > Camera Install > IP Camera Install
GV-VMS: Toolbar > Configure > Camera Install > Setup button > General Setting
141
 Loading...