2
1
min. 5 mm
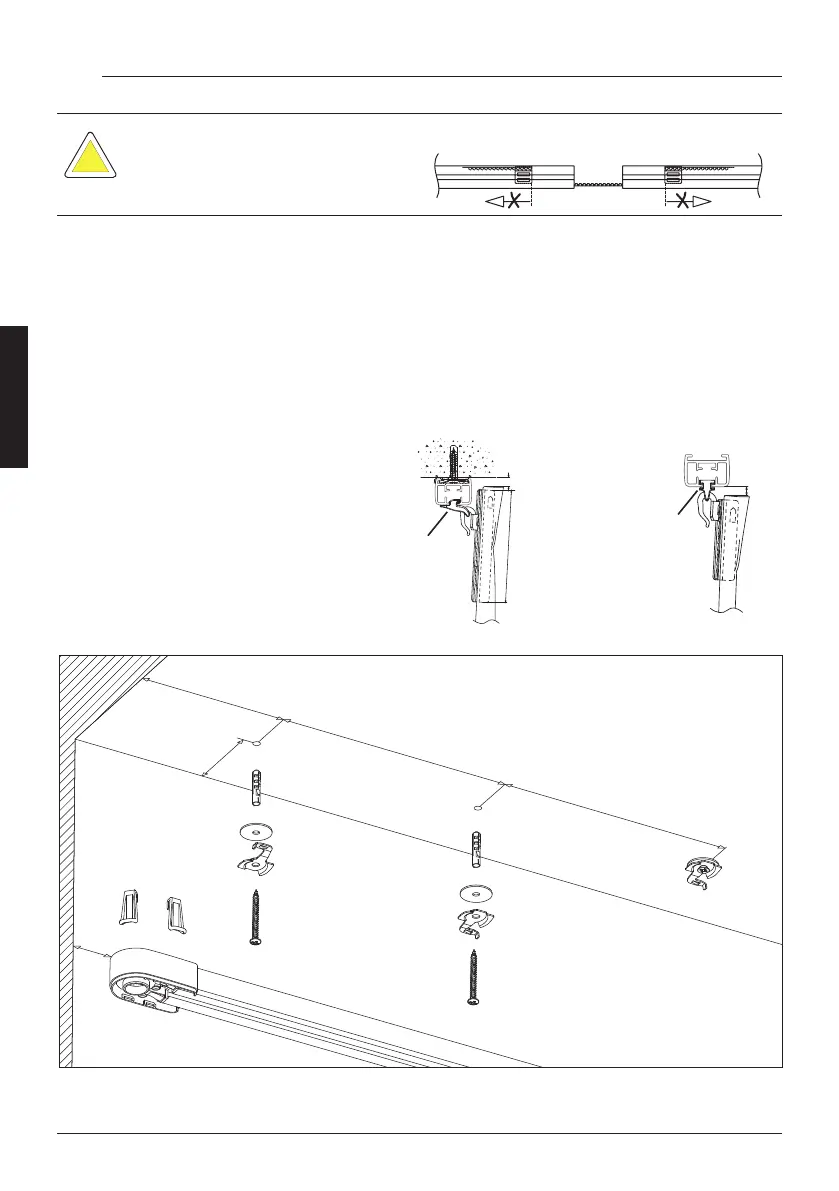
!
11 cm
60-80 cm
min. 3,5 cm
60-80 cm
min. 1 cm
min. 5 mm
min. 95 mm
4007
4010
4014
4020
4030
6009
6010
Fixing
English
Attention - If the system is supplied split e.g. for transportation - do not move the elements
sideways as indicated
See chapter B1 for re-assembly.
1.2 Fixing guidelines
General xing steps:
- Place ceiling- or wall brackets (p. 2 - 4)
- Place pulley hooks on the pulleys
- Mount rail and place motor unit (p. 5).
A clearance of at least 1 cm is re-
quired between the pulley and the end
wall, at the side of the motor unit.
When planning the rail position and
the curtain pleating, please consider:
An operating clearance should be
maintained between curtain and:
ceiling, rail, oor nish, wall and pos-
sible coving.
The pulley hooks should be inserted before mounting the rail.
Example with clamps 6050:
Glider types and clearance: