Setup
3A8099A 13
Spray Tip and Air Cap Setup
See Reverse-A-Clean® (RAC) Setup, page 14 to
complete RAC spray gun setup.
1. Follow the Pressure Relief Procedure, page 15.
2. Engage the trigger lock (3). See F
IG. 12, page 15.
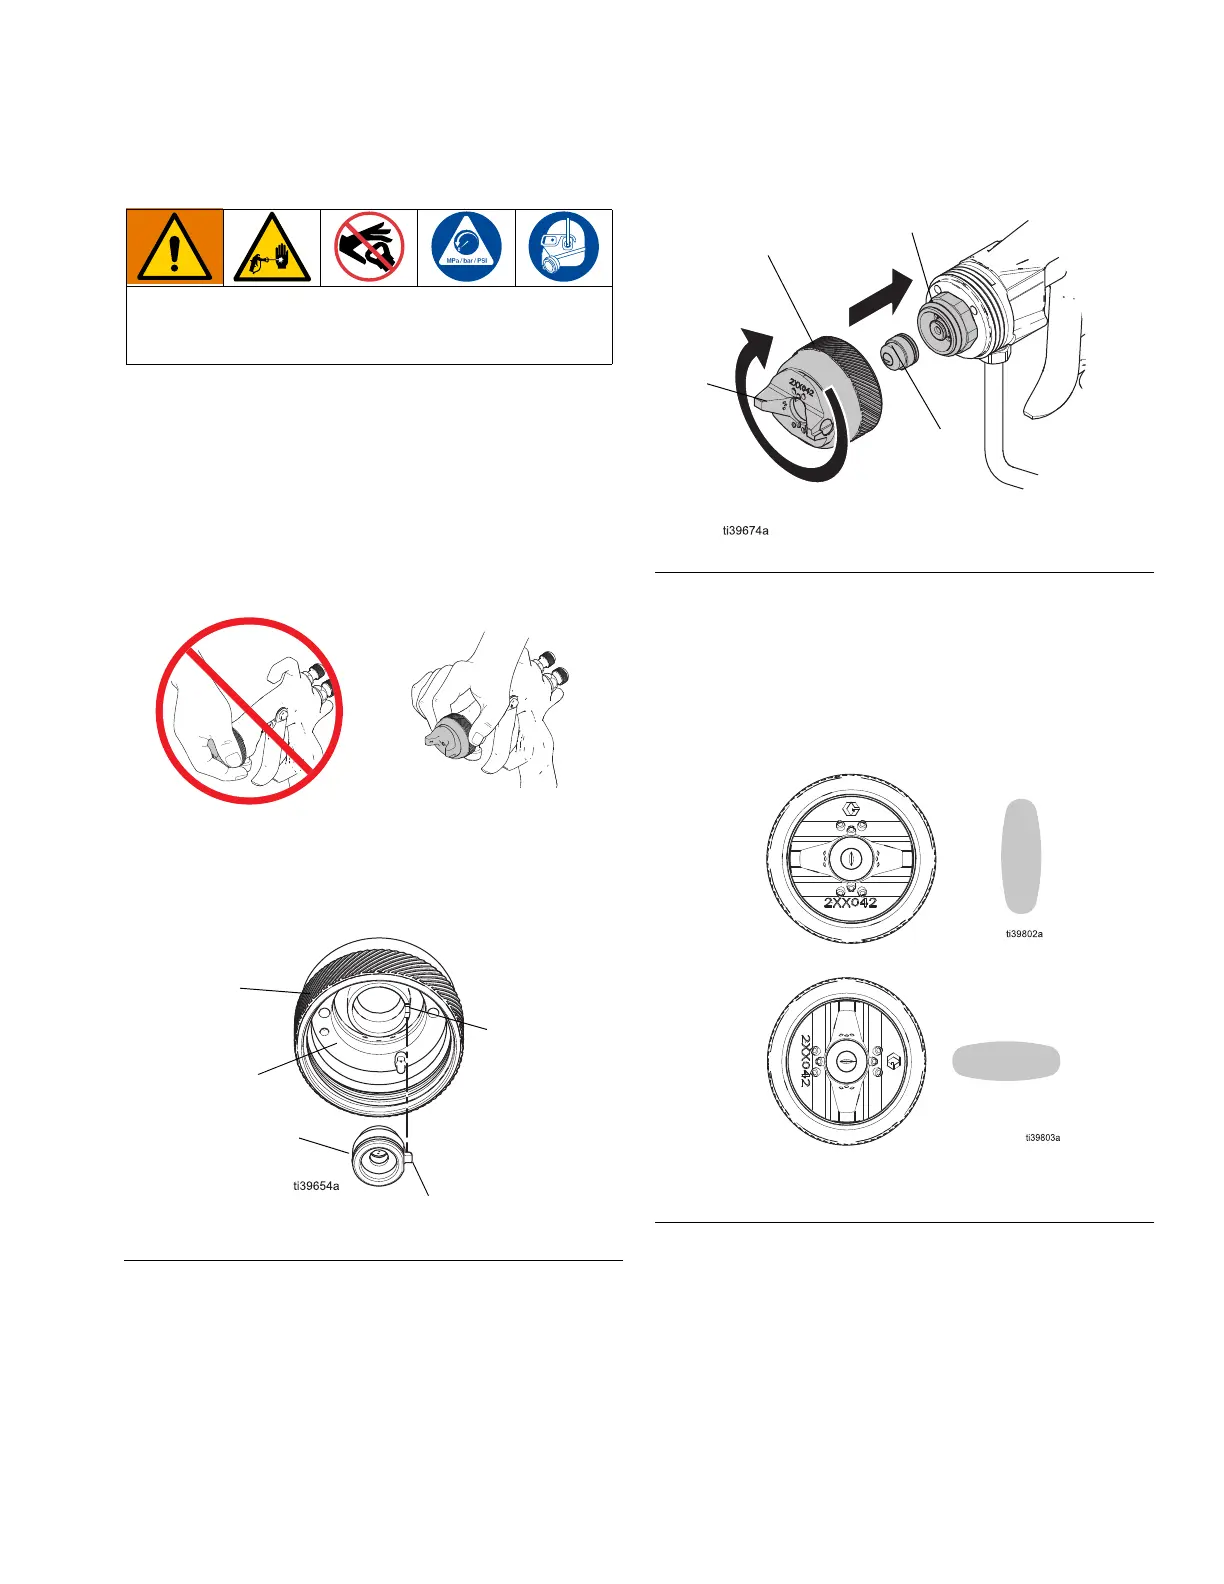
3. Remove the air cap assembly (8) and spray tip (7).
4. Install the spray tip (7) in the air cap (8a) with the tip
locating tab positioned in the air cap slot. See F
IG.
7.
5. Install the air cap assembly (8) to the spray gun.
6. Rotate the air cap (8a) to the horizontal or vertical
spray pattern position. See F
IG. 9.
NOTE: PerformAA 15 models can be positioned
precisely with an air cap alignment pin (8e). See
Alignment Pin Adjustment, page 14.
7. Tighten the retaining ring (8b) firmly by hand to
ensure a proper seal between the spray tip (7) the
fluid cartridge (5).
To avoid serious injury from skin injection, do not put
your hand in front of the spray tip when installing or
removing the spray tip and air cap assembly.
FIG. 7: Spray tip and air cap setup (back view)
7
8a
Slot
Tip Locating Tab
8b
FIG. 8: Air cap and retaining ring installation
FIG. 9: Spray pattern positions
Vertical Spray Pattern (factory-set)
Horizontal Spray Pattern