EasyManua.ls Logo

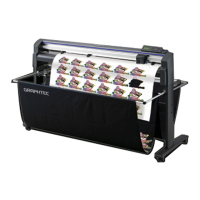
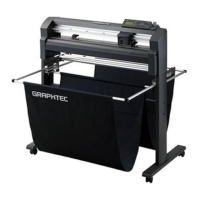
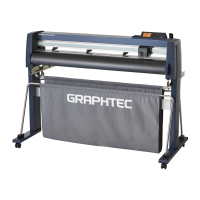
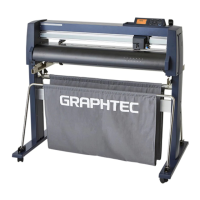
GRAPHTEC FC8600-160 User Manual

GRAPHTEC FC8600-160
283 pages
To Next Page IconTo Next Page
Page #1 background imageLoading...
Page #1 background image
FC
8600
SERIES
CUTTING PLOTTER
User's Manual
MANUAL NO.FC8600-UM-151

Table of Contents

Other manuals for GRAPHTEC FC8600-160

Questions and Answers:

GRAPHTEC FC8600-160 Specifications

General IconGeneral
BrandGRAPHTEC
ModelFC8600-160
CategoryPlotter
LanguageEnglish

Summary

TO ENSURE SAFE AND CORRECT USE

Description of Safety Symbols

Details the meaning and purpose of various safety symbols used in the manual.

Chapter 1: Assembling and Connection

Nomenclature

Identifies and describes the main components and parts of the plotter.

Assembling

Provides instructions for assembling the plotter, including the stand and basket.

Connecting to the Computer

Details the process of connecting the plotter to a computer using USB, LAN, or RS-232C interfaces.

Chapter 2: Preparing to Cut

Cutter Pen Preparation

Details the nomenclature, structure, and blade length adjustment of cutter pens.

Attaching a Tool

Explains the procedure for mounting tools like cutter pens or plotter pens into the tool holder.

Loading Media (Paper or Marking Film)

Guides users on how to load various types of media, including roll and sheet media.

Aligning the Push Rollers

Describes how to correctly position the push rollers to ensure proper media feeding and alignment.

Turning on the Power

Outlines the steps required to safely power on the plotter.

Selecting Tool Condition

Enables setting and switching between different tool conditions for various media types.

Running Cutting Tests

Guides users on performing test cuts to optimize cutting parameters for specific media.

Chapter 3: Basic Operations

Setting the Origin Point

Explains how to set the starting point for cutting operations at any desired location.

Stop Cutting

Describes how to pause or stop the cutting operation and resume or quit it.

Chapter 4: Convenient Functions

Copy (Duplicate)

Duplicates specified cutting data stored in the buffer memory for multiple copies.

Chapter 5: ARMS (Advanced Registration Mark Sensing System)

Outline of ARMS

Explains the ARMS system for scanning registration marks using sensors for precise cutting.

Setting and Adjustment of ARMS

Covers the necessary settings and adjustments for ARMS to scan registration marks correctly.

Setting MARK SCAN Mode and Numbers

Sets the MARK SCAN mode to ARMS and selects the number of registration points (2, 3, or 4).

Setting Distance Adjustment Between the Registration Mark

Adjusts cutting based on differences between scanned registration marks and original data.

Setting Offset Between the Registration Mark and Cutting Origin Points

Sets the axis origin offset, defining the distance between the cutting origin and registration mark.

Adjusting the Sensor Level

Automatically adjusts the sensor scan level for registration mark detection based on media characteristics.

Manually Adjusting the Sensor Level (Threshold Value) (When the SENSING SPEED is set to "NORMAL")

Allows manual adjustment of the sensor threshold value for mark detection in NORMAL mode.

Manually Adjusting the Sensor Level (Threshold Value) (When the SENSING SPEED is set to "ISM")

Allows manual adjustment of the sensor threshold value for mark detection in ISM mode.

Test the Registration Mark Sensor

Tests the registration mark sensor to check for plotting and detection issues.

Adjusting for the Registration Mark Scan Position

Adjusts coordinate values to match the scanned registration mark position with the cutting position.

Setting the registration mark automatic detection

Enables automatic detection of registration marks when the tool is near the first mark.

Setting the Position Using ARMS

Adjusts the cutting position using ARMS based on the number of scanned registration marks.

Adjust with 2POINTS

Adjusts position using two registration marks, measuring tilt and distance.

Adjust with 3POINTS

Adjusts position using three registration marks for 2-axis tilt and distance measurement.

Adjust with 4POINTS

Adjusts position using four registration marks for warp and tilt correction, offering higher precision.

Adjust Automatically

Automatically adjusts the cutting position by scanning registration marks.

Adjust Manually

Manually adjusts the cutting position by scanning registration marks via tool carriage movement.

Chapter 6: Manual Position Adjust

Manual Position Adjust

Details the procedure for manually adjusting the plotter's position using specific marks.

Chapter 7: Setting Regarding Cutting Quality

Chapter 8: Settings Regarding Cutting Time

Chapter 9: Setting Regarding Interface

Chapter 11: Settings of Controls from Computer

Chapter 12: Maintenance

Replacing Cutter Blade

Guides users through the process of safely replacing a dull or damaged cutter blade.

Chapter 13: Troubleshooting

When the Plotter Does Not Operate After Turning the Power On

Addresses issues where the plotter fails to power on or respond.

When It Does Not Work Right

Provides solutions for common operational problems and errors encountered during use.

When registration marks are scaned wrongly.

Offers troubleshooting steps for errors related to scanning registration marks.

When the Cutting Result is Not Good

Helps diagnose and resolve issues leading to poor cutting quality or results.

Error Messages in GP-GL Command Mode

Explains error codes and messages specific to GP-GL command mode.

Error Messages in HP-GL Command Mode

Details error codes and messages related to HP-GL command mode operations.

Error Messages for ARMS

Lists and explains error messages encountered when using the ARMS system.

Self Diagnostic Test

Performs a self-diagnostic test to check sensors and switches for proper operation.

Chapter 14: Option

Tool Offset Adjustment

Adjusts cutting offsets between different tools (e.g., tool 1 and 2) to compensate for differences.

Chapter 15: Specifications

Main Specifications

Lists the key technical specifications of the FC8600 series plotters.

Related product manuals