28
Essential Conventional Channel parameters
CONV objects are the simplest objects supported by the radio. By this we
mean that there really isn't that much for you to do if you want to create one.
There are only a few essential parameters in the CONV object fields that
must be set correctly for a CONV object to work. The Frequency must be
set to match the frequency of the transmitter you want to scan or monitor,
and the MODE should be set to AU, or, if desired, AM, FM or NFM. Note
that the scanner will automatically select the default mode based on the
frequency you enter when MODE is set for AUto. In most cases it will not be
necessary to change this.
We also recommend that you label your CONV object by giving it a name in
the TAG field. This will make it easier for you to find the CONV object later,
and identify it when the scanner stops to monitor activity. Enter your CONV
object by following these steps.
As we mentioned above, a brand new radio will launch into Program Mode
when it is first turned on, which allows for creation and editing of Scannable
Objects. If this is the first time you have turned on your radio, you should
see these softkey labels at the bottom of your screen:
NEW EDIT GLOB
If not, press the PROG (Program) key now.
Press the
NEW
softkey to begin entry of a new object.
Press the
CONV
softkey to begin entry of a CONVentional Channel object.
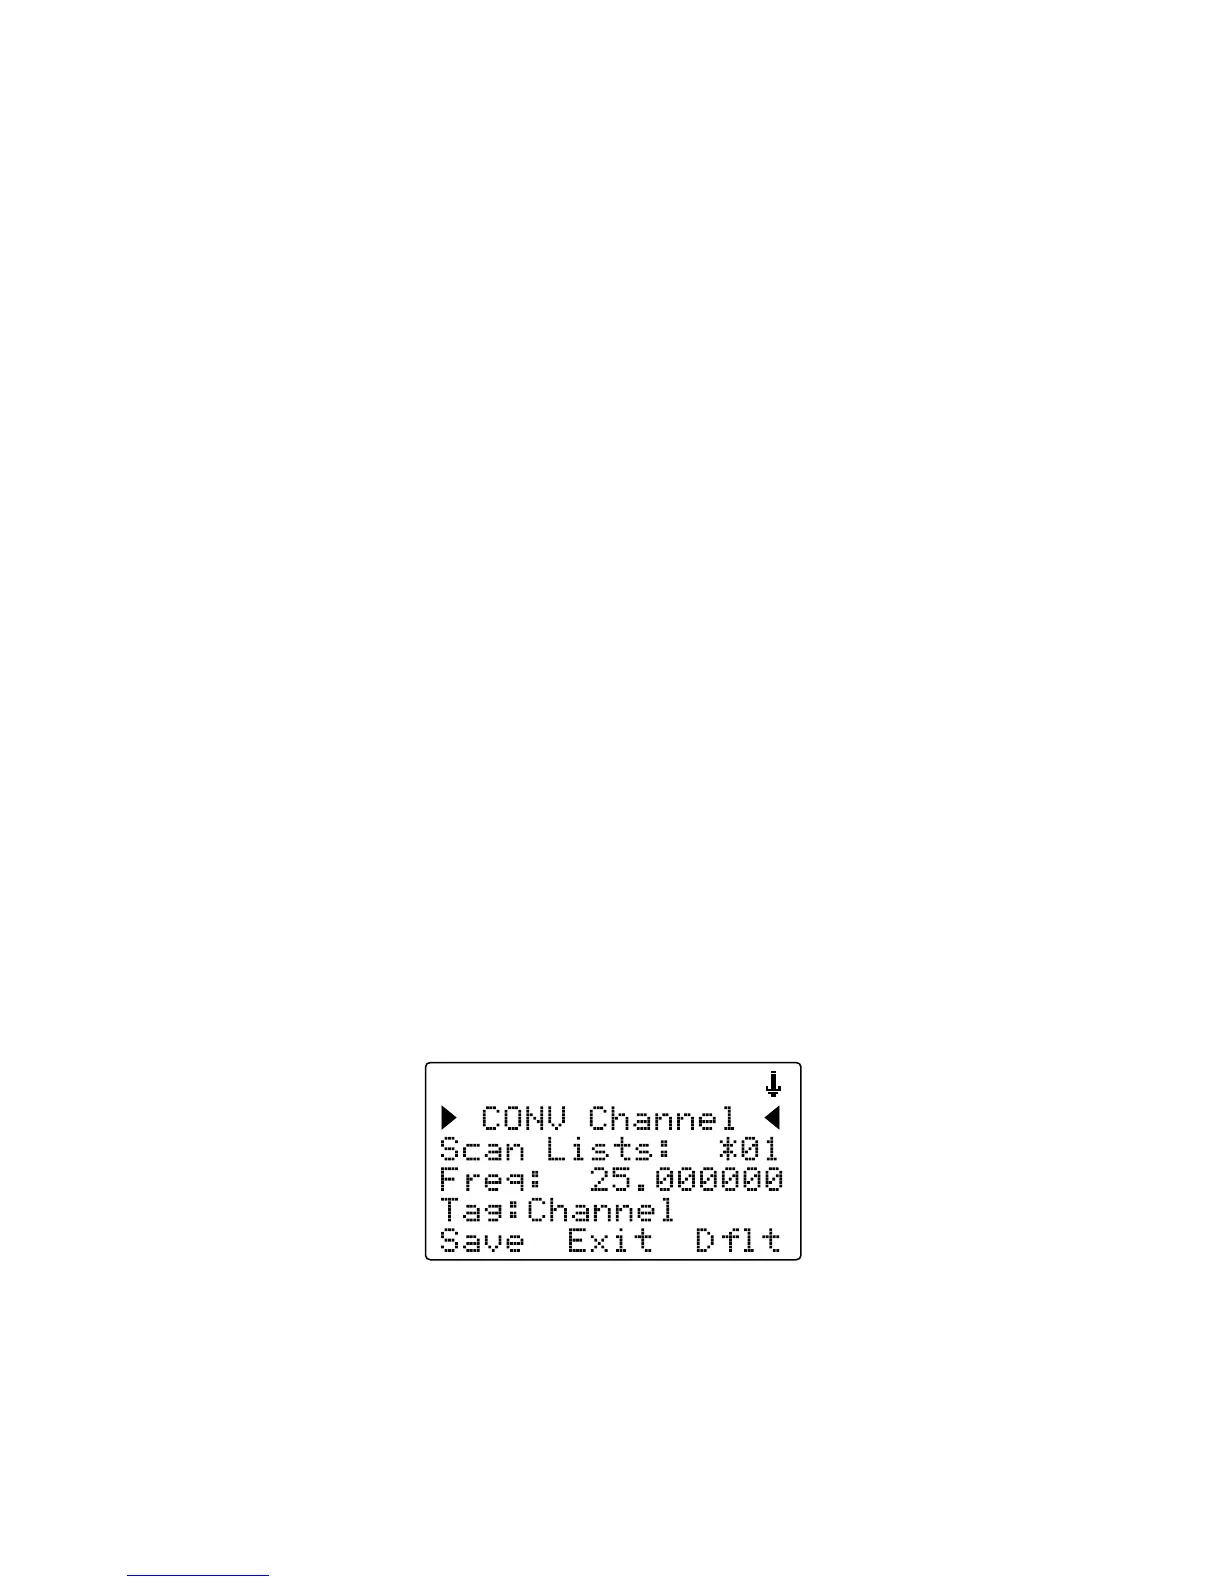
Your scanner's display should read as follows:
Now, take a moment and study the display. You will notice that the
6
icon
is active. Its purpose is to indicate that you are at the very top position of
the menu for a conventional channel object, and there are more parameters
that can be accessed if you scroll down. We also see three new softkeys: