M
Megan RuizSep 12, 2025
Why won't the rip fence on my Grizzly G0771 lock at the rear?
- CcookelizabethSep 12, 2025
If the rip fence on your Grizzly Saw does not lock at the rear, the clamp screw may be out of adjustment. Adjust the clamp screw.
Why won't the rip fence on my Grizzly G0771 lock at the rear?
If the rip fence on your Grizzly Saw does not lock at the rear, the clamp screw may be out of adjustment. Adjust the clamp screw.
What to do if the workpiece catches on the table/dado insert during cutting operation on my Grizzly Saw?
If the workpiece catches on the table/dado insert or table throat during a cutting operation on your Grizzly Saw, the table/dado insert may be out of adjustment. Adjust it so it is perfectly flush with the table surface.
What to do if my Grizzly G0771 Saw blade will not move up or down?
If the blade on your Grizzly Saw will not move up or down, a set screw on the worm gear may be loose or missing. Tighten or replace the set screw.
Why is the blade too close to the insert on my Grizzly Saw?
If the blade is too close to the insert on your Grizzly Saw, verify that the blade arbor washers are correct and in the required position, as the blade position on the arbor may be incorrect.
Why does my Grizzly G0771 Saw have vibration or noisy operation?
Vibration or noisy operation in your Grizzly Saw can stem from several issues. Check the following: * Inspect and replace any damaged bolts/nuts on the motor or components, and re-tighten them using thread-locking fluid. * Replace a warped or bent blade, or resharpen a dull blade. * The belts may be worn or loose. * Realign or replace the shaft, pulley, setscrew, and key if the pulley is loose. * Tighten or replace the motor mount if it's loose or broken. * Ensure the machine is correctly mounted by tightening the mounting bolts and relocating or shimming the machine as needed. * Retighten or replace the arbor pulley if it's loose. * Replace the arbor housing bearings or the arbor if the arbor bearings are faulty. * Test the motor bearings by rotating the shaft; if grind...
What to do if my Grizzly G0771 stalls or is underpowered?
If your Grizzly Saw stalls or is underpowered, consider these potential causes: * Decrease the feed rate or cutting speed if it's too fast. * Ensure you're only cutting wood and that the moisture content is below 20%. * Straighten or replace the workpiece, and adjust the fence if the workpiece is crooked or the fence is mis-adjusted. * Use the correct blade and reduce the feed rate or depth of cut if the machine is undersized for the task or you're using the wrong blade. * Test, repair, or replace the run capacitor if it's faulty. * Wire the motor correctly if it's wired incorrectly. * Test the plug/receptacle for good contacts and correct the wiring if they are at fault. * Replace the loose pulley/shaft if the pulley/sprocket is slipping on the shaft. * Test, repair, or...
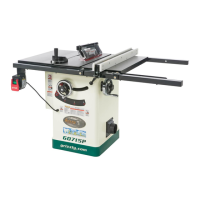
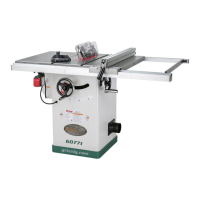
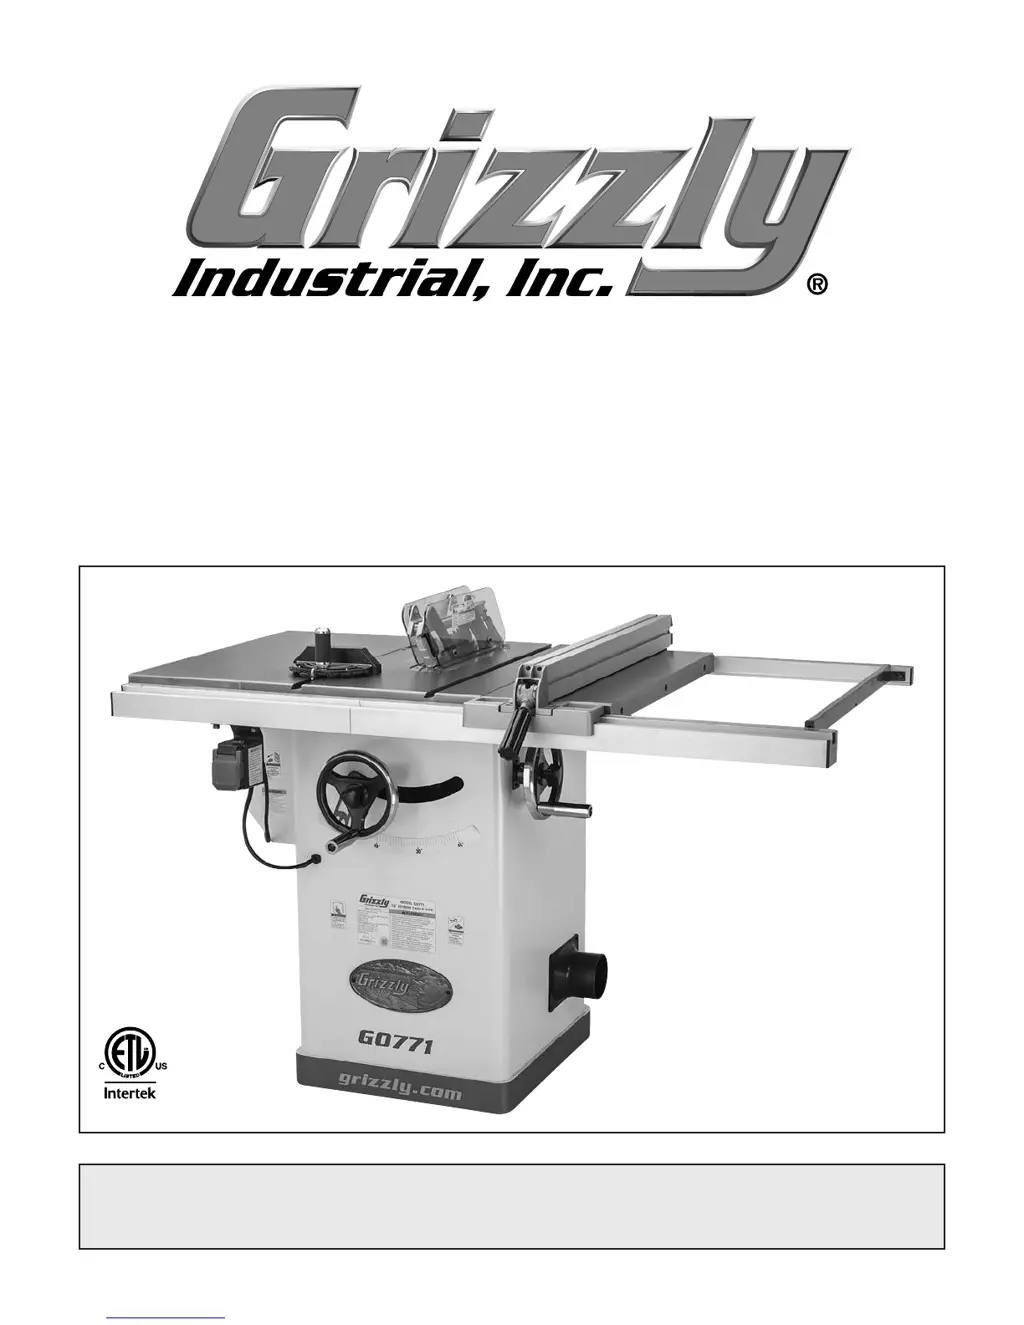
Details the features of the 10" Hybrid Table Saw, including motor, stand, and table.
Provides Grizzly Technical Support contact details and feedback channels for the manual.
Explains potential discrepancies between manual and machine, directing users to website updates.
Explains the function of the ON/OFF switch and how to disable it.
Describes the blade height handwheel and its range of adjustment.
Details the blade tilt handwheel for adjusting the blade angle from 0° to 45°.
Explains the function of locks to secure blade height and angle adjustments.
Describes how to lock and unlock the fence using the handle.
Lists key specifications like blade diameter, arbor size, and cut depth.
Provides specs for the included blade, riving knife, and kerf thickness.
Details table height, size with wings, and main table thickness.
Lists fence type, size, rail type, length, width, and height.
Provides details on miter gauge slot type, width, and height.
Lists materials used for table, wings, cabinet, trunnions, and fence assembly.
Includes number of dust ports, port size, and compatible mobile base.
Emphasizes reading the manual and understanding safety symbols before operation.
Covers operator training, environment, mental alertness, and electrical safety.
Provides detailed methods to avoid kickback incidents during operation.
Offers advice on how to stay safe if kickback occurs.
Discusses power circuit availability and the need for qualified personnel for installation.
Details circuit needs for 120V and 240V operation, including amperage and grounding.
Explains the importance of proper grounding to prevent electric shock.
Recommends against extension cords and provides guidelines if one is necessary.
Provides instructions for rewiring the motor and changing the plug for 240V operation.
Instructions for safely unpacking the saw and inspecting for shipping damage.
Lists tools and materials required but not included for machine setup.
Lists all included parts to verify against the contents list before setup.
Steps to remove rust preventative coating from unpainted surfaces.
Guidelines for weight load, space allocation, physical environment, and lighting.
Step-by-step instructions for assembling the table saw, including wings and fence rails.
Lists factory-set adjustments to verify for safe and accurate cutting.
Provides a basic understanding of table saw usage for novice operators.
Crucial checks for material type, foreign objects, knots, and warping before cutting.
Explains the difference between cut types and associated safety precautions.
Specifies required blade thickness and kerf for the machine.
Details through cuts and the mandatory use of the blade guard assembly.
Step-by-step guide for safely installing a new saw blade.
Describes the components and safety functions of the blade guard.
Explains the function and installation of the spreader/riving knife.
Details how anti-kickback pawls work and how to disable them.
Specifies when to use the blade guard and when it can be removed.
Explains the riving knife's role in preventing kickback and its proper usage.
Step-by-step guide for performing rip cuts, including safety precautions.
Instructions for performing crosscuts using the miter gauge.
Guide to making angled crosscuts using the miter gauge.
Steps for installing a dado blade system and safety warnings.
Instructions for cutting dadoes using a standard saw blade.
Guide to cutting rabbets using a dado blade and sacrificial fence.
Instructions for cutting rabbets using a standard saw blade.
Instructions for building a resaw barrier for enhanced safety.
Steps to construct and attach an auxiliary fence for resawing.
Detailed steps for resawing with the table saw and safety precautions.
Benefits of featherboards for kickback protection and workpiece control.
Instructions for creating clamp-mounted and miter slot featherboards.
Guides for securing featherboards using clamps or miter slot.
How to use push sticks to keep hands away from the blade.
Template and instructions for building a shop-made push stick.
How push blocks improve safety and control during cuts.
Template and instructions for constructing a shop-made push block.
Instructions for building a specialty jig for narrow rip cuts.
Guide to using the auxiliary fence and push block system for narrow rips.
Explains how a crosscut sled improves safety and accuracy during crosscutting.
Routine checks for loose bolts, blade condition, wires, and table cleaning.
Includes cleaning dust buildup and checking belt tension.
Details on lubricating trunnion slides, worm gears, and leadscrews.
Identifies possible causes and solutions for machine problems like no start or stalling.
Adjusting the blade to ensure it stops precisely at 90 degrees.
Adjusting the blade to ensure it stops precisely at 45 degrees.
Steps to align the blade parallel to the miter slot for accurate cuts.
Procedure to verify the spreader/riving knife is parallel with the blade.
How to adjust the mounting position for proper alignment.
Instructions for straightening or replacing a bent spreader/riving knife.
Steps to ensure the fence is parallel to the saw blade.
Optional adjustment to offset the rear of the fence for kickback prevention.
Adjusting the miter gauge to achieve precise 90° stops.
Adjusting the miter gauge to achieve precise 45° stops.
Instructions for adjusting belt tension if power is lost.
Procedure for replacing a worn or damaged drive belt.
Critical safety warnings for working with electrical components.
Presents the wiring diagram for 120V and 240V configurations.
Illustrations and details of key electrical parts like switches and capacitors.
Diagram and part numbers for the main components of the table saw.
Detailed list of part numbers and descriptions for the entire machine.
Part list and diagram for the table saw cabinet and related parts.
Diagram and part numbers specific to the fence and rail system.
Diagram and part numbers for the blade guard assembly.
Diagram and part numbers for the miter gauge assembly.
Part numbers for all labels and cosmetic components on the machine.