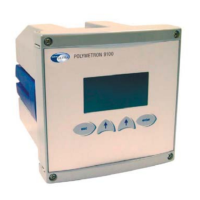
Section 6 Menu overview
MAIN MENU
The main menu gives access to the following functions:
• STOP - Pressing Enter causes the measurement process to stop immediately
• START - Pressing Enter initiates the measurement process
• STAND-BY - Pressing Enter puts the analyzer in standby
• PROGRAMMING - Program the analyzer (Command mode only)
• READING - View parameters (Operating mode only)
In PROGRAMMING or READING mode the following options can be selected using the
scroll keys:
• CALIBRATION - Calibrate the analyzer
• ANALOG-OUT - Analog output parameters
• ALARM - Alarm limit parameters
• SEQUENCE - Measurement mode
• SERVICE - Check the analyzer and accessory operations
• CLEANING - Chemical cleaning parameters
• SAMPLE COND. - Sample conditioning parameters
• CAL PARAMETER - View the primary and last calibration details
• TIMING - Titration cycle parameters
• PM XXXX - System configuration (only available in PROGRAMMING mode and
requires a valid password)
Note: Some of the above options are only available if the relevant accessory has been installed.
6.1 System configuration (PM XXXX option)
Refer also to any Installation Procedure documents delivered with the analyzer for
application specific information.
1. Select PM XXXX with the scrolling keys and press Enter. Using the Select key to
move from one digit to the next, enter the special code and press Enter.
Option Description
ELECTRODE Define the electrode parameters:
• Name
• Slope
• (Uiso) Isothermal point potential
• (E) Reference point potential adjusted to 25°C
• (C) Reference point concentration adjusted to 25°C
The E and C parameters are used to calculate the standard potential
(E
025
= E - S.logC)
UNIT Select the unit of concentration from the list available. Selecting USER
allows you to define your own, and requires a 5 character description.
Adjust ADC This option is reserved for Hach Lange service technicians.
CAL
TEMPERATURE
Two-point temperature calibration. Use a temperature simulator for
each of the two points. Wait until the measurement stabilizes before
accepting each calibration point.
Adjust Iout Select the output type (0-20mA or 4-20mA). Place a multimeter in
series with the analog output and make any small adjustments to the
signal as required.
25
 Loading...