14 | Pro‑Stcher Lite for the HQ Simply Sixteen www.ProStcher.com
Installing the Pro‑Stcher Lite Assembly on the
HQ Simply Sixteen
These instrucons are for installing Pro‑Stcher Lite on the HQ Simply Sixteen machine. Pro‑Stcher
recommends installaon by an authorized Pro‑Stcher retailer if available.
Tools required
• Power drill
• 2.5mm hex wrench
• 3mm hex wrench
• 4mm hex wrench
• 5mm hex wrench
• 9/16‑inch open‑end wrench
• 5/16‑inch nutdriver (oponal)
• Sloed screwdrivers (one large and one small)
• Phillips screwdrivers (one large and one small)
Installing the Pro‑Stcher Lite Tray Assembly
These instrucons are for installing the Pro‑Stcher Lite Tray Assembly. These instrucons are for both the
HQ Lo Frame and the HQ Lile Foot Frame.
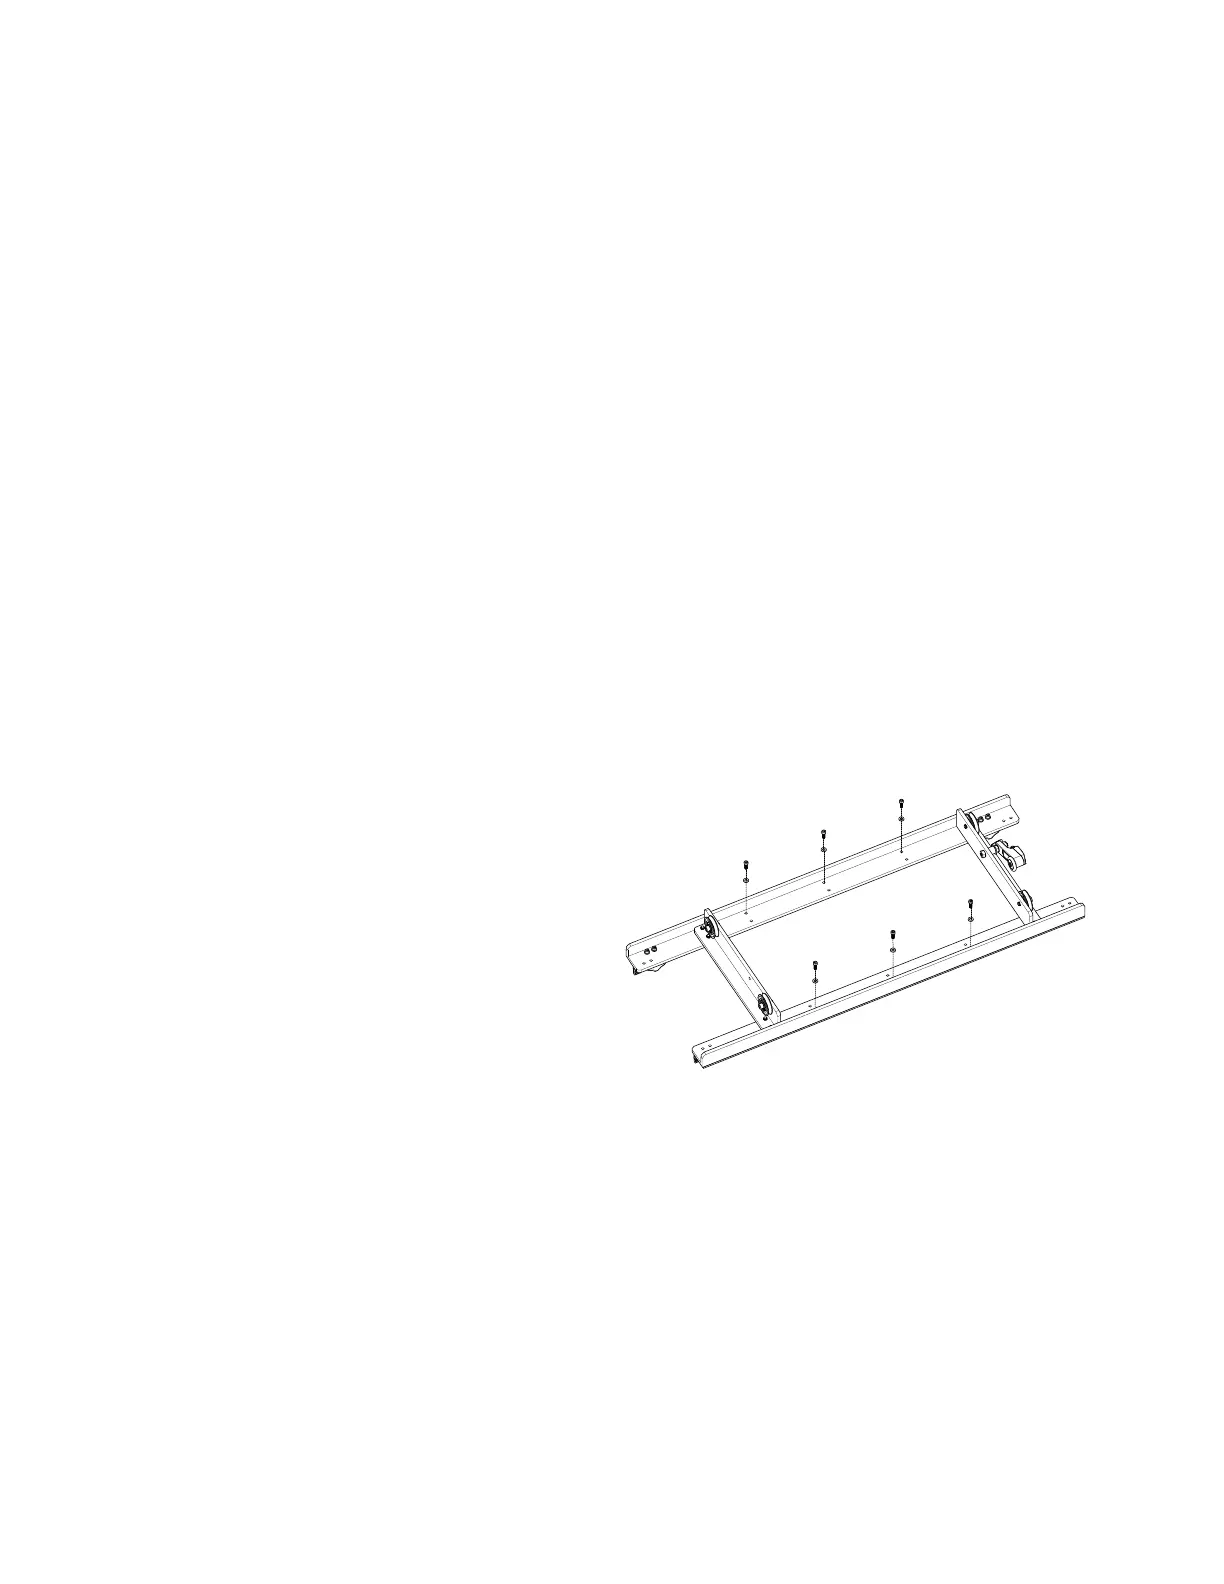
1. Locate the Pro‑Stcher Lite tray assembly,
screws, and washers (see Parts List, item E).
2. Place the HQ Simply Sixteen carriage (not shown
in Parts List) upside down on a protected at
surface with the wheels up toward the ceiling.
3. Remove and discard the six screws and washers
which are located in the outside holes holding
the track supports to the top of the carriage as
shown.
 IMPORTANT: There will sll be two outside
screws close together on each end of the
track support holding the tracks in posion
and in place on the carriage at this point. Do
not remove these screws. They are keeping
the tracks aligned in posion.