Pro-Stcher Lite for the HQ Simply Sixteen Installaon Instrucons | 17
HQ Lo Frame Table Top Installaon Instrucons
Parts List
PART NUMBER DESCRIPTION QTY
QF01501‑RAW 4‑Foot Table Top Secon 2
QF00043 Double‑sided Foam 118 inches 1
Tools Needed:
• Scissors for cung foam tape (not included)
 IMPORTANT: Removing the frame poles
will make it easier to place the table‑top
secons.
 IMPORTANT: Before installing table‑top
secons, conrm that guide rails and tracks
are in the correct posion, by placing the
machine and carriage on the tracks and
rolling it from end to end, checking for
smooth movement and no binding.
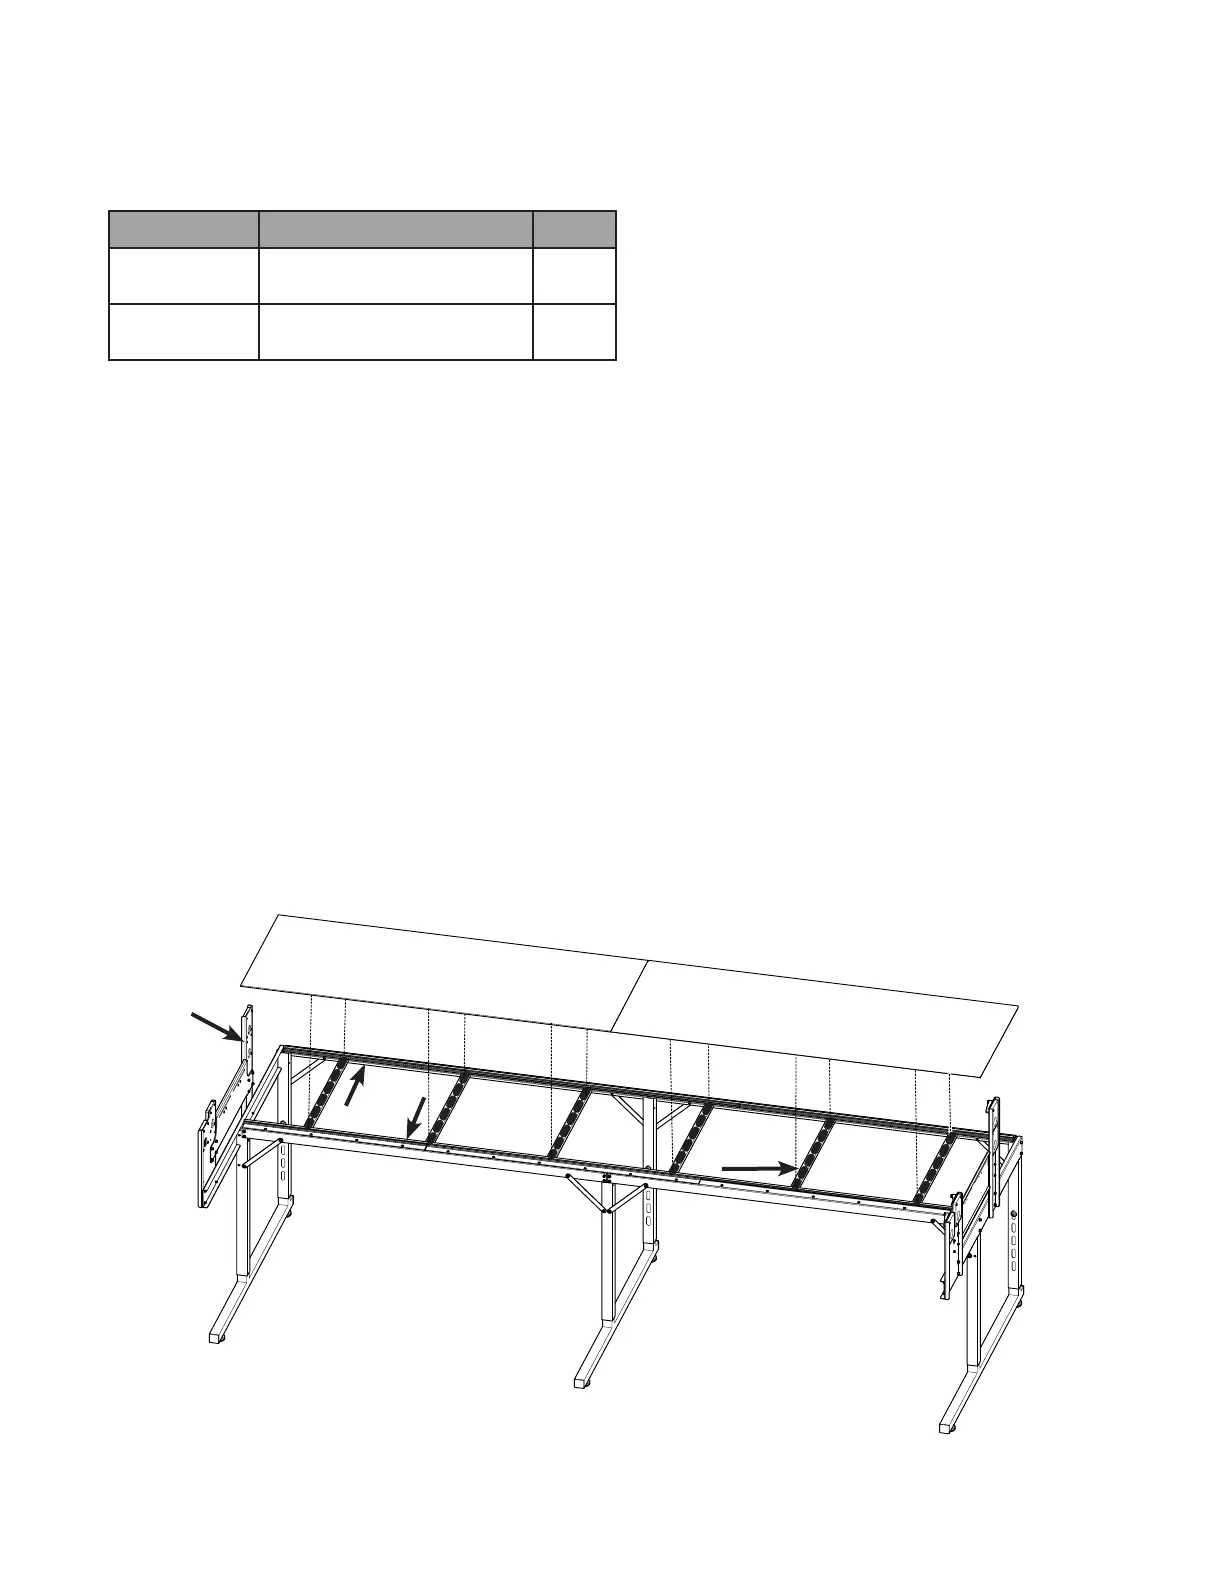
1. Cut the double‑sided foam tape to t the
crossbar supports and apply the adhesive side of
the foam tape to all six cross‑bar supports.
2. Remove the protecve cover from the tape on
the three crossbar supports on the right side of
the frame.
3. Remove the clear backing from the smooth
boom side of both table tops. The textured
side goes up.
4. Starng at the right vercal brace, bu the end
of one table‑top secon against the brace and
align it between the guide rails. Make sure the
table‑top secon is between the front and rear
guide rails and does not overlap the lip of either
guide rail. Do not press the secon down into
the foam tape unl both table‑tops are in place.
5. Remove the protecve cover from the foam
tape on the three remaining crossbar supports.
6. Bu one end of the second table‑top secon
end against the end of the installed table‑top
secon and align between the rails. When
correctly posioned, press the table‑top
secons rmly onto the foam tape.
PART# QF01501
vercal
brace
guide
rails
crossbar
supports
table‑top secon
table‑top secon