28 | Pro‑Stcher Lite for the HQ Simply Sixteen www.ProStcher.com
Verify the Alignment
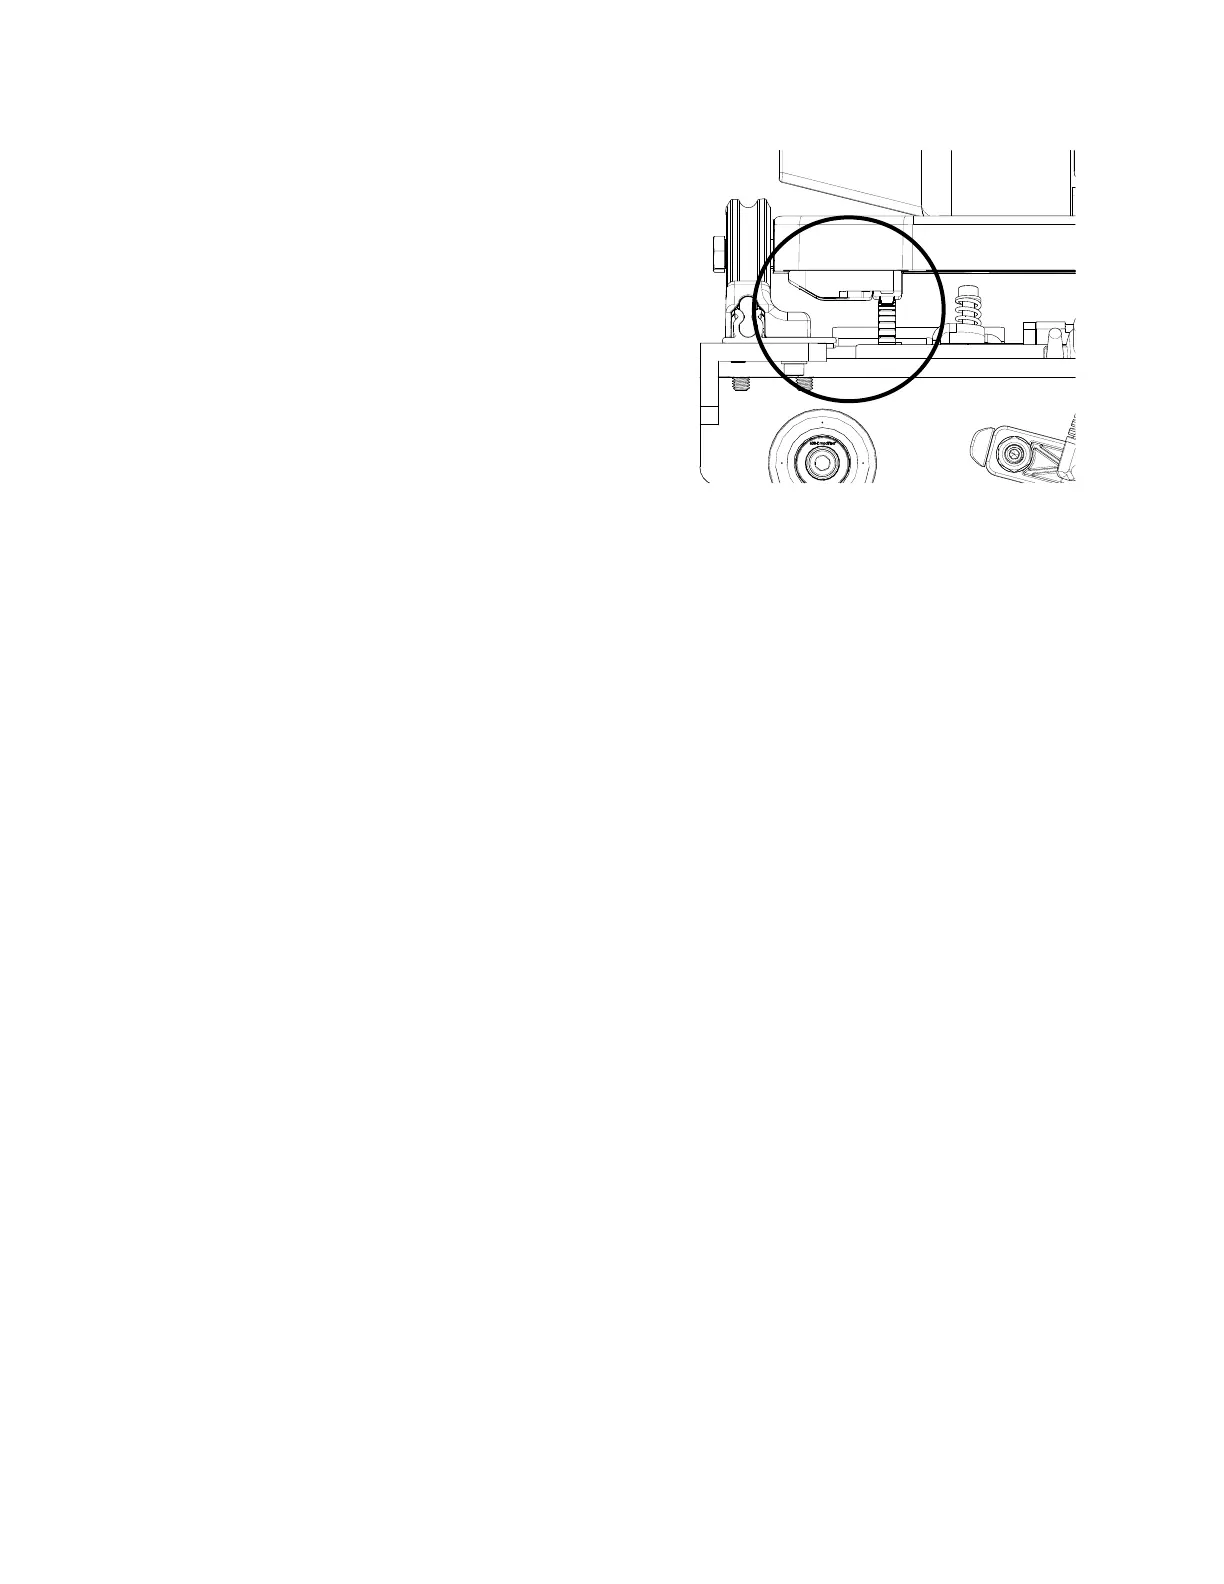
1. Verify that the black Y‑axis gear engages the
blue Flexirack for the Y‑axis at the front and
the rear of the Y‑rack. To do this, look from the
back of the machine between the boom of the
quilng machine and the top of the carriage.
If necessary, use your hand to rotate the liing
cam eccentrics unl the gears are engaged. This
will need to be done on the underside of the
carriage before it is placed onto the frame.
2. Ensure that at least two‑thirds of the black
y‑axis gear and blue Flexirack are interlocking
the enre length of the rack. Some horizontal
adjustments may be necessary. If so, loosen
the two screws that mount the Y‑axis bracket
to the base plates and push the bracket in the
necessary direcon, hold it in place, and then
reghten the screws.
NOTE: The screws can be adjusted with the
quilng machine on the carriage. Pull the
machine to the front to access the front
screws and to the rear to access the rear
screws.
3. Pull the quilng machine to the rear of the
carriage and ensure the rear of the Y‑axis bracket
does not collide with the black plasc track
retainer on the rear of the carriage. Adjust the
Y‑bracket if needed.
4. With the power cable plugged into the machine
and the motors in the engaged posion,
ensure that as the quilng machine can move
in both the X and the Y direcons and that the
corresponding gears are rotang as well.