Pro-Stcher Lite for the HQ Simply Sixteen Installaon Instrucons | 31
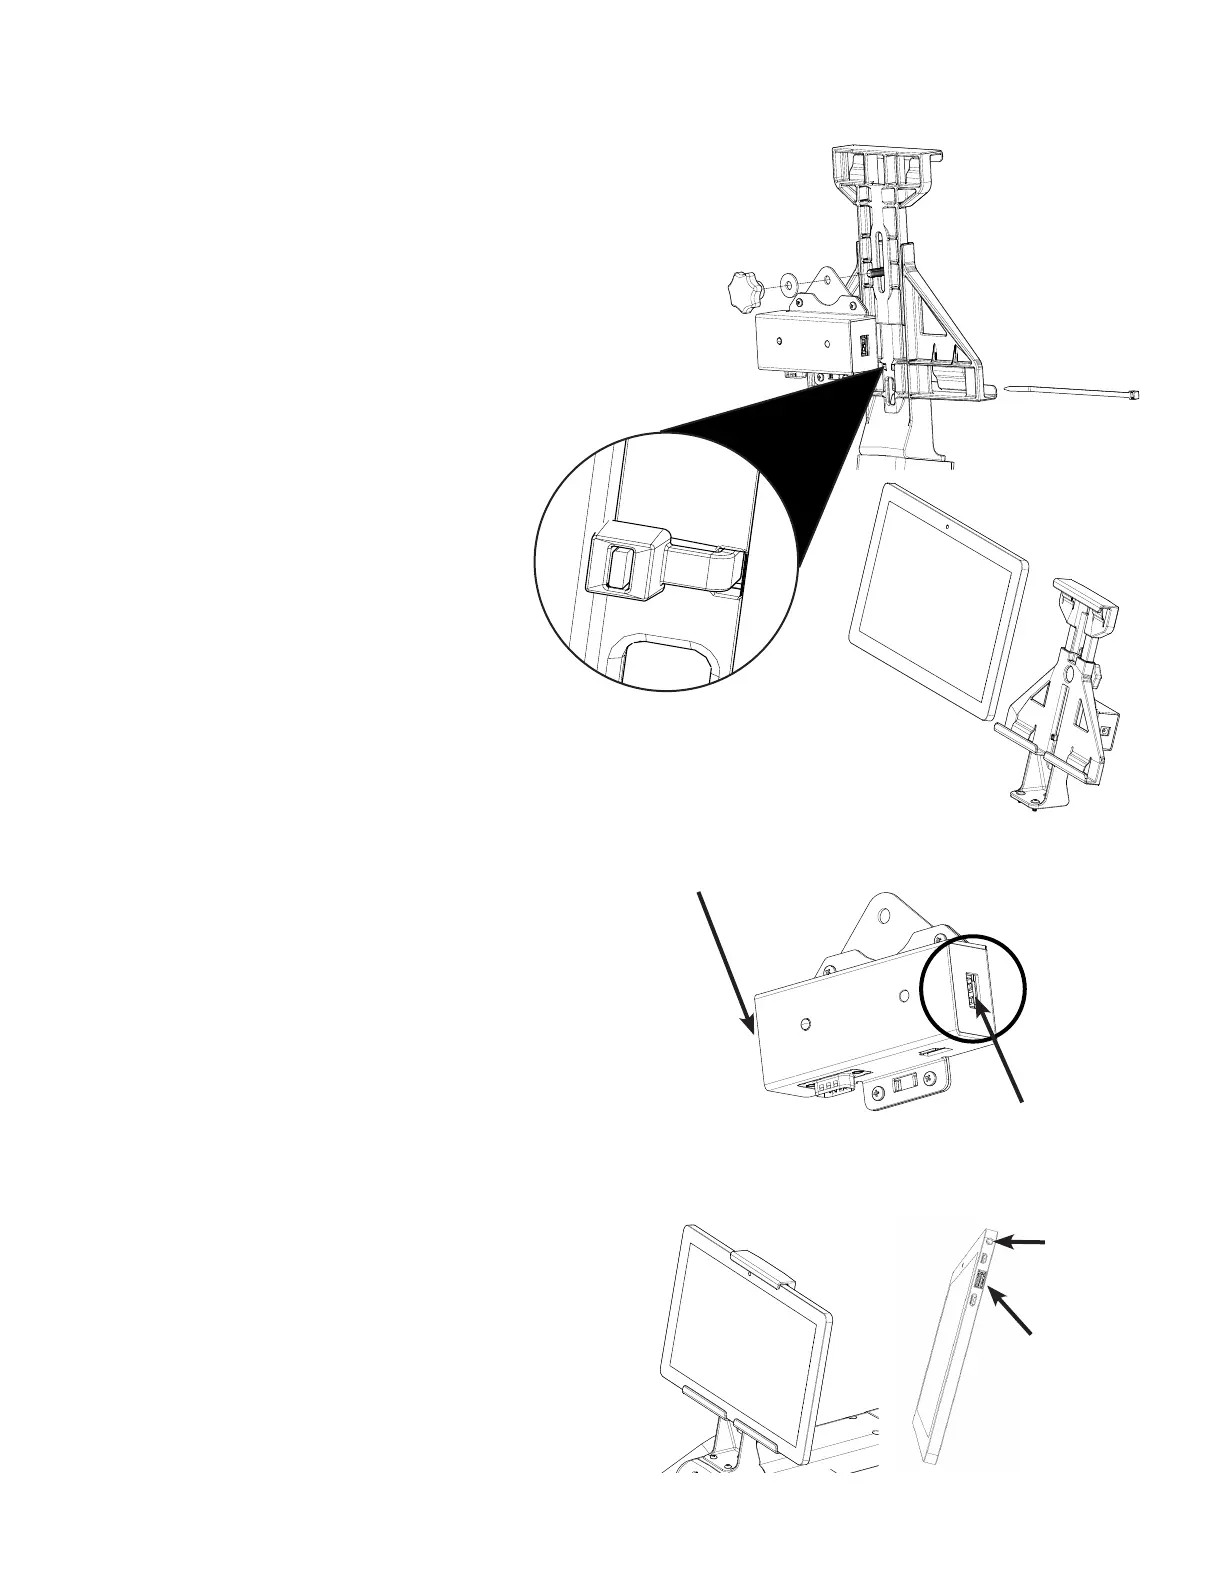
Aaching the transion box to the bracket
1. Remove the bracket knob and washer. Hold the
bolt into the bracket and place the transion
box bracket, washer and knob onto the bolt.
Hand ghten the knob.
2. Insert the end of the zip e from front to back
through the bracket and transion box and then
back through the box and bracket to the front.
3. Put the end through the locking head
of the zip e. Pull the zip e ght and
trim o the end with scissors or wire
cuers.
Aaching the tablet to the HQ Simply
Sixteen machine
1. Loosen the knob on the back of the
tablet mount and raise the top of the
mount.
2. Tilt the tablet out slightly at the top and snap it
down into the lower mount tabs, then lt back.
3. Lower the top of the mount down onto the
tablet unl the mount top tabs snap onto the
tablet and ghten the knob rmly by hand.
4. Ensure the tablet is held securely in the mount,
if not repeat step 3 and press the top of the
mount down onto the tablet before ghtening
the knob.
5. Plug in the power cable (see Parts List, item J)
from the transion box to the tablet.
NOTE: Be sure it is the power connecon,
not the headphone jack.
6. Plug the USB cable (see Parts List, item K) into
the tablet and into the transion box.
power
cable port
USB cable
port
back front
transion box USB
connecon to tablet
transion box power
connecon to tablet
front