Disclaimer: 3
rd
party and/or custom firmware providing extra features are not covered in this manual.
4K Integral 2 – User Manual
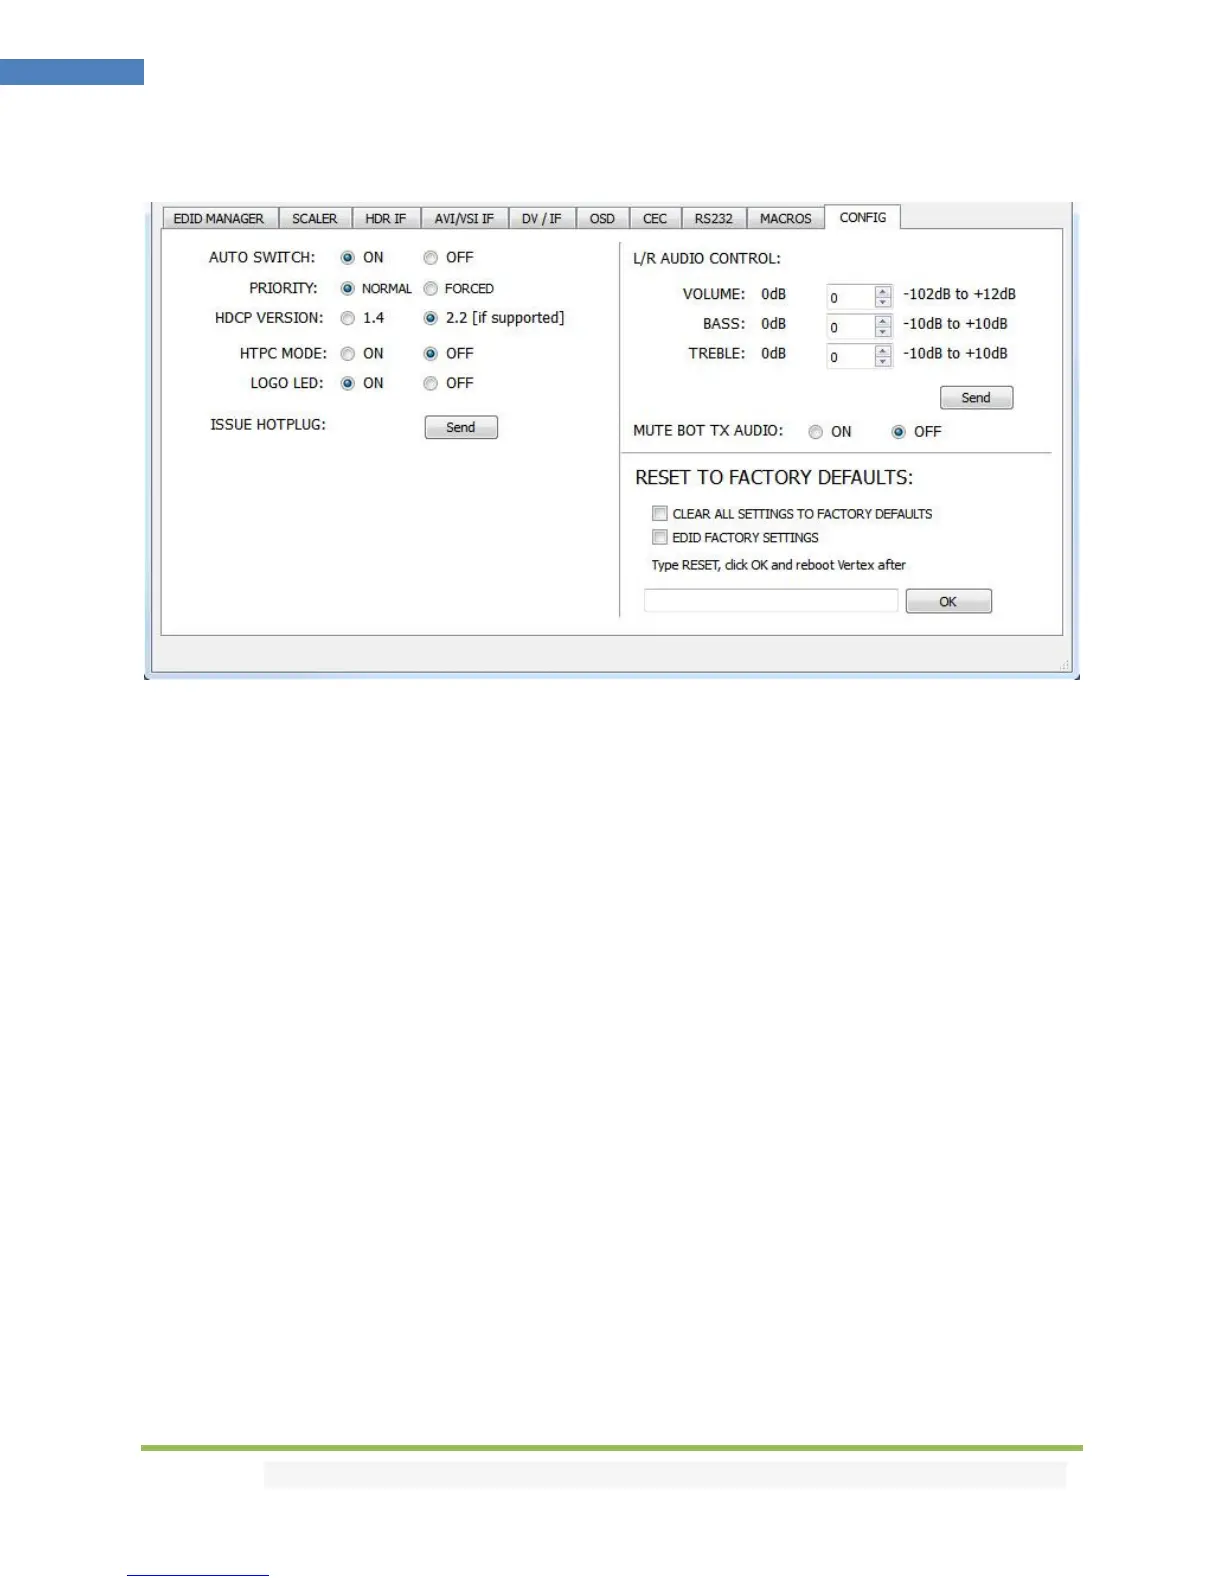
The CONFIG section of the USB GUI for Windows PC:
[AUTO SWITCH]: When activated, the Auto Switch feature will force the Integral 2 unit to automatically
switch to the active signal if the selected signal is lost.
[PRIORITY]: When in FORCED input priority mode, as soon as a new active input is detected, Integral 2
will switch to it.
[HDCP VERSION]: Allow you to select/force the HDCP revision of the Output Ports. Similarly to what you
can do from the push button on the unit (see page 10)
[HTPC MODE]: Useful if you have trouble with windows display and icons when resuming from stand-by
mode.
[LOGO LED]: Enable by default, GREEN Integral 2 side logo can be turned ON/OFF at will. Some users
might found Integral 2 side logo visually disturbing in their HT setup. You have the possibility to turn
them off.
[ISSUE HOTPLUG]: Click Send button to perform a soft-reset in your setup.
[L/R AUDIO CONTROL]: This option adjust the Analog Stereo output. Volume, Bass and Treble control
are available.
[MUTE BOT TX AUDIO]: If you use an AVR at TOP output, you might want to disable sound going to
equipment connected at BOT output. Here you can mute the BOT output sound.
[CLEAR ALL SETTINGS TO FACTORY DEFAULTS]: Similar as [LP] Long Press on the RESET button (see
page 7). Click the available check box to clear all settings to factory defaults and type RESET in the test
field. Finally click the OK button and unit will be reset to factory defaults. Integral 2 power cycle needed.
 Loading...