GR FS9040003000000000 GR FS9040004000000000
Maintenance
confidential
D.3.8
3.1.4 Cleaning the rotary valve
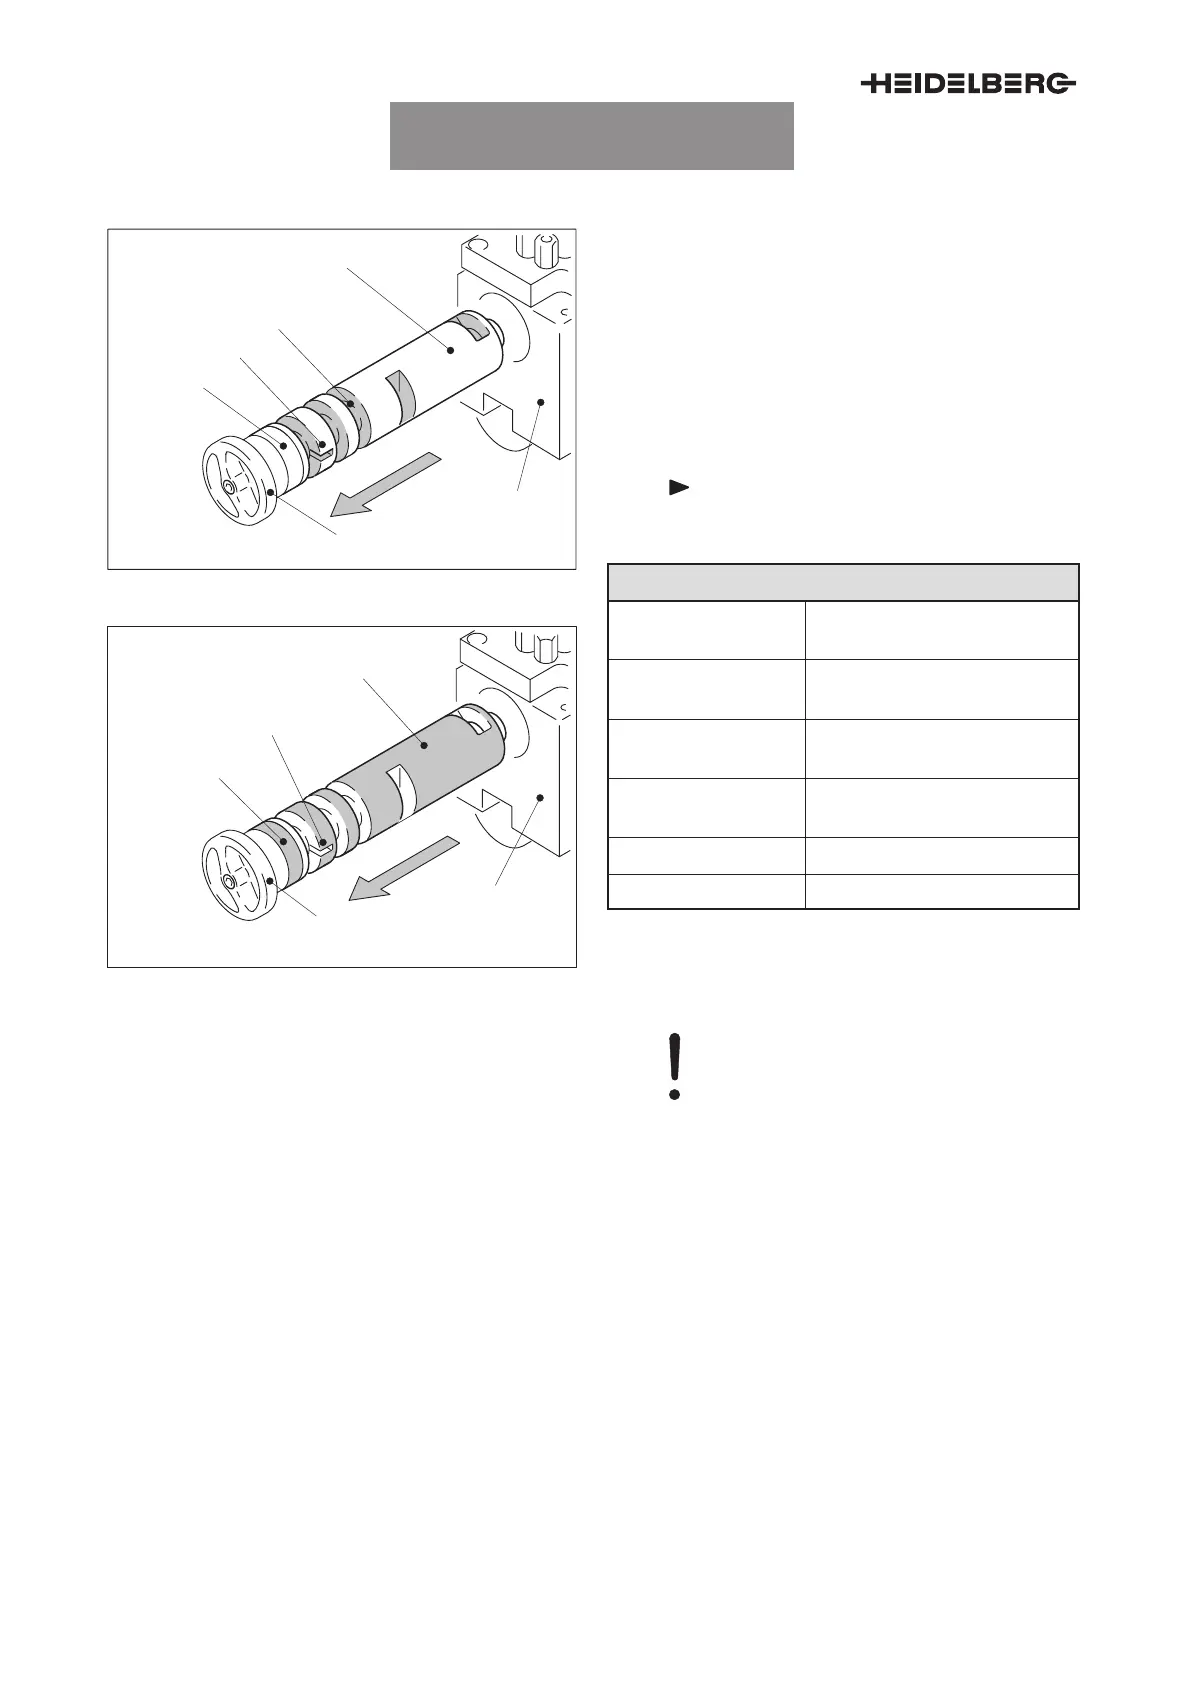
1
2
3
4
5
6
Fig. 6 Rotary valve, valve ports
1
2
3
4
5
Fig. 7 Rotary valve, surface
Valve ports, cleaning surface and bearings
1 Rotary valve / surface
2 Suction head housing
3 Cover plate
4 Bearing
5 Mark
6 Valve ports
Note
Do not lubricate!
Maintenance point description
Maintenance inter-
val
3 000 000 press rotations, or
monthly
Maintenance loca-
tion
–
Accessing the main-
tenance point
See installation and removal.
Maintenance work Clean valve ports, surface,
and bearing.
Tool Soft, fluffless cloth; brush
Cleaning solution See ”Approved cleaners”.
Tab. 5
Caution – Damage
During any work on the rotary valve
you must ensuring that the surface is
not damaged.
Installing and removing the rotary valve
1. Press the cover plate (Fig. 6/3) slightly towards
the inside and remove it by turning it anti-clock-
wise.
2. Pull out the rotary valve (Fig. 6/1), together with
the cover plate (Fig. 6/3).
3. Clean the valve ports (Fig. 6), the surface
(Fig. 7), and the bearing (Fig. 6/4) of the rotary
valve.
4. For installation, set the mark (Fig. 6/5) of the
rotary valve to the 3-o’clock-position and push
the rotary valve into the suction head housing
(Fig. 6/2). Turn the cover plate clockwise to lock
it.
 Loading...